![]() Estimating Edge’s team of experienced construction professionals and software engineers have developed the industry’s smartest takeoff and estimating software solutions for competitive estimates.
Estimating Edge’s team of experienced construction professionals and software engineers have developed the industry’s smartest takeoff and estimating software solutions for competitive estimates.
Don’t just estimate faster. Estimate better.®
- /
- /
- /
- /
Add a Report (v10)
Standard Reports – Add
Add
This button is used to add new User-Defined Reports to The EDGE. Clicking the Add button opens the Report Properties dialog window, there are four tabs to this window each is reviewed below.
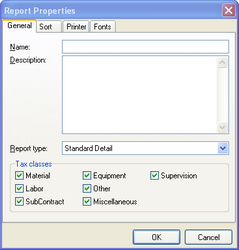
General Tab:
Name – The name selected for the new report. Whatever you typed here will appear on the User-Defined list of reports of the Standard Reports menu. This is a required field
Description – In this box you can enter a more detailed description of the new report, how and why it was created, its purpose and hoe to use it. This is not a required field
Report Type
There are four basic types of reports in The EDGE, you must pick one from the list to build your new report on. The types are:
- Standard Detail – creates a report that list individual items and group totals.
- Standard Summary – creates a report that lists group totals only.
- Condition Detail – creates a report that lists conditions along with their items.
- Condition Summary – creates a report that lists condition totals only.
Tax Class:
This field displays all of the tax classes that have been set up in this copy of The EDGE. The first five are standard and the last two on this screen are optional ones created by the user. You must select at least one tax class but you can select as many as you wish. You can use the Tax class to give you specialized reports based on labor only for example.
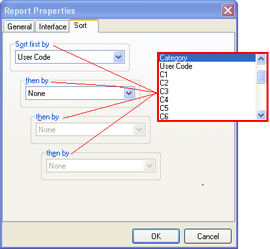
Sort Tab:
Sort by – To further assist you with defining your report so that you can cull out only the information you are looking for and need The EDGE includes a four (4) deep sort field. It is called a four deep sort because as you can see in the frame above there are four levels. Each sort goes a little deeper into the estimate.
– Depending on the Report Type selected the number of levels may change. In fact for one report the Sort tab is replaced by the Condition tab, this will be explained in a moment. When you open the Sort dialog click the droparrow. A list of fields that The EDGE can sort on appears.
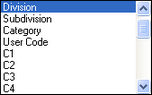
– A portion of the list is shown above. Click on the field you want to sort on then click OK, or move to the next level and select another sort, repeat as necessary.
Condition Detail Report Type
– In the above examples the left panel is set to a Standard Detail report type, in the right panel the report type is changed to Condition Detail. Look at what happened to the Sort Tab when the change was made.
Condition Detail Report Properties – The check boxes are more or less self explanatory. If you check the box then in addition to what is normally going to print on a Condition Detail report you will also print whatever you have checked. The Condition Detail report is a very detailed report it can easily consume a quantity of paper when it begins to print.

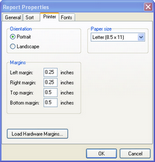
Printer Tab:
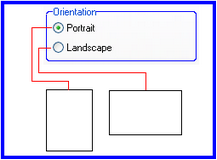
Orientation – Select whether you want to print vertically or horizontally.
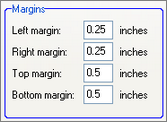
Margins – A place where you can set customized margins.
Load Hardware Margins… – If you need to reset your margins to the original setting for your printer.
Paper Size – A place where you can select the size paper you would like to print your paper on. The paper sizes you can print to will come from your printer when you load the printer drivers.
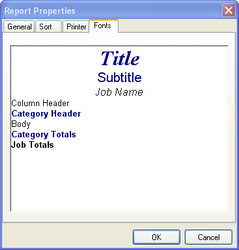
Fonts Tab:
Fields – The Fonts Tab as shown above displays the field names, fonts, color and size of the fields to be printed with the currently selected or newly created report. If you wish to change a font, style, size or color all you have to do is take your mouse and click on the title of the field you want to change.
Font – Clicking on a field title opens The EDGE Font dialog window. Here you select the font, font style, size, and effects. After making your changes click OK.