![]() Estimating Edge’s team of experienced construction professionals and software engineers have developed the industry’s smartest takeoff and estimating software solutions for competitive estimates.
Estimating Edge’s team of experienced construction professionals and software engineers have developed the industry’s smartest takeoff and estimating software solutions for competitive estimates.
Don’t just estimate faster. Estimate better.®
- /
- /
- /
- /
How to Add a Page Pitch and Condition Pitch
This video covers how to assign the pitch at the page level, but also at the condition level in v12.
Today we’re going to cover how to assign the pitch at the page level, but also at the condition level. This way, if you have different fields on your roof that you need to measure the different pitches, you get the accurate quantity of material.
Add the Page Pitch
To add the page pitch, you’re going to either edit the page properties or you’re going to use the page properties icon
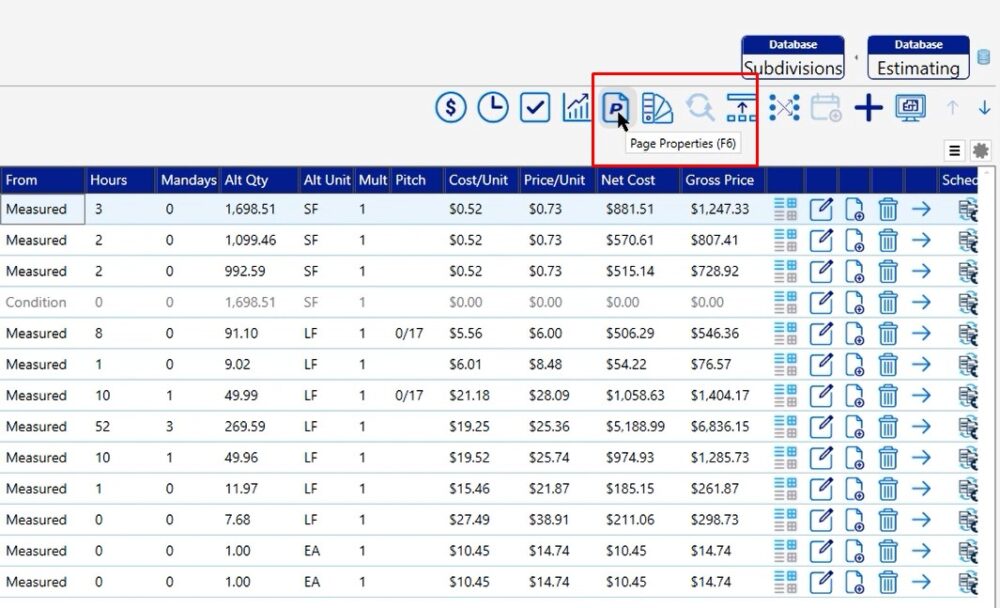
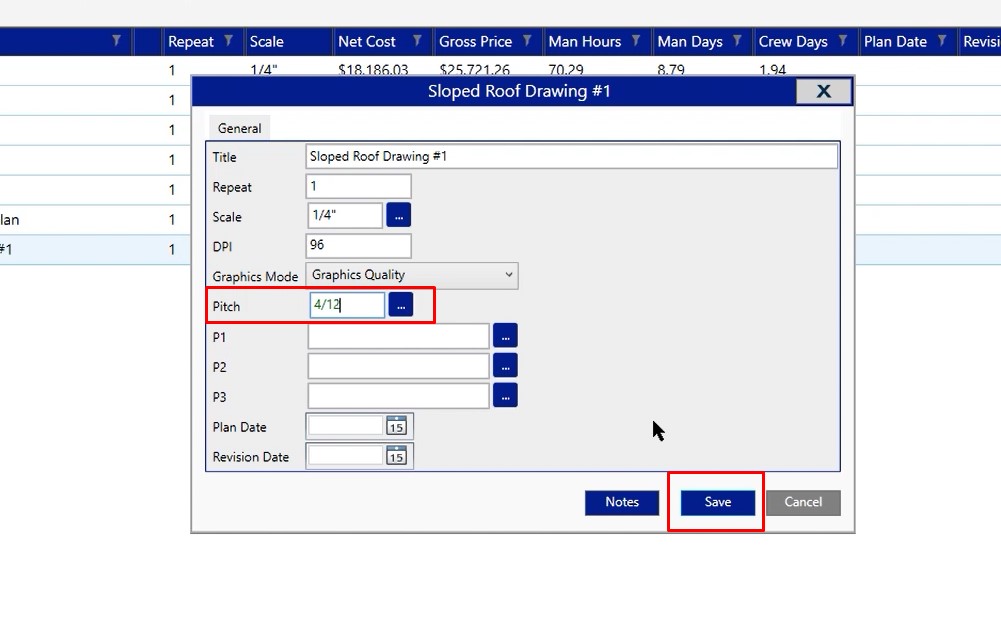
In this case, I’ll go back to the page’s breadcrumb, then click the edit button to add my pitch in the page properties.
In this case, my pitch is 4/12 so input that in the pitch box, then click save.
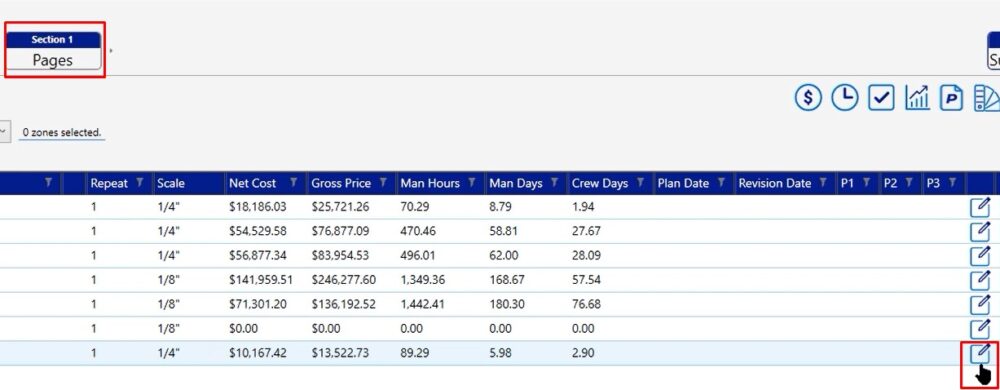
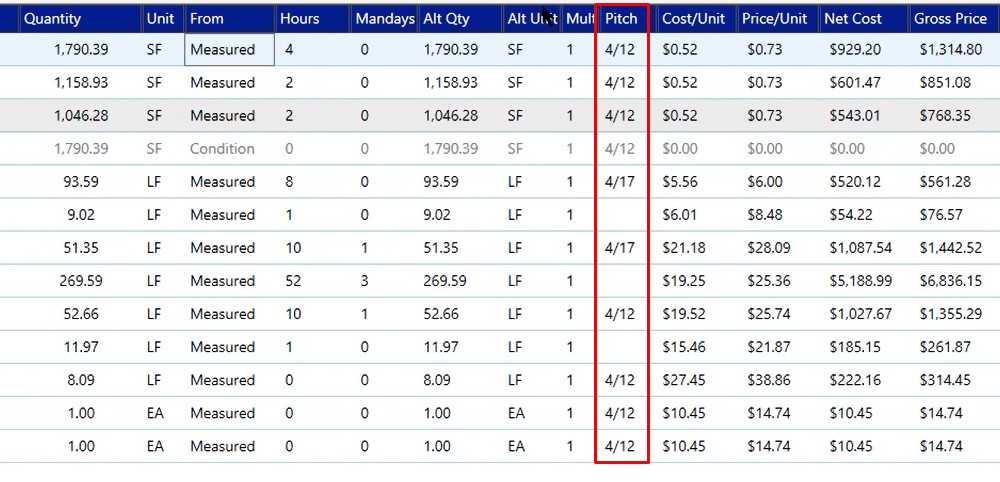
Once I click save and click my forward arrow button, you’ll notice that we have a 4/12 pitch assigned to almost all of our conditions.
There are a couple of conditions that don’t need the pitch because of where they’re located on the roof for example, the ridge or the eave.
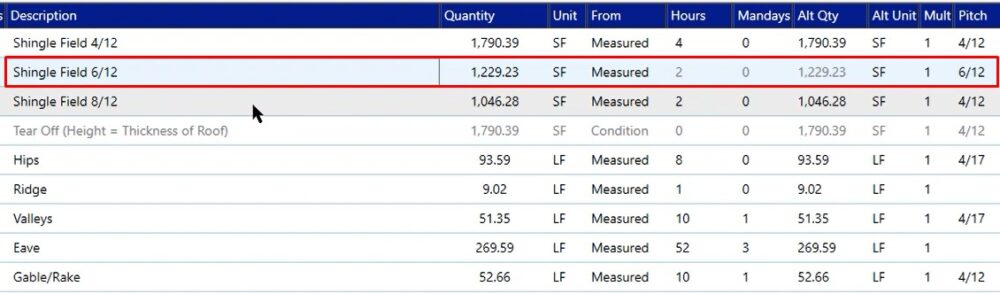
There are still a couple conditions that don’t have the 4/12, and it’s actually greater, in this case 4/17. Those conditions have that because it’s your hips and valleys.
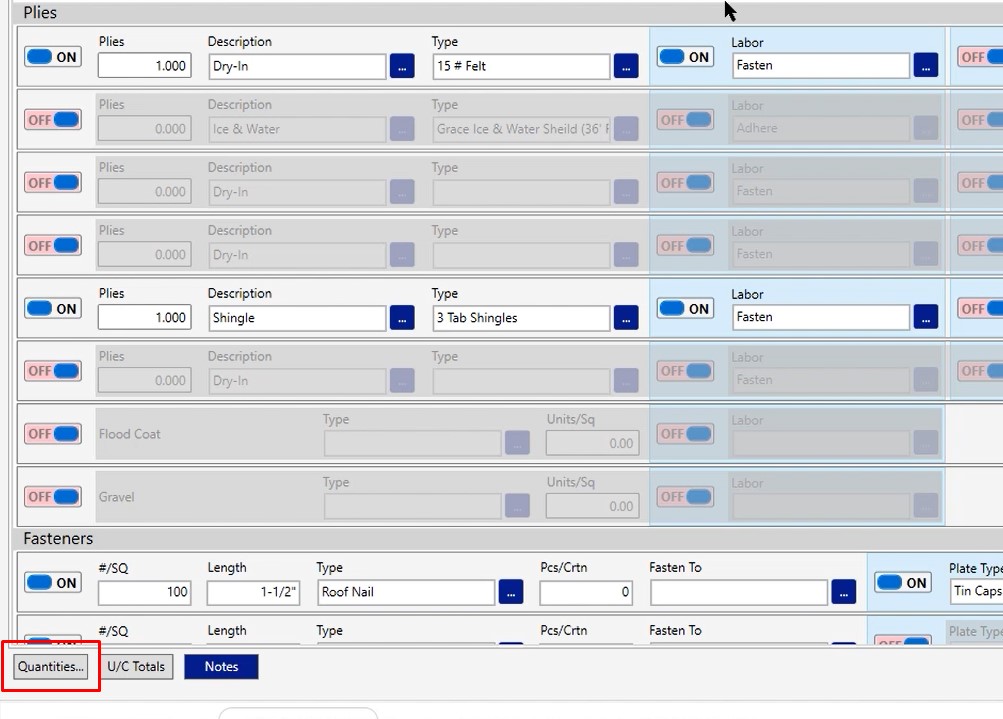
Condition Pitch
In the shingle field, I have one that is set at 4/12, and that is the majority of the roof. However, there are two additional pitched areas on this project as well. The description may say 6/12, but the pitch is still reading 4/12. In this case, we’re not quite getting the amount of material that we need. This is where you can override the page pitch with a condition pitch.

To override the page pitch, we open up the condition properties. You can do that by double clicking or hitting the edit button.
Once you open your condition properties, click on quantities in the bottom left corner
After you open up quantities, there is an override page pitch checkbox. Left click that checkbox, backspace the number that is in the box and change it to what the condition should be. Click OK, then OK again.
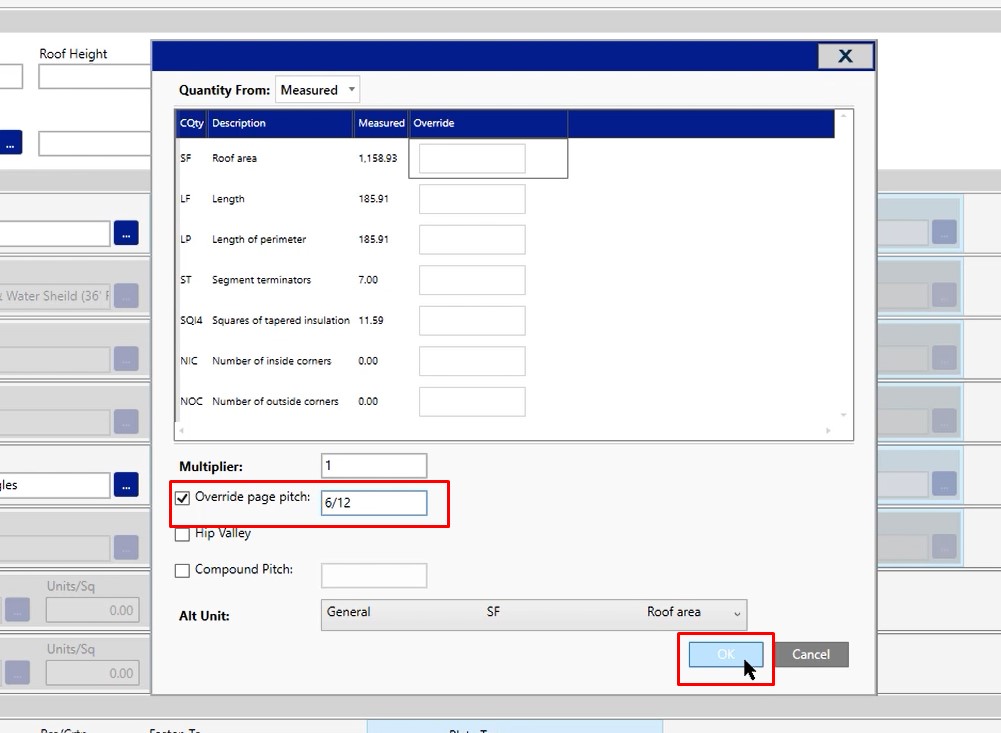
When you return to the condition properties window, you see that the quantity has changed.
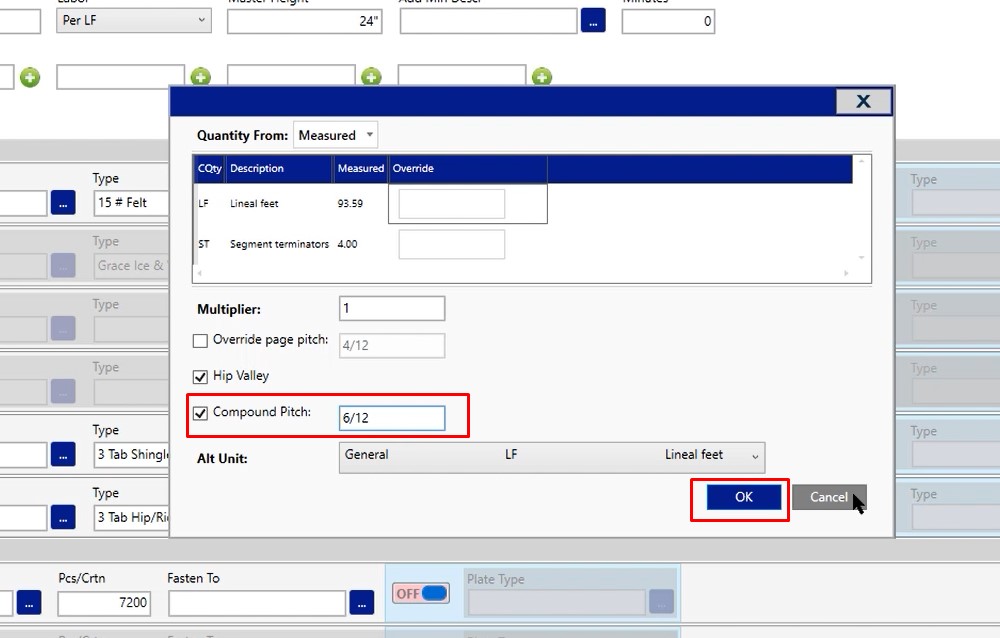
Compound Pitch
What happens if you run into a hip where on the left side of the hip you have a 4/12 pitch and on the right side of the hip you have a 6/12 pitch?
In that case, you open up your hip condition, click on quantities and that’s where we’re going to use the compound pitch option.
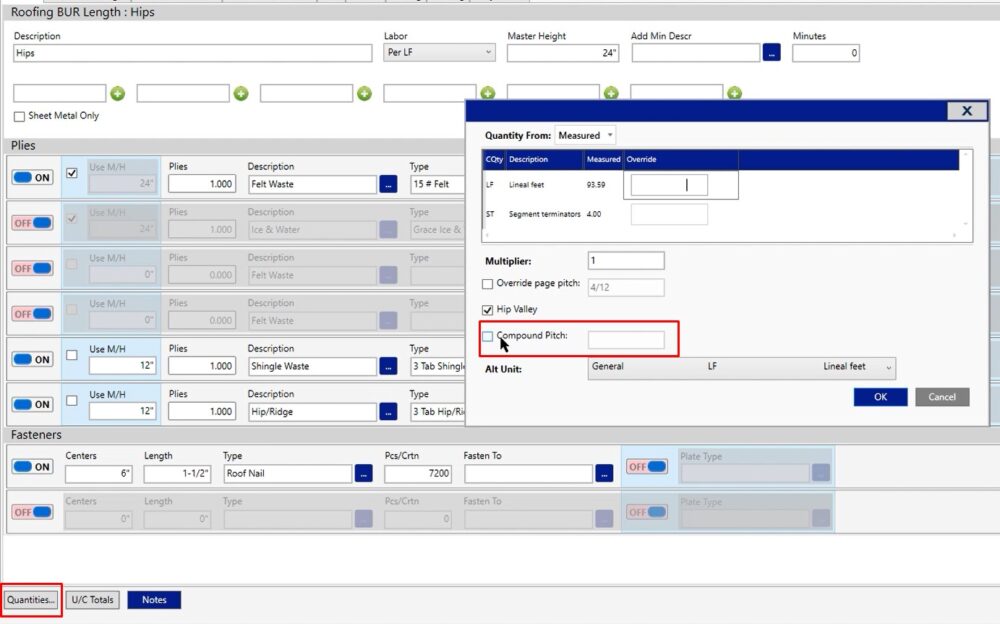
Select the compound pitch check box, then type in your pitch – in this case 6/12, then click ok
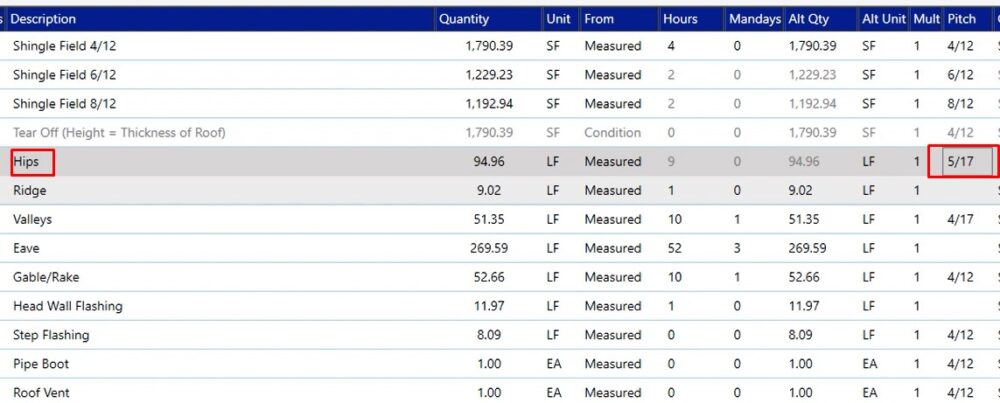
Now this is producing 5/17 because on the left side you had a 4/12 pitch and on the right side you had a 6/12 pitch; and this is the average of the two.
If you’re making any adjustments to the pitch or you’re running into any issues as you’re setting up a project, feel free to give us a call on the tech line and we’d be happy to assist you in any way we can.