![]() Estimating Edge’s team of experienced construction professionals and software engineers have developed the industry’s smartest takeoff and estimating software solutions for competitive estimates.
Estimating Edge’s team of experienced construction professionals and software engineers have developed the industry’s smartest takeoff and estimating software solutions for competitive estimates.
Don’t just estimate faster. Estimate better.®
- /
- /
- /
- /
How to make Database Changes in the Database
This video how to make changes directly in the database in v12.
Now, there are a lot of different changes that you can do in the database and a lot of updating, so it really depends on what you’re wanting to modify. We’re going to cover a couple of different scenarios with you.
Let’s say that you’re inside of a project and you get an updated pricing list or you go over your labor production and you want to take all of the information in this current project and save it to the database. This way, the next project you create where you’re using a very similar setup or the same product, it’s going to pull that information in for you.
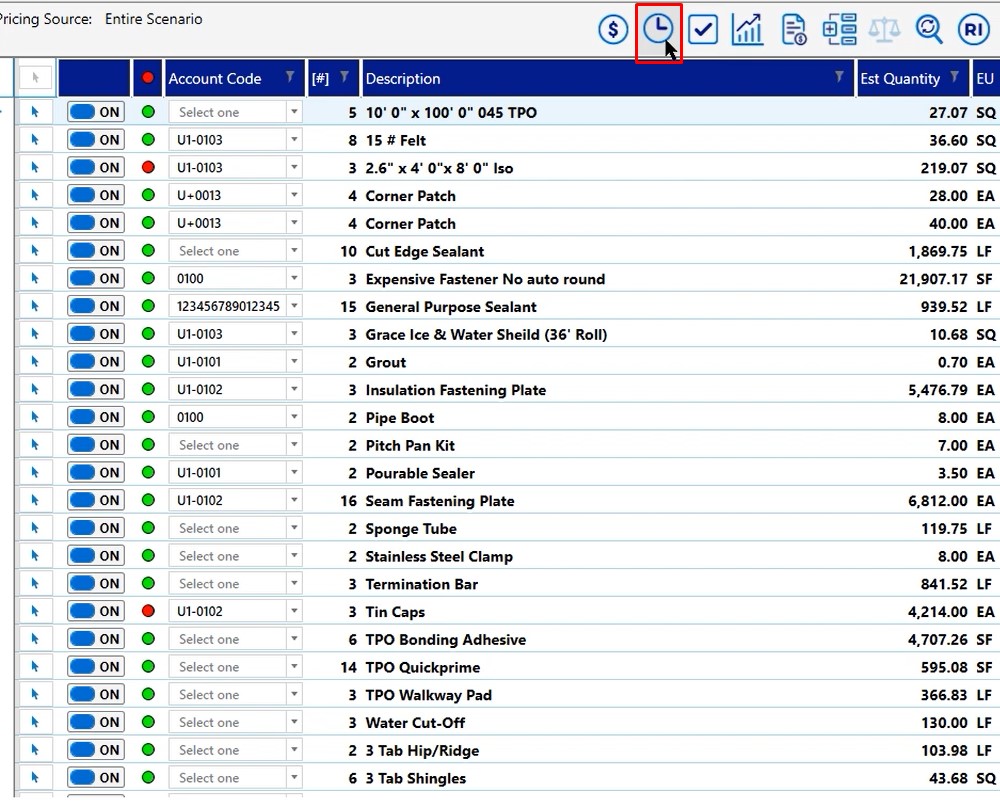
Pricing Screen Changes
Once you are inside of the project, click on the icon for your pricing screen
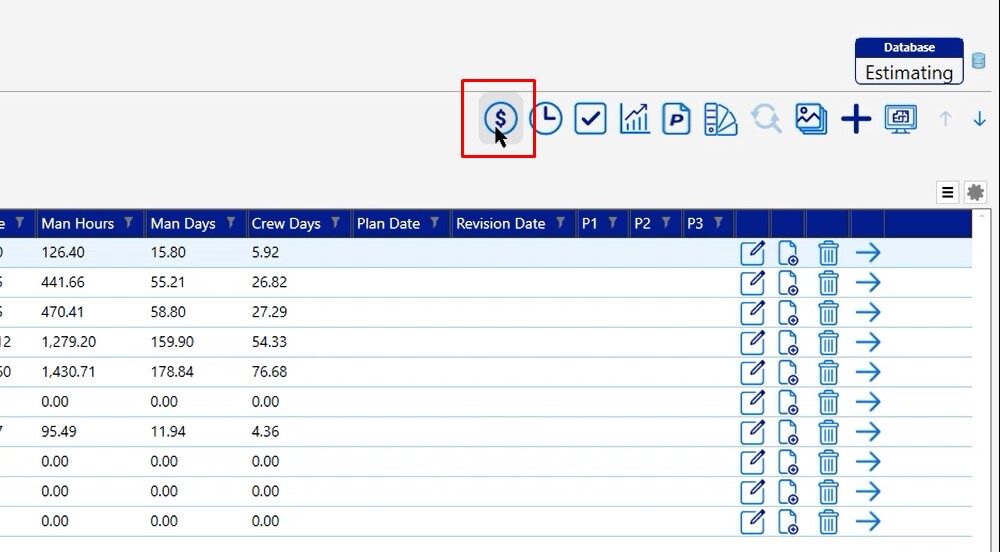
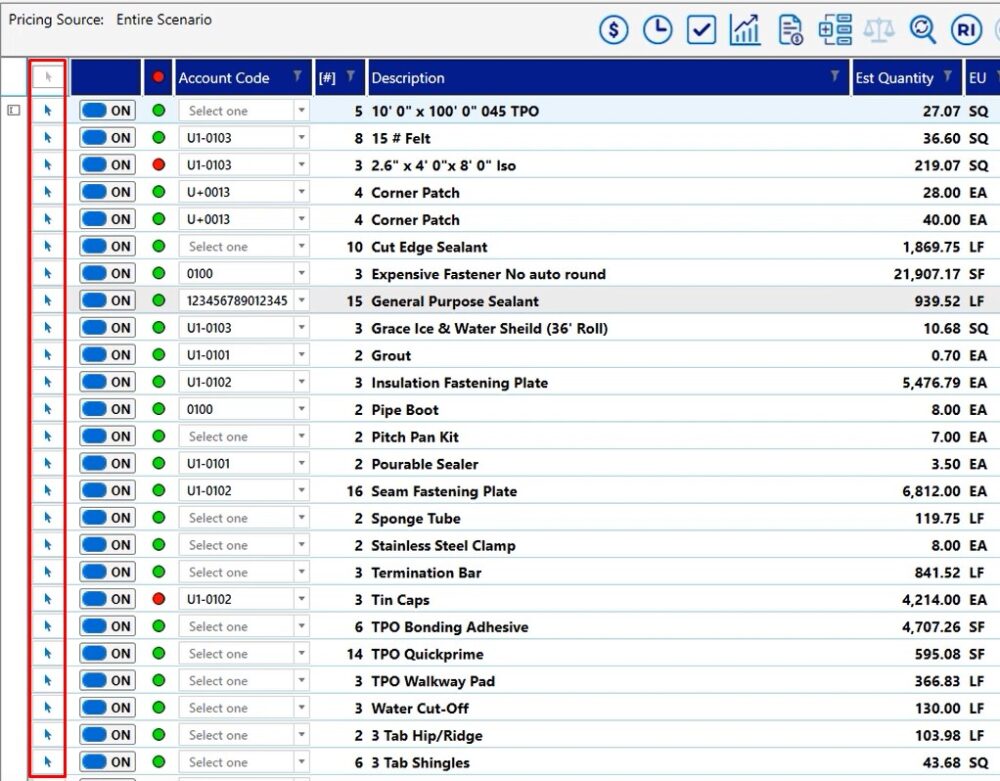
If you have pricing account codes, user codes, any of that type of information that you’ve made modifications to, when you’re on the pricing or labor screen, you can simply mark the item in the white checkbox on the left hand side of the screen.
Then, click the drum with an arrow (database icon).
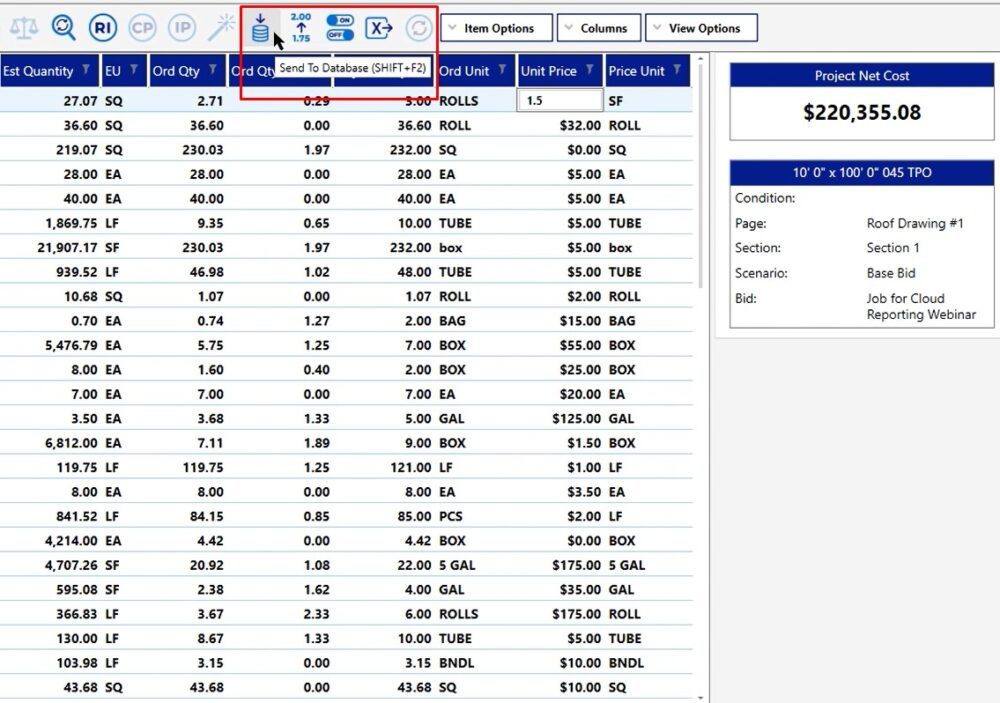
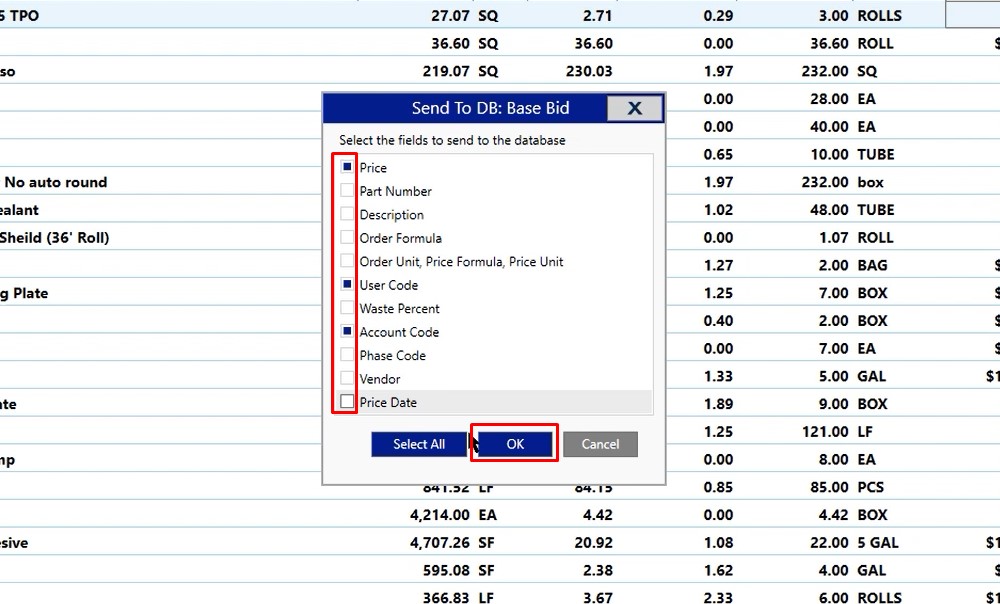
Once you click that icon, you’re going to be presented with a dialog box. Go through and choose the options for what you would like to update for these items on the pricing screen.
Once you select those options, click OK it’s going to allow you to save. It may take a couple of minutes for the program to process.
Now, the next time that you pull this product in, it’ll have all of that information saved to it, and you won’t have to go in and refill out everything that you had to this time.
Labor Screen Changes
Click on your labor icon
The process is the same as on the pricing screen.
- Mark the items that you want to make changes to by selecting the white checkboxes
- Click the save to database icon
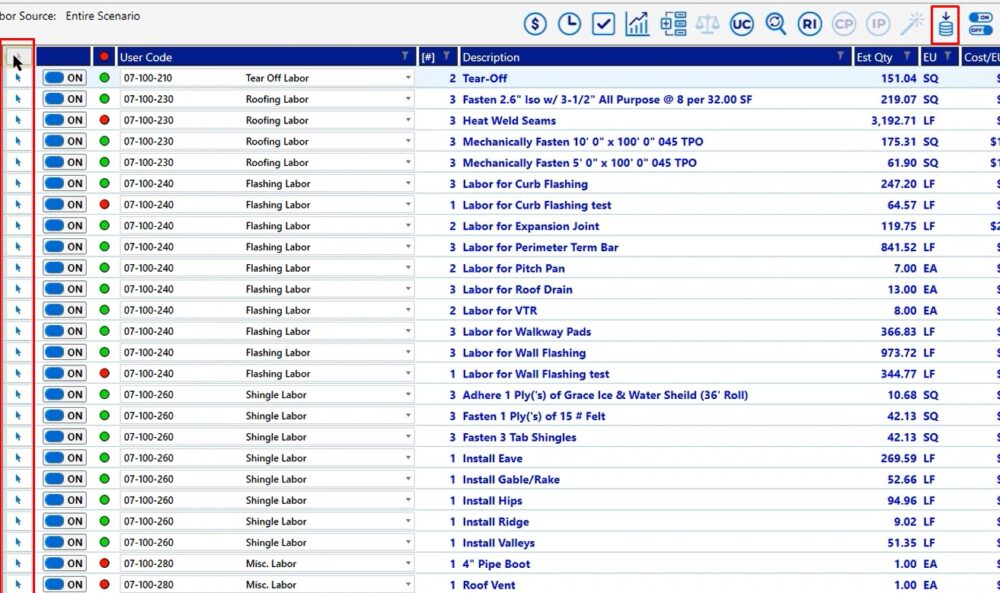
In this case, you’re going to have some different options because you’re looking at labor instead of pricing. Select the options you want and then click OK.
Once you do that, the program saves all the information. After it’s saved, you will now have an updated database for your pricing and your labor.

Database Changes
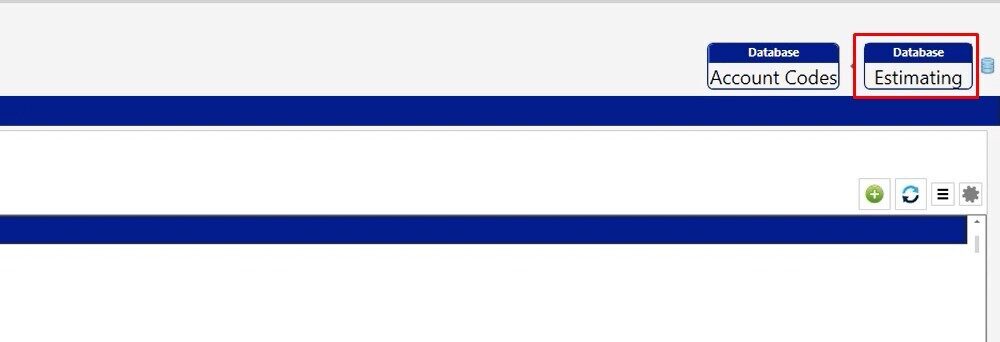
To make changes to conditions that are part of a master or a job in the database directly, you’re going to click on your database breadcrumb in the upper right corner.
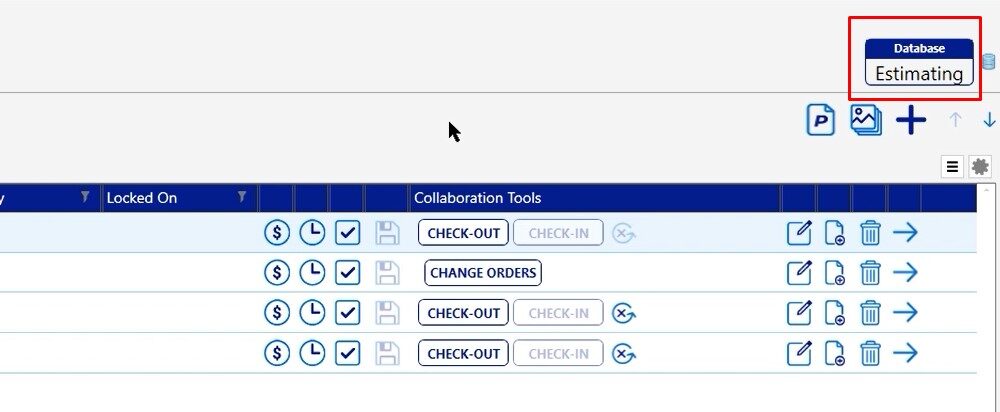
Once you have click on that, you’re going to be presented with a window with quite a few options.
To make any modifications or do any editing here, you would double click on that field. At this point, you can make any modifications, edits, or add any information that you need to.
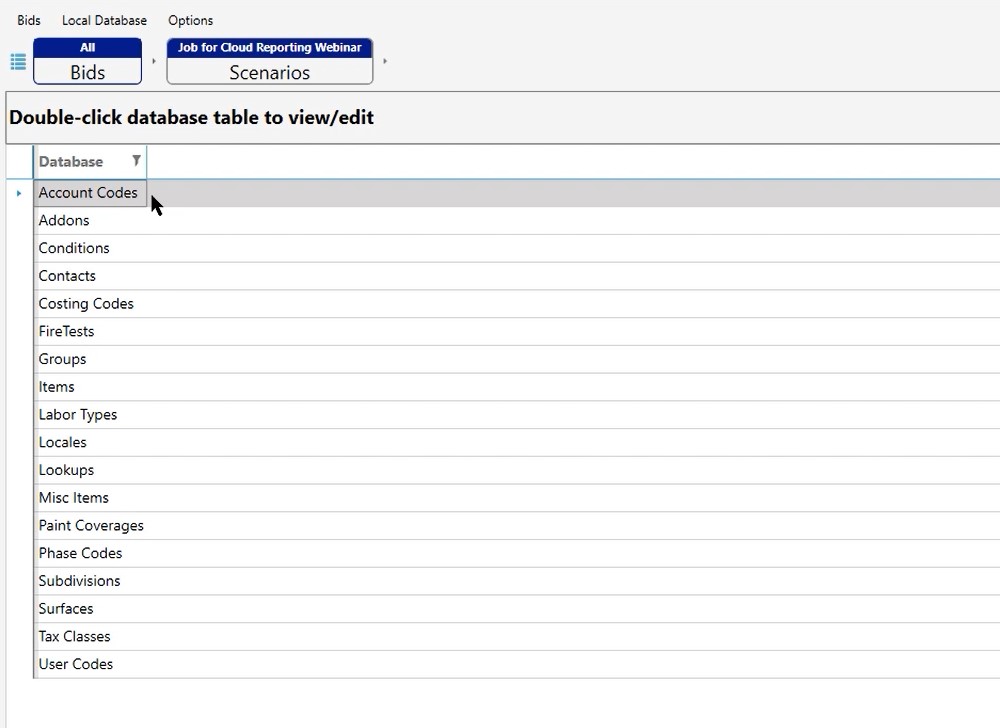
If you want to go back to that main list, click on the Estimating breadcrumb again and it will take you right back to the main list.
On the main list, by double clicking on each item, you can:
Add On Items
This is where you build and modify your add on items

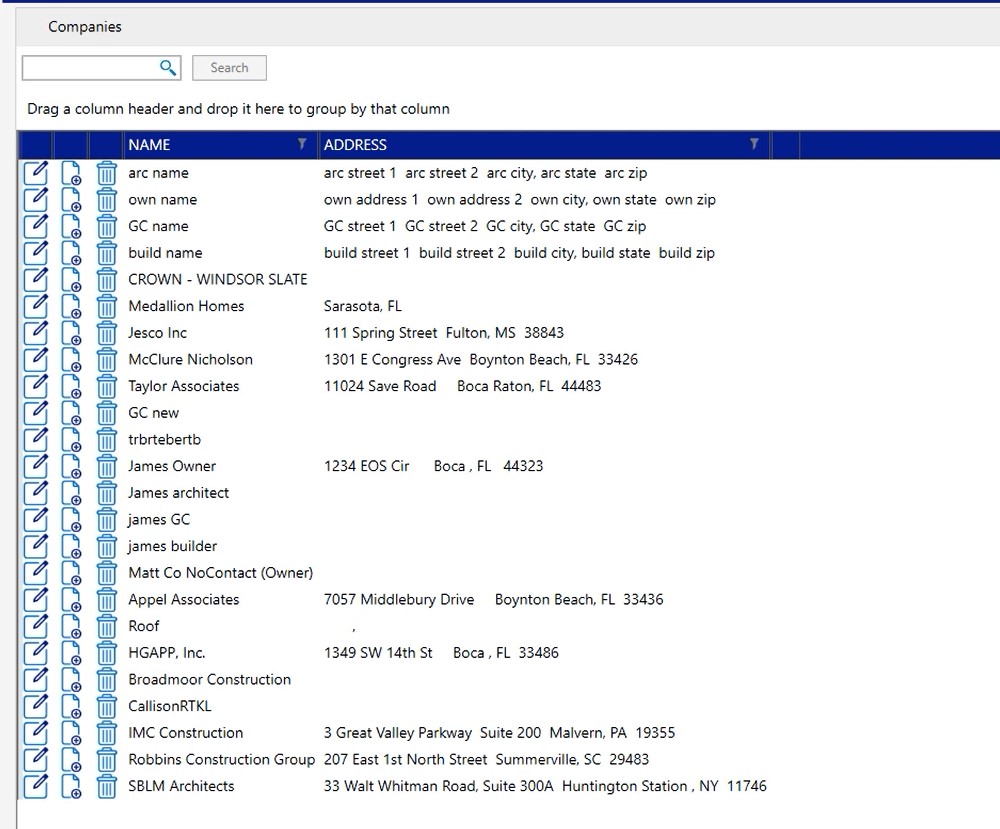
Add or edit contacts
Where you can add or edit contacts; such as business owners, architects, or project managers
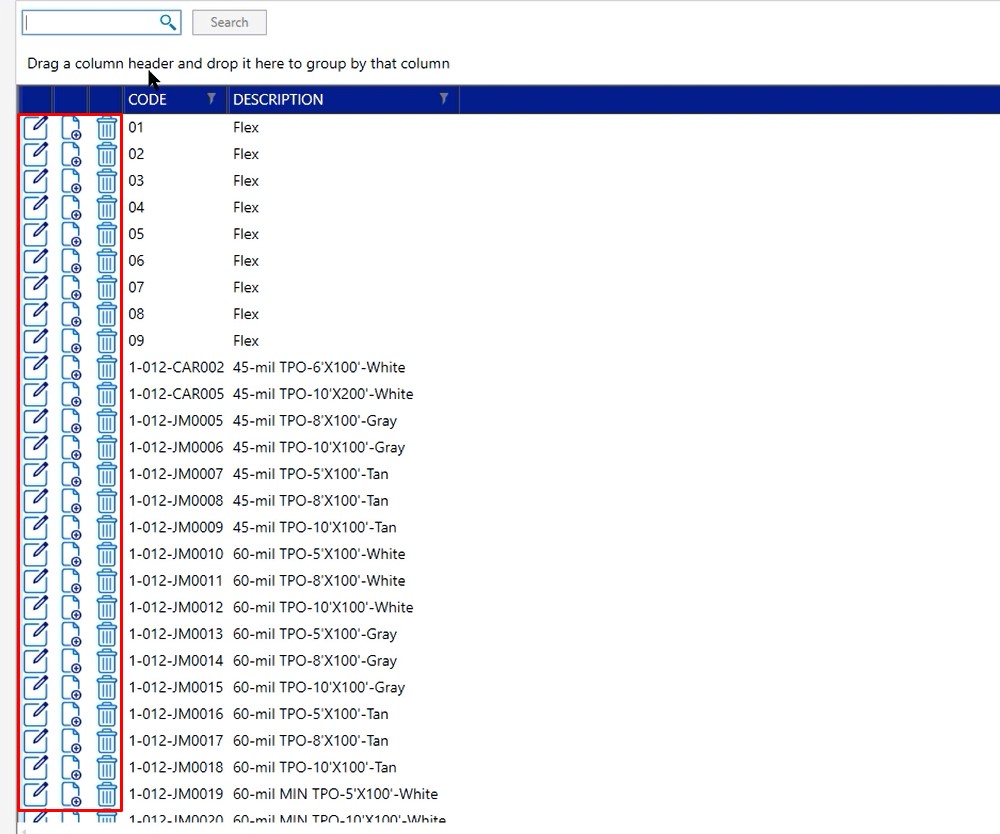
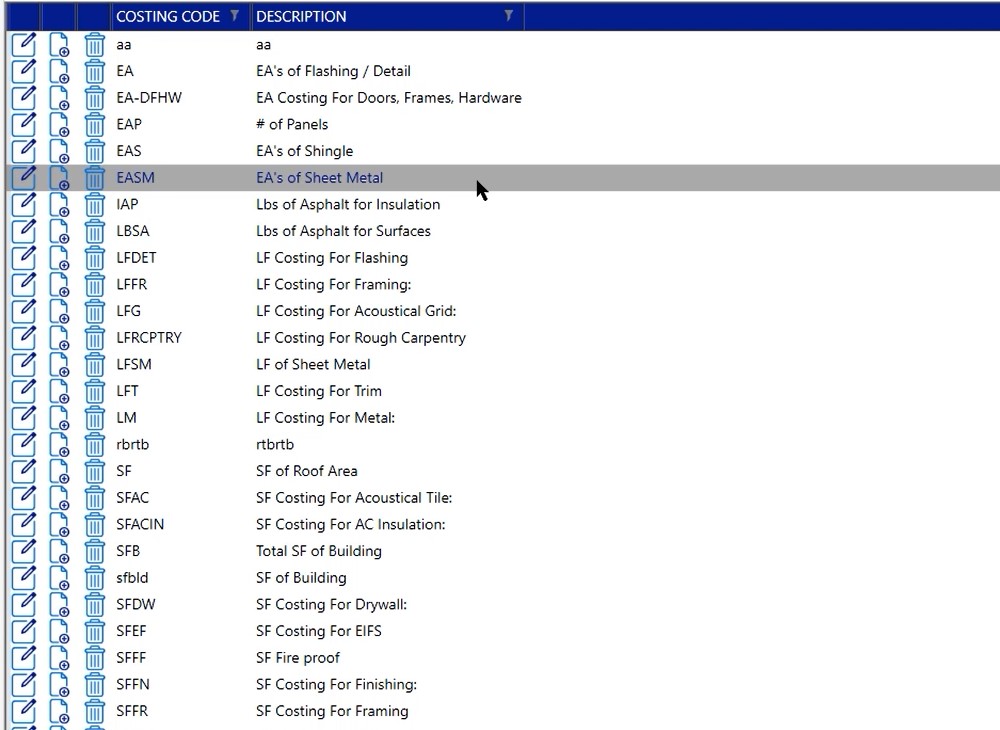
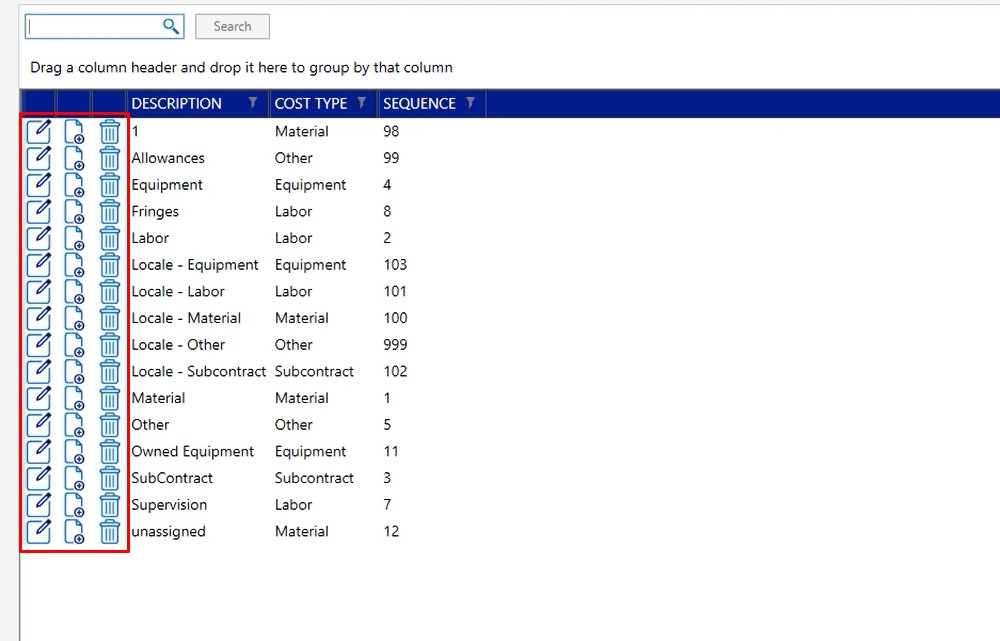
Costing Codes
Costing Codes is how we’re calculating all of the information on the recap screen. You can add additional costing codes if you need them, however, in most cases, you’re going to be using what we’ve provided to you by default.
Fire Test
Fire Test is specific for the fire proofing industry. This is where you can manipulate, modify and edit any fire test that you may need
Groups
Groups are going to be the masters that you’ve saved back to the database or the groups that you’ve saved. In this case, you’ll notice that we have quite a few out there because we’re working in a test database. However, if you wanted to make any modifications to this, there’s a couple of different views that you’re going to be seeing – this is your main view.
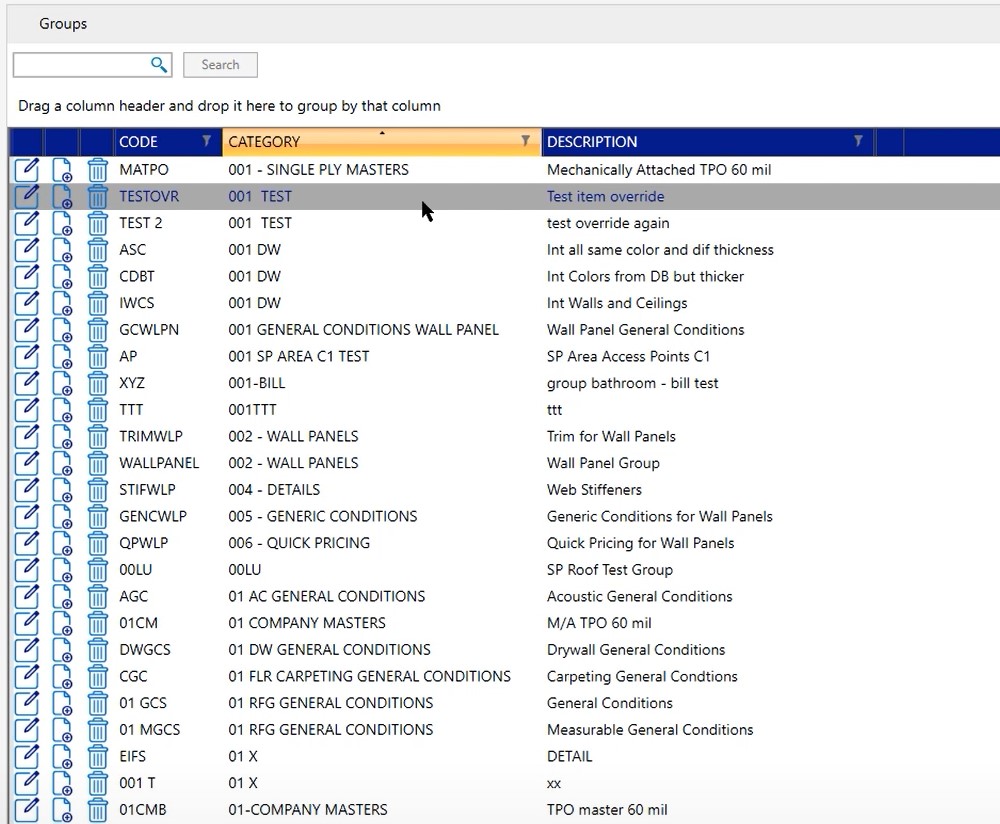
If you were to click on any one of these masters, you’re then going to see the condition view that’s inside of the master.
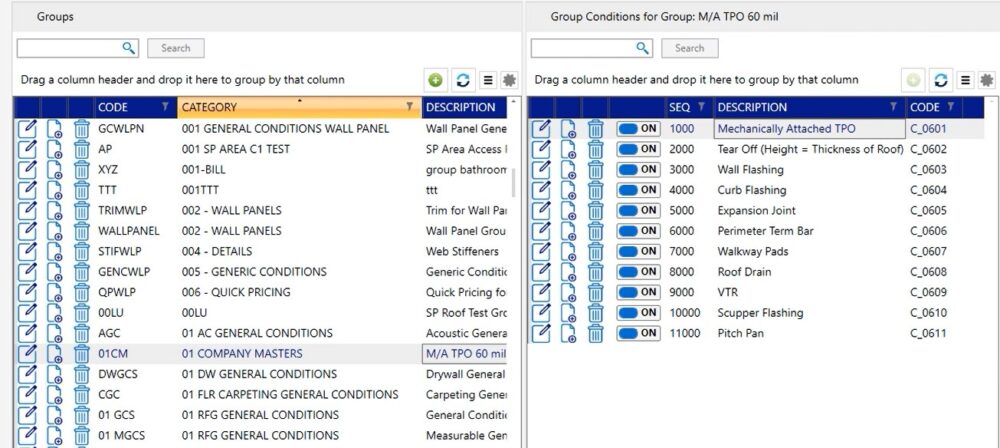
If you were to then left click on any condition, you’re going to be see with the items that are part of that condition
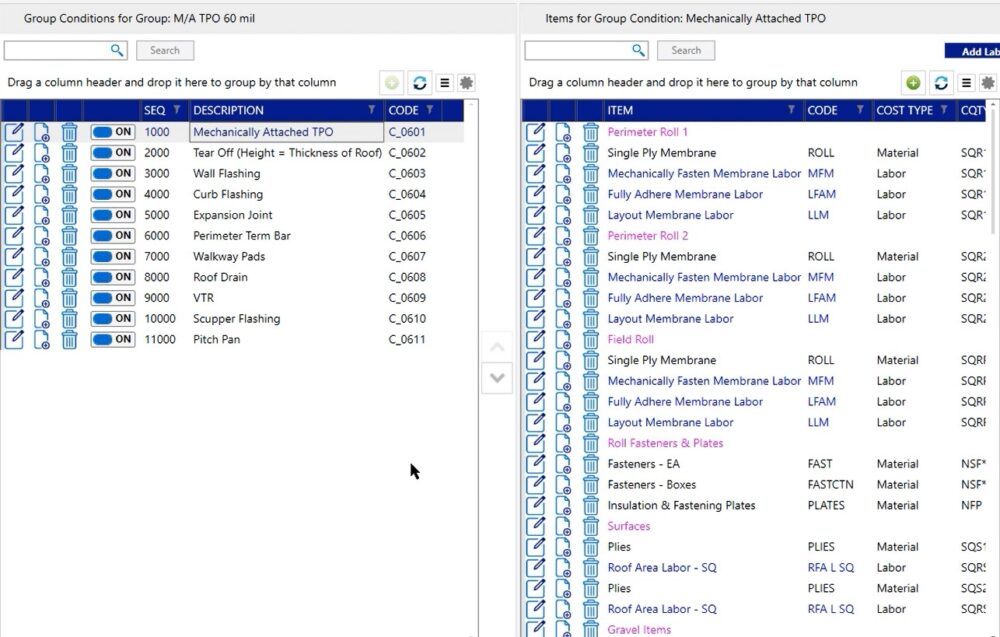
In most cases, you’re not going to be making item changes here; you’re going to be making condition property changes.
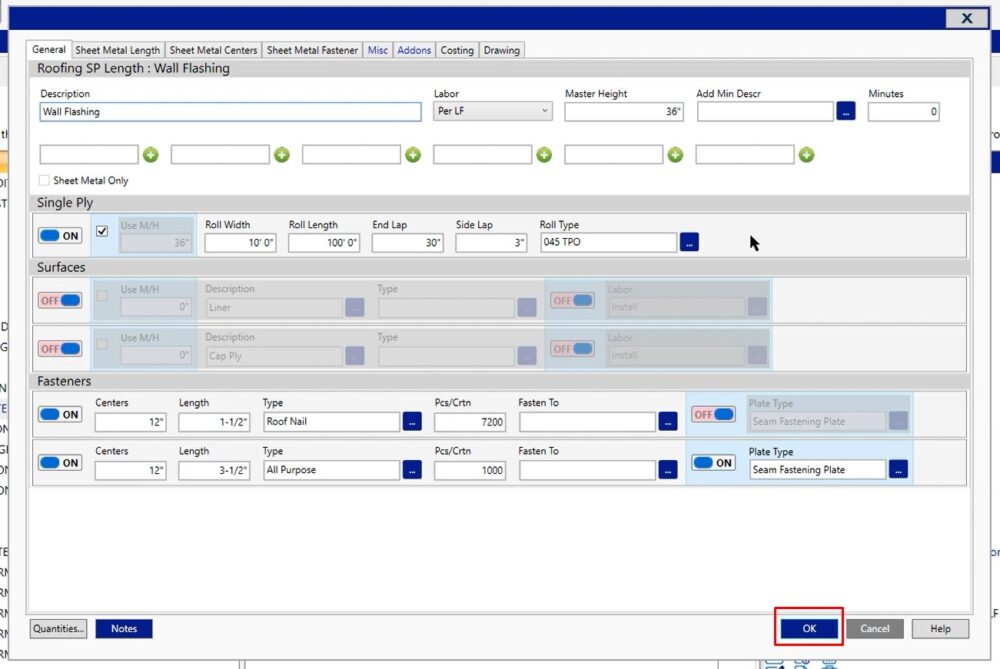
For example, let’s say that you wanted to adjust the default starting height of your wall flashing. To do that, you’re going to click the edit button on your wall flashing condition
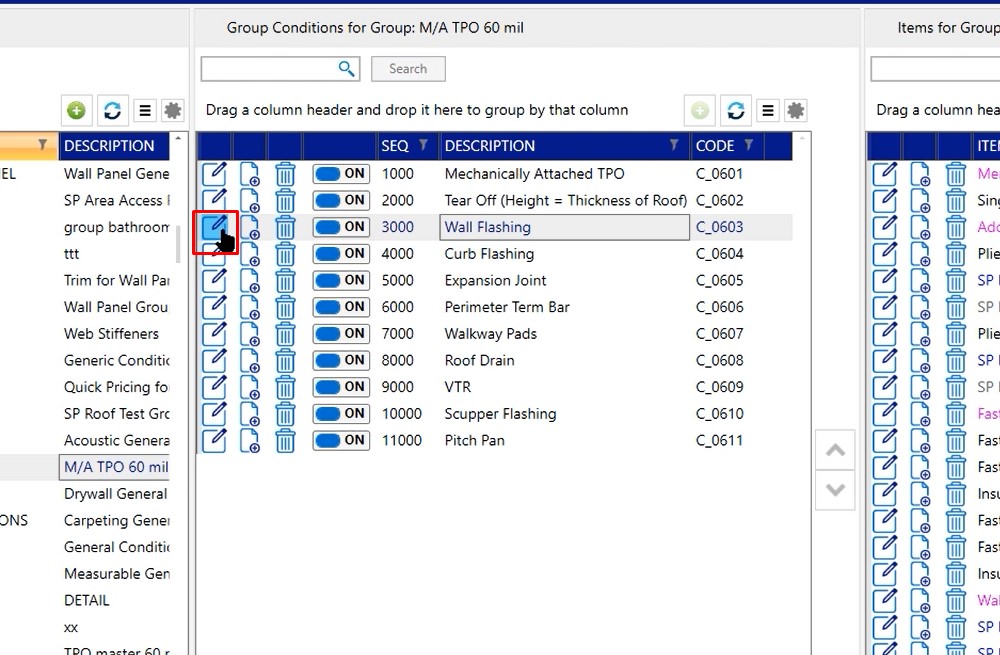
Now you can make any modifications to the condition properties for this master. Click OK when you are finished making your modifications.
Item Changes
Item Changes are if you need to make some item changes and you know exactly what the changes are. Open the item line, search for the item you need to modify, then make your changes

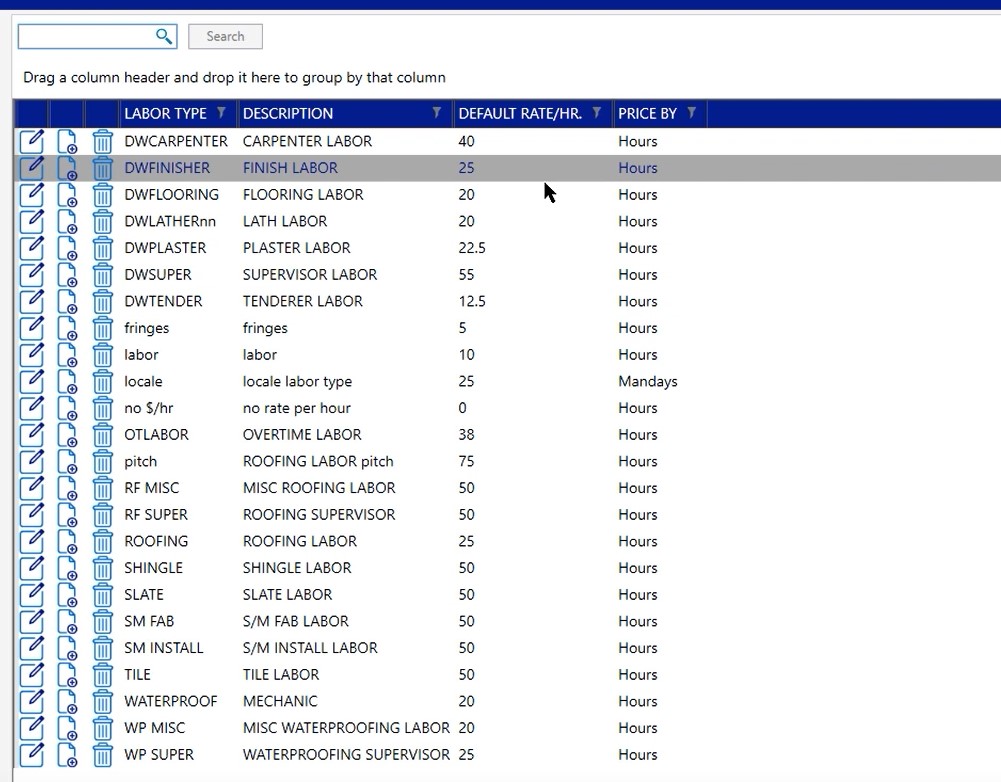
Labor types
Labor types are going to apply to all the different labor fields that you’re going to be using.
In this case, if we open up our labor types, you’ll notice that we have quite a few different labors and there’s a cost per hour there. This is how you’re going to change that cost per hour for every project from this point moving forward.
For example, let’s say at the beginning of the year you know these rates are going to be changing. You want to get your database up to speed so every project going forward that you’re estimating, is going to have the correct rate per hour.
If that’s the case, this is where you’re going to make those changes. Double click on that labor type option and make your modifications
Locales
Locales is where you’re going to add or modify any locales that you’re using inside of your project. If you’re not familiar with locales, locales allows you to save different rates per hour as well as different markups. So if you’re working in different counties or different states and you don’t want to change those numbers on every project, you have the capability to set a locale so you can have that information feed directly into your bid upon creation.
Lookups
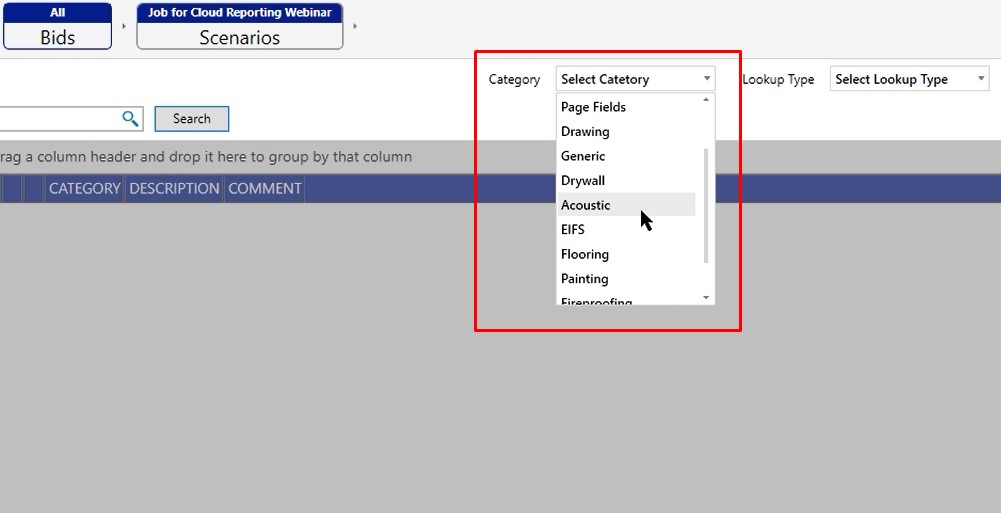
Lookups is the database way to make modifications to any lookup that you have inside of your database.
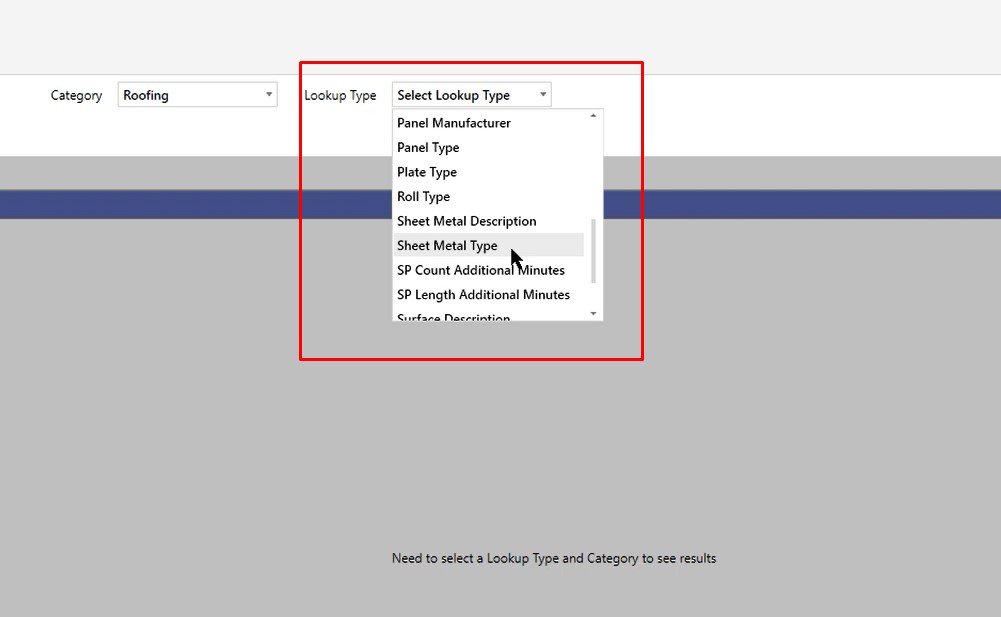
Depending on the trade, you can click the category and you can see what different trades you have.
Then, I can choose my lookup type. The information you see will be specific to the trade that you work in.
There will be specific lookups that apply to everyone, everything else is going to be specific to the industry that you’re working in, except the generic. Generic is going to be those generic conditions that you have available in your database with the quick pricing conditions.
Miscellaneous items
Miscellaneous items opens up all the miscellaneous options that I have in my database. If you did want to make any modifications to those, you could do that directly in a job or this is another option for you directly in the database.
Paint coverages
Paint coverages applies only to the painting trade, but this is just going to allow you to adjust the coverages for some of those specifics that you have out there.
Phase codes
Phase codes are user definable fields and is just like the account code option. It’s going to allow you to add, modify or delete any of those user defined codes that you’ve added into the program.
Subdivisions
Subdivisions is where you’re going to go in and make modifications to the different breakouts that you have on your recap screen. This is where you’re going to control any markups you have.
If you wanted to make any adjustments, you would go to the subdivision that you want to adjust or edit and click the edit button. On the left hand side, you can also double click. That’ll open up the properties for you as well
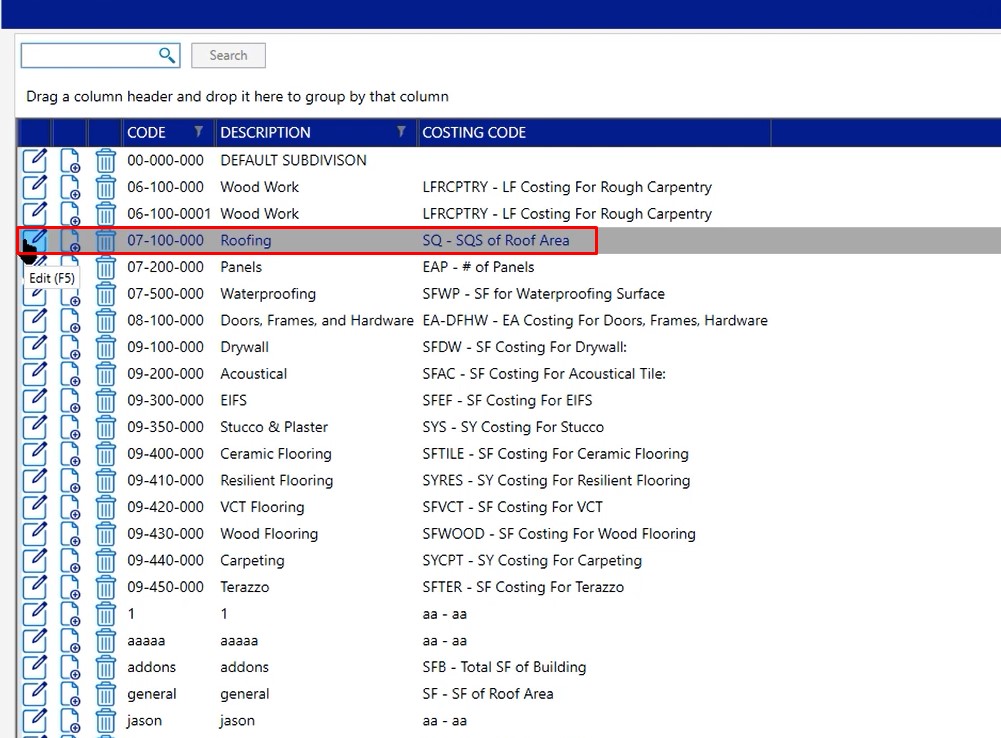
Once you open the properties, you’re going to be working with the three tabs across the top; tax class markup, subdivision markups and profit.
Tax Class Markups
This is going to refer to any tax classes that you have.
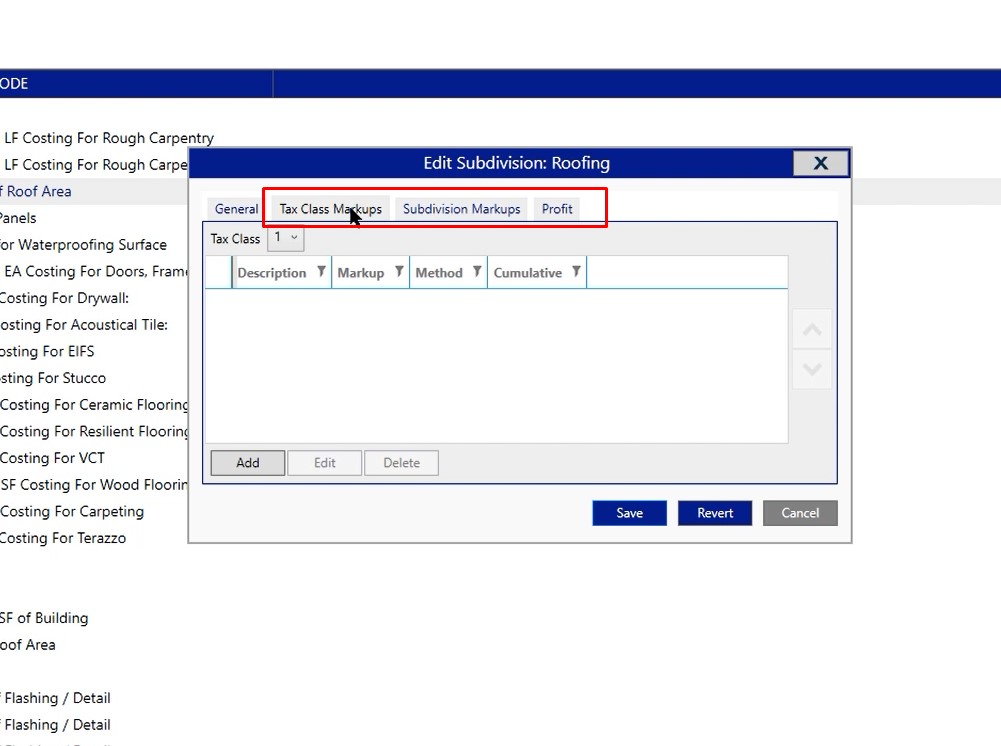
So if you need to make an adjustment, click on one of those options.
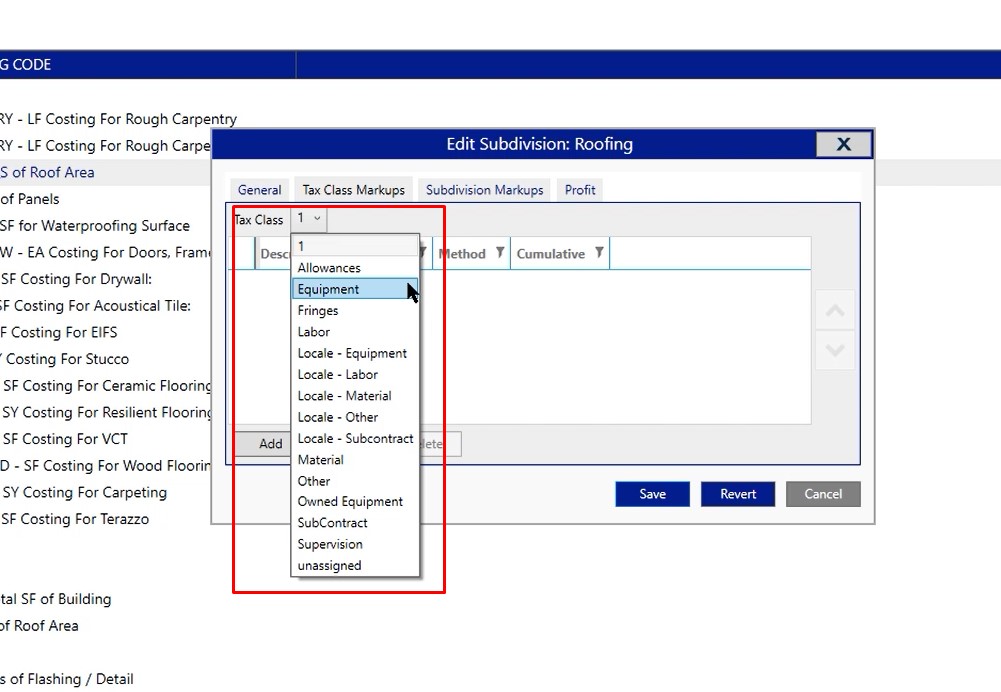
Now you can go through and edit any of those markups that are in there by default. If you need to add or delete you also have that capability by just left clicking. Click on the option, choose delete and say yes. What you’re doing is making a change to that specific subdivision. So any job from this point forward that you create is now going to be reflected upon what you’re seeing here.

Subdivision markups
This is where you’re going to adjust any overhead or any of those markups that you need in between the subtotal of your tax classes and the contract amount; so this is going to be right before your profit.
To edit, double click on any one of these options and make your changes, then click save

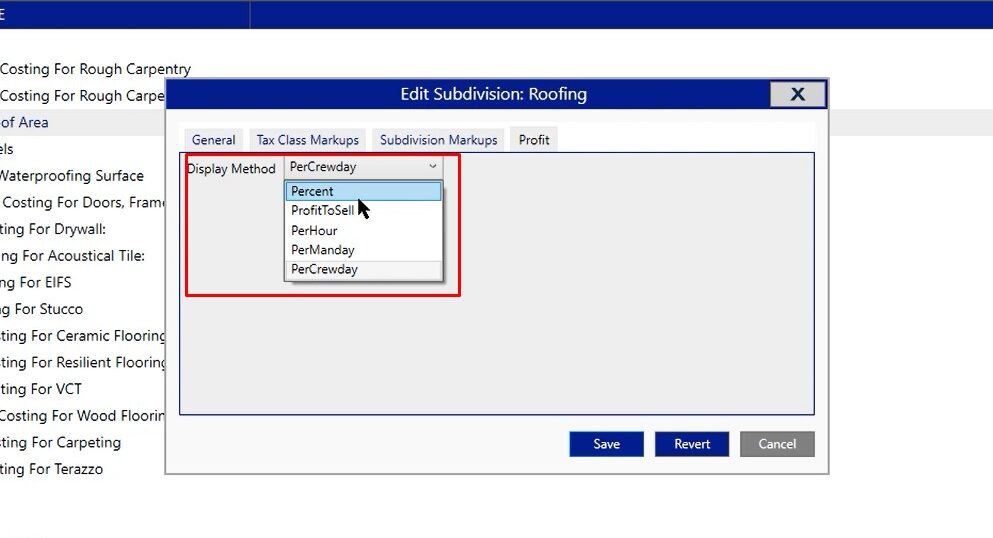
Profit
If you need to make an edit to the profit, go ahead and open that back up. Click on your profit item and now you can make your modifications.
In this case, you’re seeing that applies to all tax classes is not selected. If you need to apply to all tax classes, choose that option.
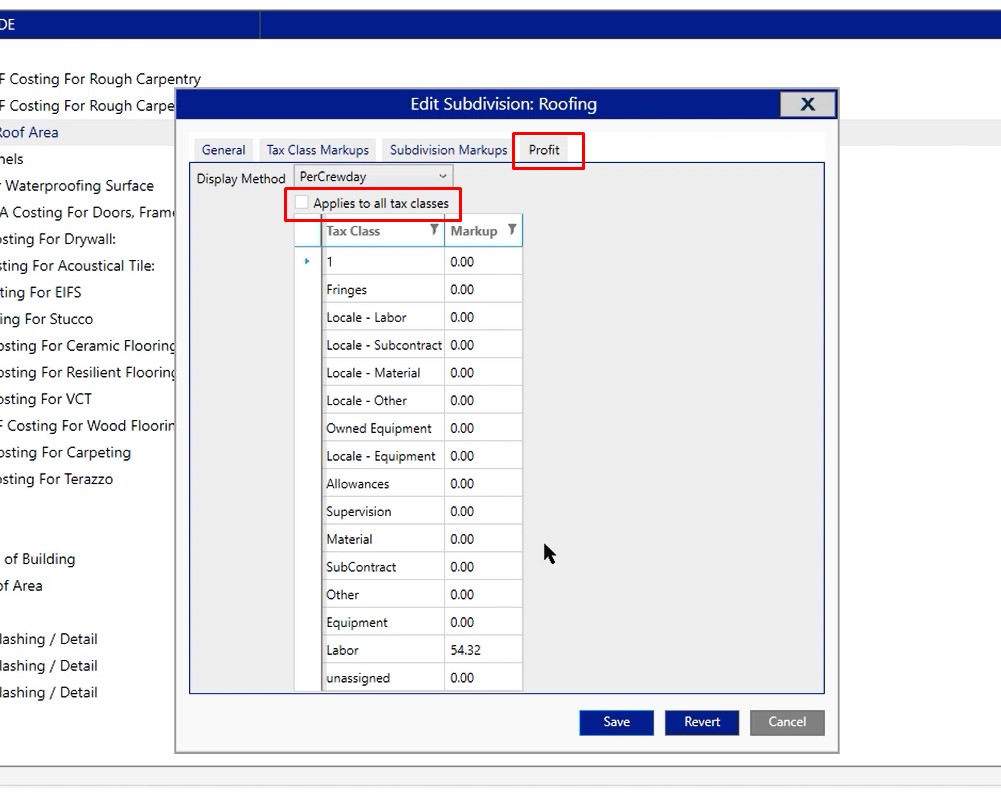
You can also choose a different display method for your profit by clicking the dropdown beside display method
After you have made all of your modifications, click save
If you do break your recap screen into multiple subdivisions, feel free to go through and make all of the adjustments you need to the different subdivisions that you’re utilizing.
Surfaces
Surfaces is going to be one of those fields that applies to fireproofing. You can adjust the surface information and how it’s presented in every single project. Double click on surfaces, find the surface you’re working with and make your edits.
Tax Classes
Tax classes are how we’re organizing the recap screen. In this case, you’ll see the different cost types and you’ll see the sequential number. If you need to make modifications, feel free to go in here and edit these. This will allow you to customize what’s being displayed starting from top down on the recap screen.
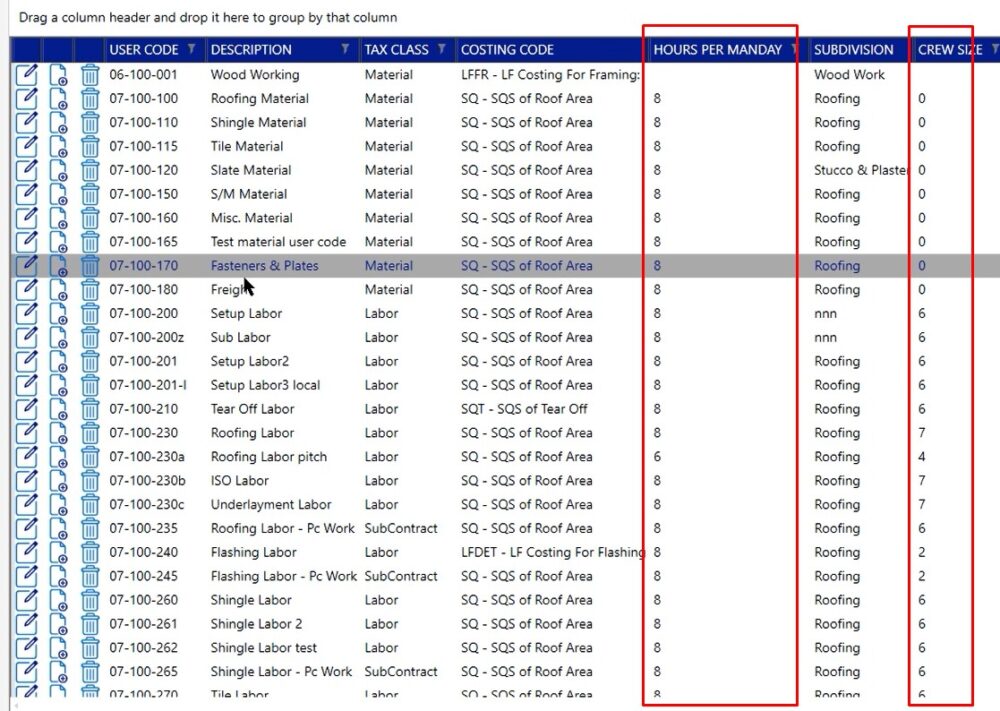
User Codes
In this case, if you double click on a user code, you’re going to be able to make modifications to any of this information. So in this case, you can change the hours per manday and you can also change the crew size when you’re looking at labor.
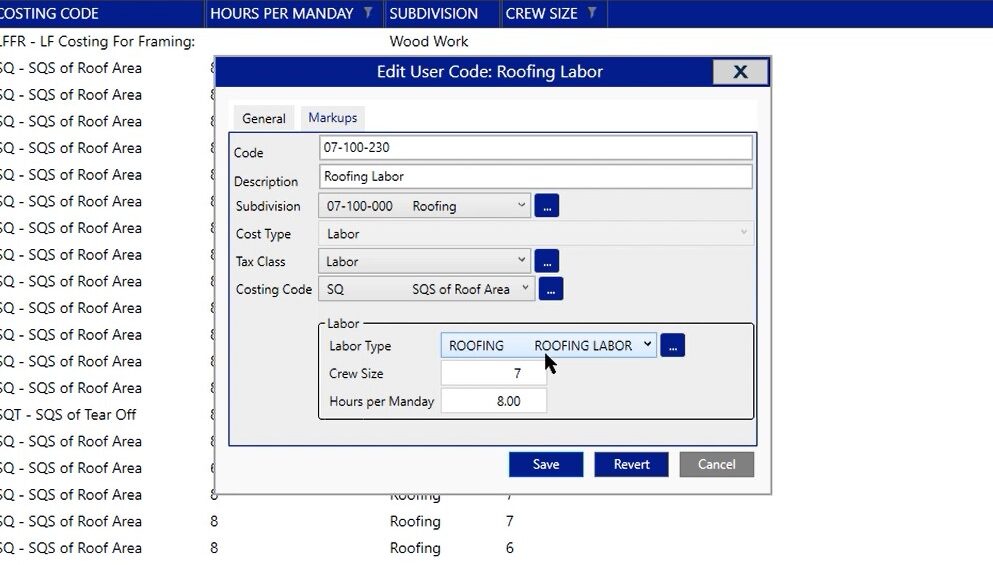
If we look at our roofing labor and we open the properties by clicking the edit button, you’ll see that their labor type is roofing labor.
So if I wanted to make sure that my labor and my cost per hour was going to be correct, this is where I would make modifications.
If you need to add any user code, you can click the green plus sign at the top

Or you can click the copy and insert button on anything that’s going to be similar to what you may need to create.

If you have any additional questions or you need any assistance as you’re making these database changes, please do not hesitate to call our tech team.