![]() Estimating Edge’s team of experienced construction professionals and software engineers have developed the industry’s smartest takeoff and estimating software solutions for competitive estimates.
Estimating Edge’s team of experienced construction professionals and software engineers have developed the industry’s smartest takeoff and estimating software solutions for competitive estimates.
Don’t just estimate faster. Estimate better.®
- /
- /
- /
- /
How to use Replace Tilde Codes
This video shows how to use the Replace Tilde Code Tool from the pricing screen to update an item across multiple occurrences in a project in v12.
In this example, you’ll notice that I’ve selected an installation item for the roofing industry. However, you can use the replace tilde code tool or on any item on your pricing screen.
The difference will be the window that’s presented, whether you’re utilizing a hardcoded item or a templated item that is built in the back end of the condition or a miscellaneous item. We’ll go through and show you what both windows look like.
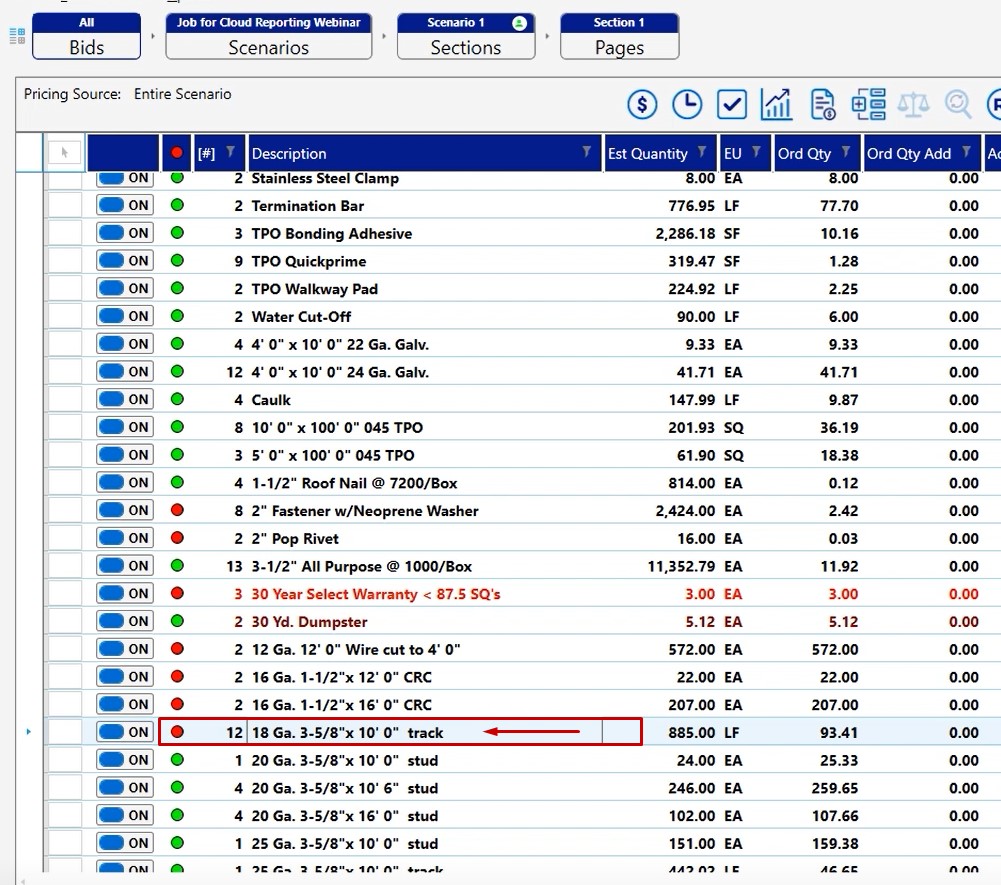
Number Sign Column
The first thing to discuss is this number sign column on the left hand side of the item description. The number sign column represents the number of occurrences that this product has inside of your project.
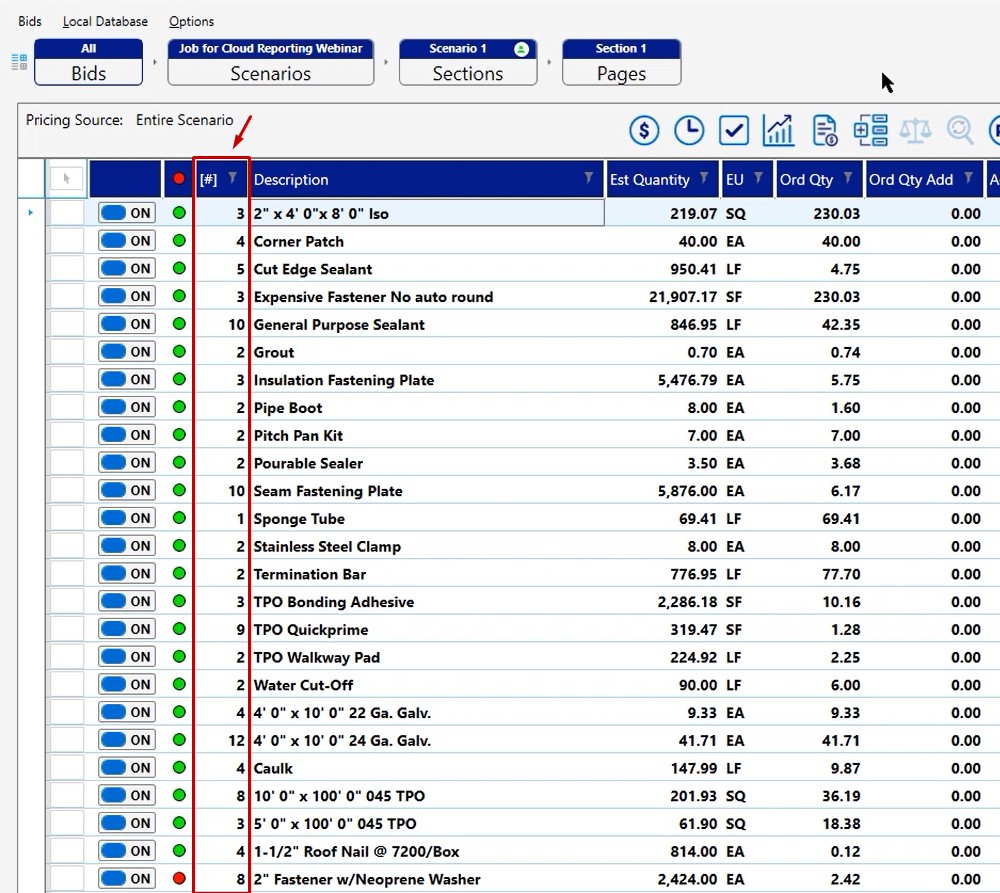
So you’ll notice that with the ISO, we have three different conditions where this is being calculated or three different areas in a condition where this is being calculated. So instead of going and changing each one of those areas, we can change all three of them simultaneously by utilizing the replace tilde code tool.
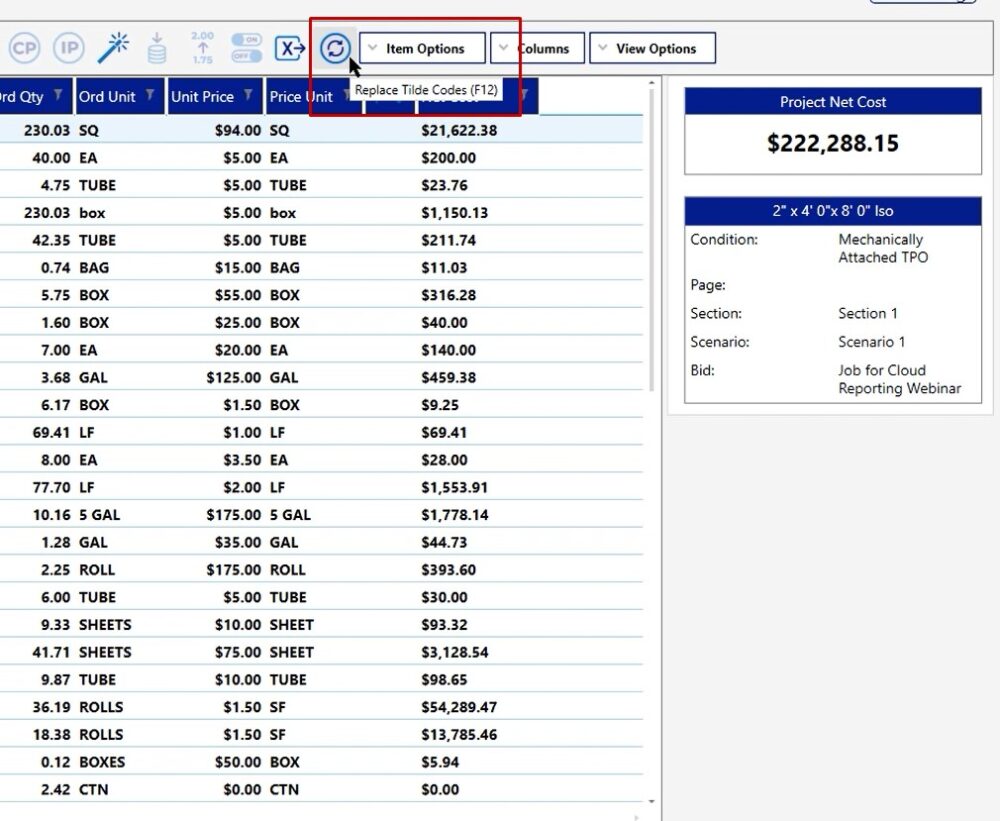
Replace Tilde Code Tool
The replace tilde code tool is the icon is located on the top toolbar.
To make changes:
- Left click to select the line which you would like to adjust
- Click the replace tilde code tool
Replace Tilde Codes Window – Roofing
In this example, we are opening up a hard coded item. So inside of your condition properties in the insulation tab, these are all fields that you have the ability to fill out:
- Insulation thickness
- Insulation Width
- Insulation Length
- Insulation type
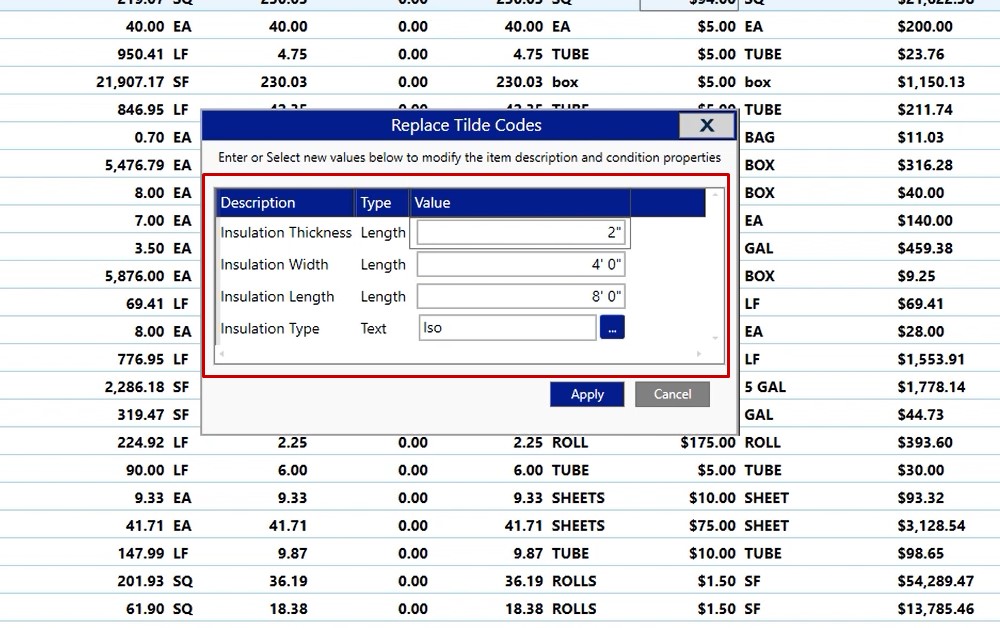
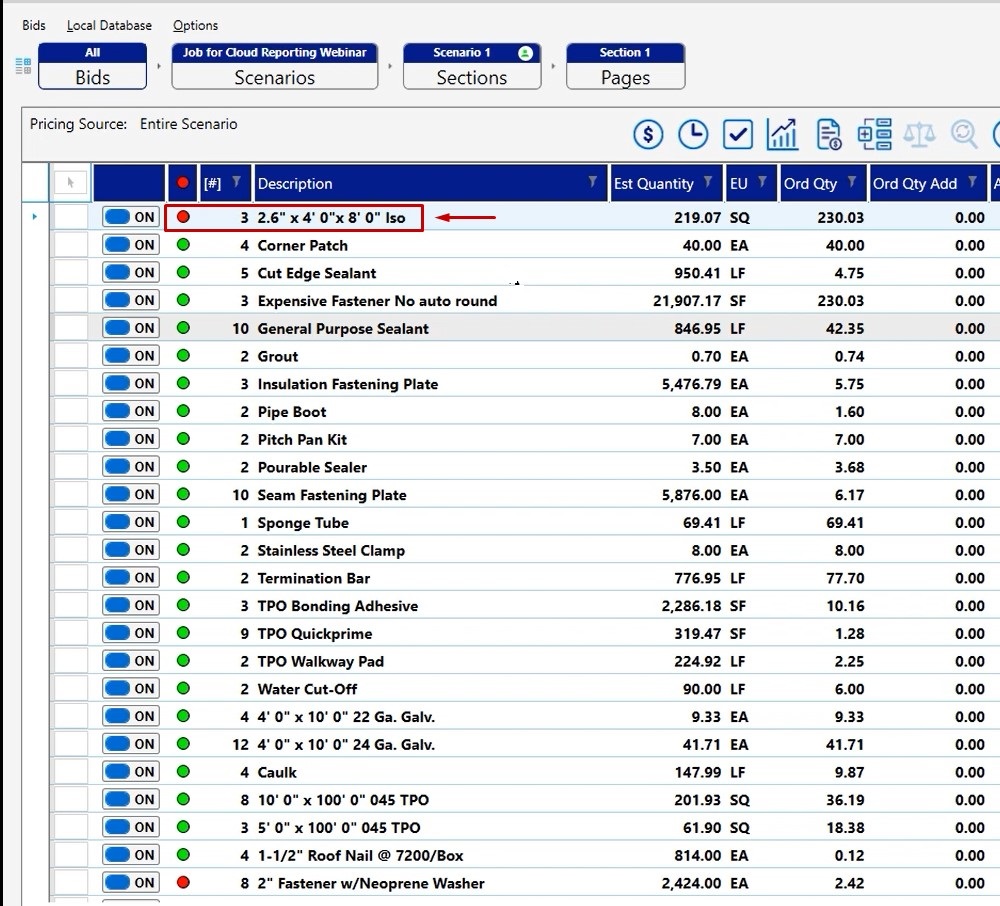
If we were to make any adjustments here, then click apply, you’ll notice that in all three locations it automatically changed that for us. In this example, we don’t have a price and as you can see it pulled zero in as our price.
Replace Tilde Codes Window – Track
For this example we are looking at a track.
- Left click to select the line which you would like to adjust
- Click the replace tilde code tool
Here, we have the ability to change:
- Track Gauge
- Track Width
- Track Length
- Track type

Make your adjustments, then click apply. Again, all of those occurrences have changed, and you can now put the correct price to that item you’re working with.
Replace Tilde Codes – Miscellaneous Item
Find the item that you want to change, single click to select the line, then click your replace tilde tool. At this point, you’ll notice that you’re going to get a different view.
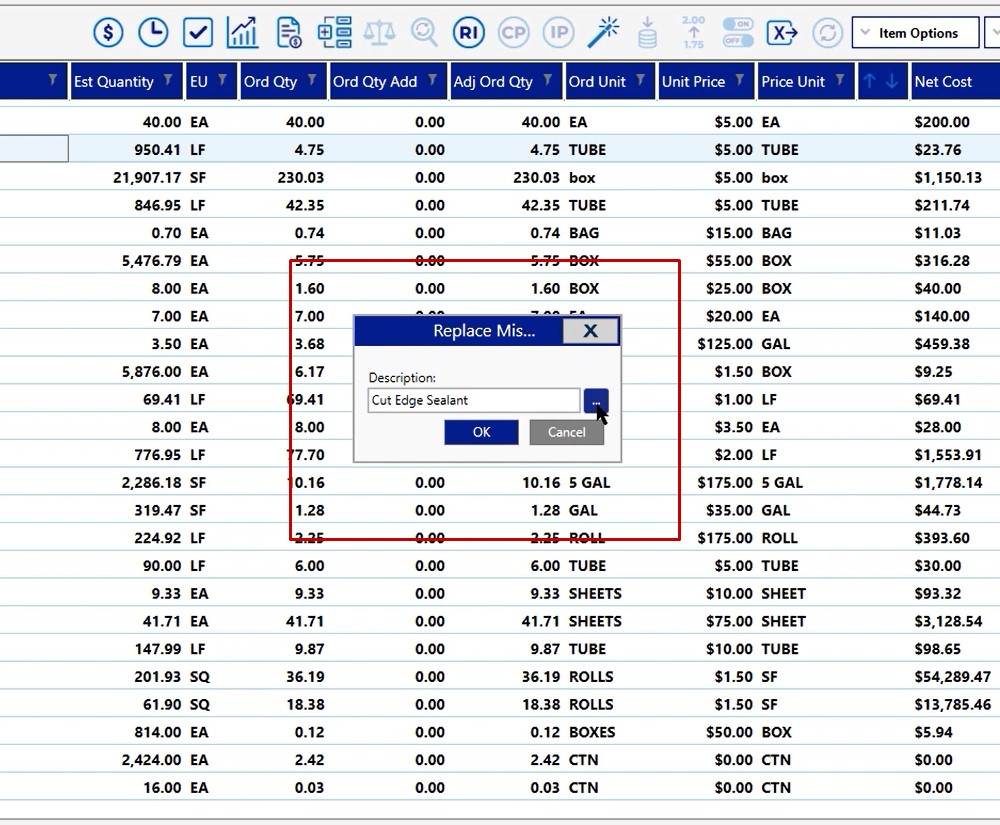
All we’re allowing you to do here is simply click the three dotted button and go choose from the same unit in the miscellaneous items, another product that you would like to see.
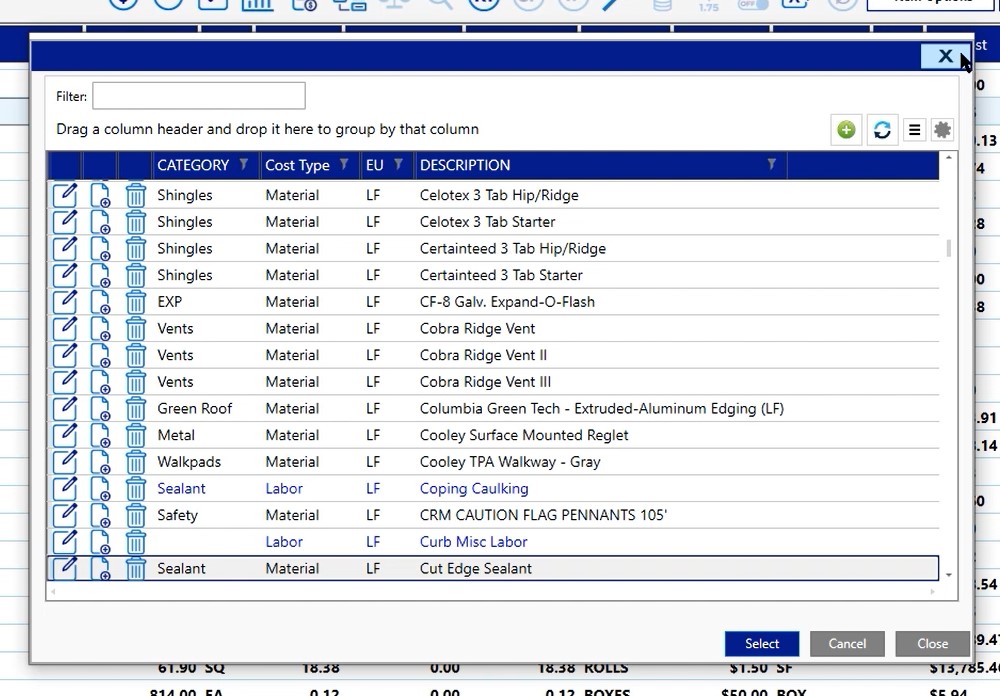
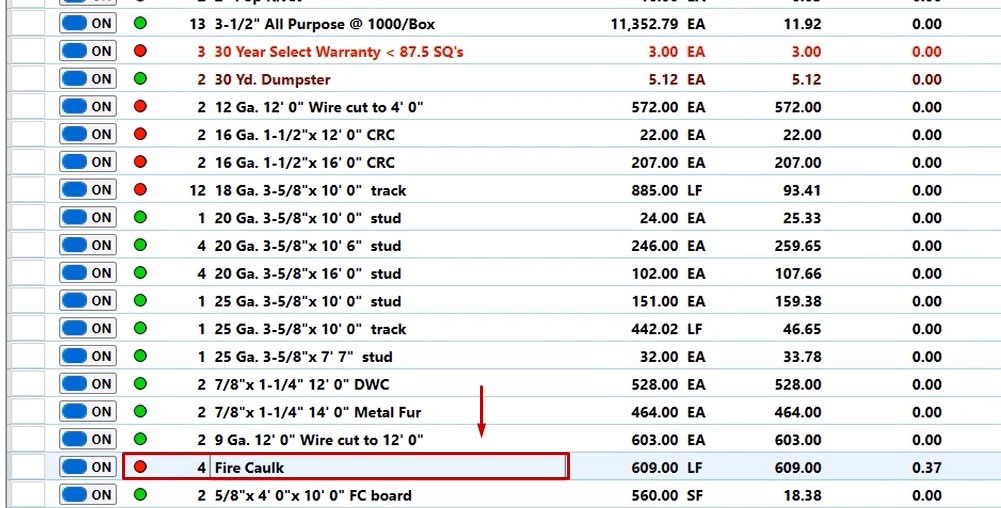
In this example we will look at this not in the roofing industry, but in the interior industry.
Scroll down and find your sound caulking line item, single left click to select it, then click the replace tilde tool.
To change this to fire caulking:
- Click the three dotted button
- In the search box, type fire
- Choose Fire Caulk
- Click Select
- Click OK
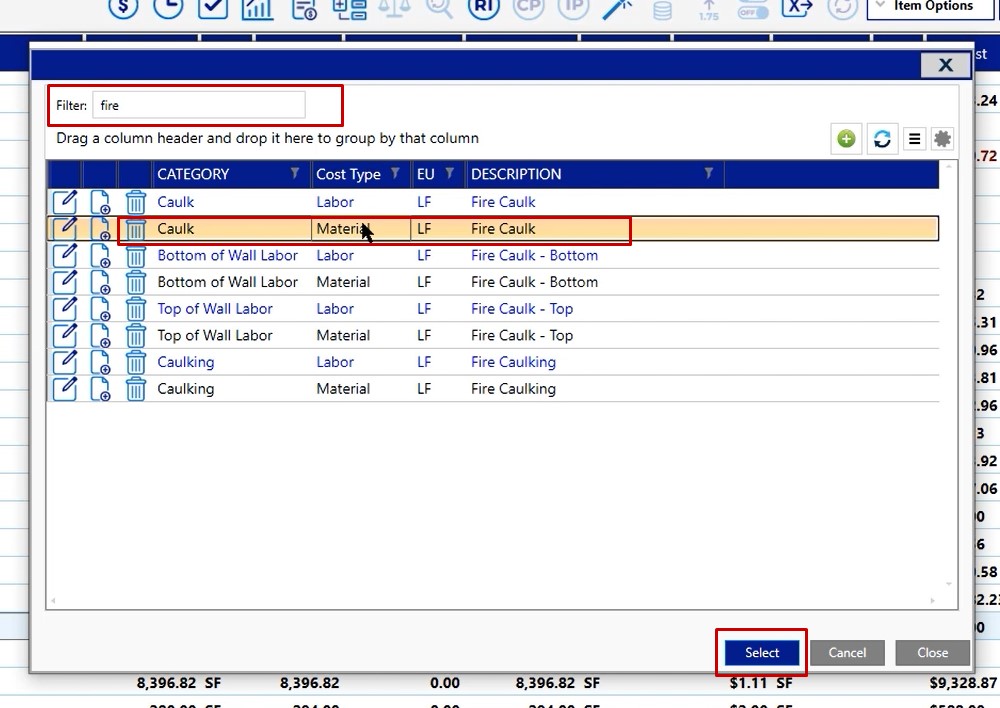
Note that the sound caulking is no longer in the project, and it has now since been replaced with fire caulk.
This is how you can utilize the replace tilde tool from the pricing screen to help you quickly update multiple occurrences of an item inside of your project.
If you have any additional questions as it pertains to the replace till they code tool, please reach out to our tech support team and they’d be happy to assist you in any way they can.