 Estimating Edge’s team of experienced construction professionals and software engineers have developed the industry’s smartest takeoff and estimating software solutions for competitive estimates.
Don’t just estimate faster. Estimate better.®
- /
- /
- /
- /
How to use the Excel Import/Export functionality
This video shows you how to access the Excel uploads and download spreadsheets that you can use to update your database at a mass level in v12.
In this video we’re going to cover how to access the Excel uploads and download spreadsheets that you can use to update your database at a mass level.
In this case, we’re going to be doing this through the administration portal on the bid grid view.
Database Templates
Click the database dropdown and scroll down to the bottom and click on upload item templates.
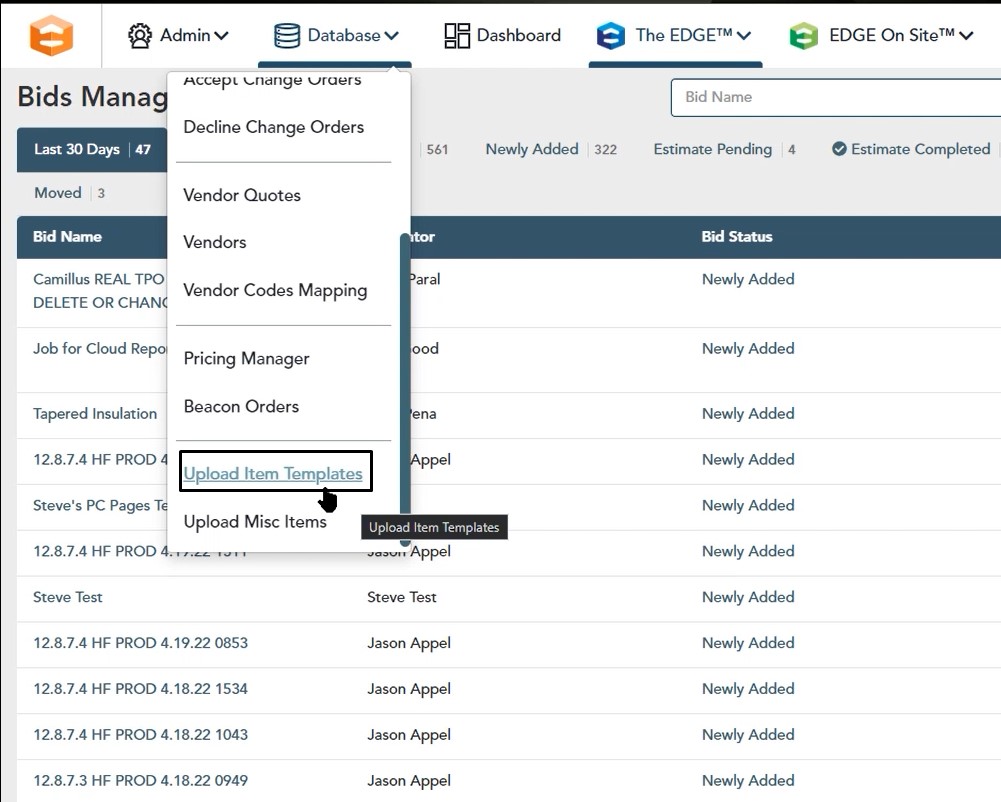
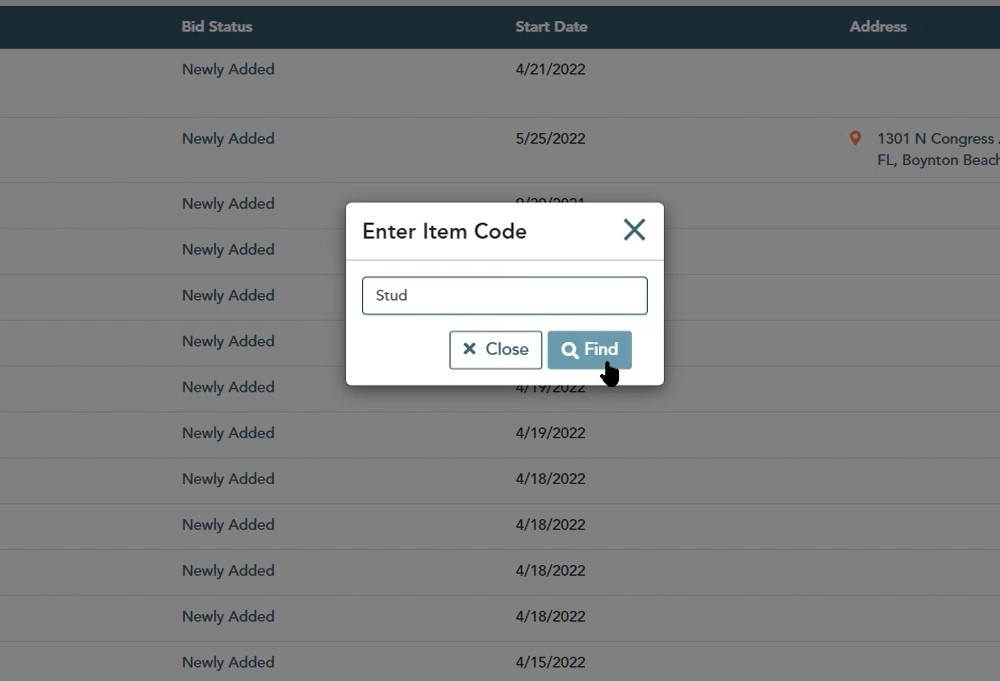
A window will now open that prompts you to Enter Item Code. It’s important that you know the item code for the specific item you’re going to be working with. If you need to find that item code inside of The EDGE when you’re working in a project.
*Note about Item Codes below
Item Codes
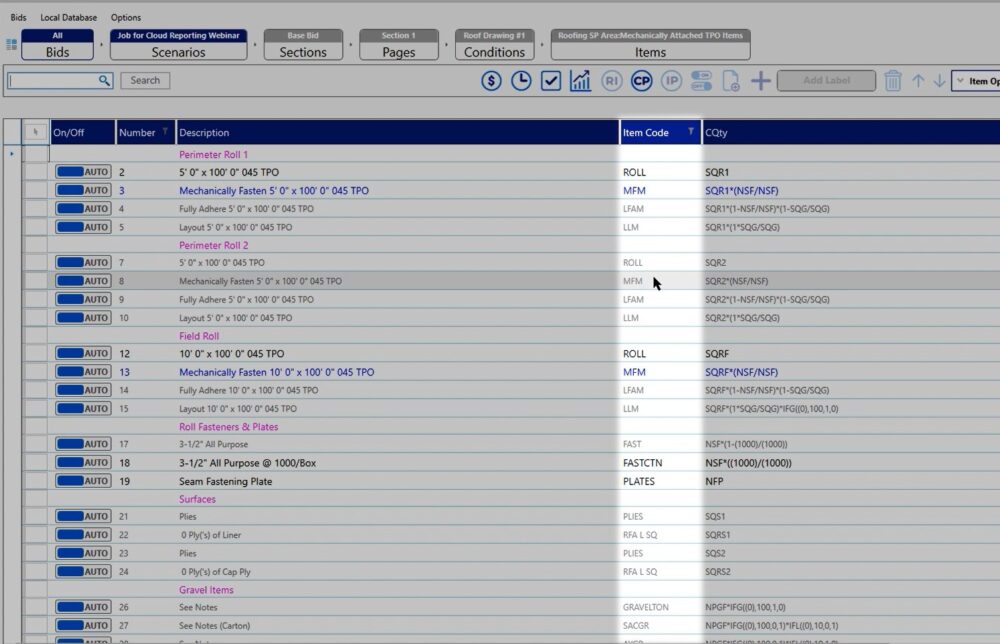
If you go to your condition level, you’ll be able to see the item code that’s assigned. For example, if we go into this roofing drawing, you’ll notice that at the item level, when we’re looking at the mechanically attached condition, you’ll see all of the item codes displayed.
So if you wanted to update your membrane, you’ll see the item code is ROLL. If you go back and take a look at any one of the other pages here, you would be able to see that for the wall items. If we’re looking at this information, you’re going to have all of that information available to you.
Once you know your code, enter it into the text box labeled Enter Item Code, then click Find
Download Template
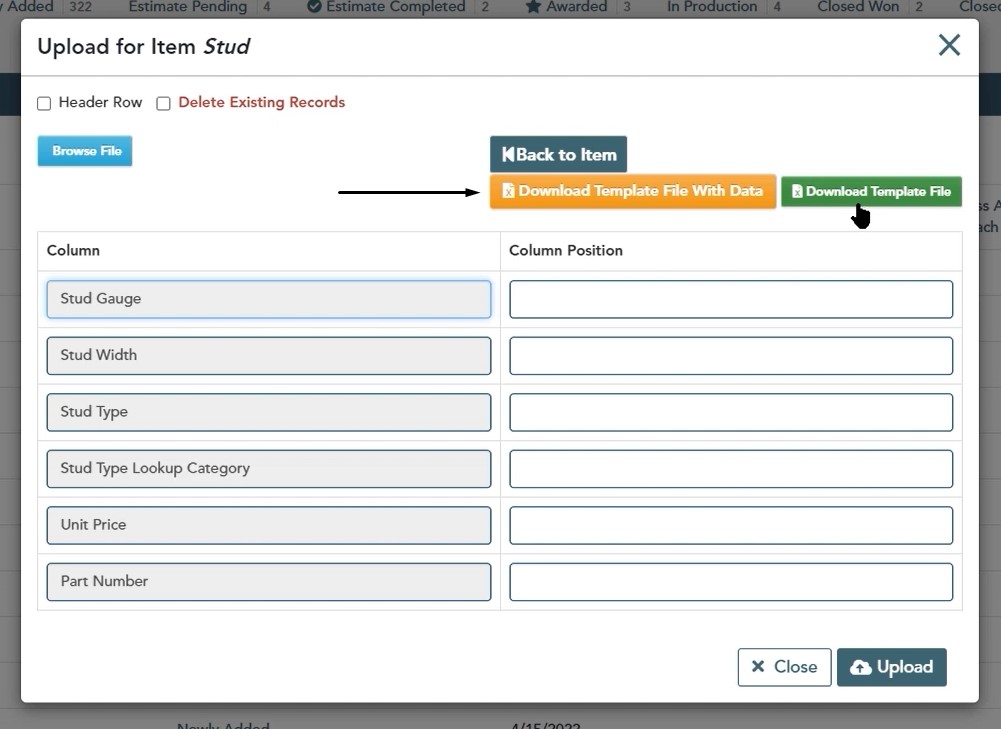
Once you choose find, we recommend downloading the template file with data. However, if you don’t want the data that’s already in your database and you would like to start from scratch, you can choose the download template file. This will give you the file format that you need so you can upload this back into The EDGE.
Miscellaneous Items
Click on the Database dropdown, then on Upload Misc Items.
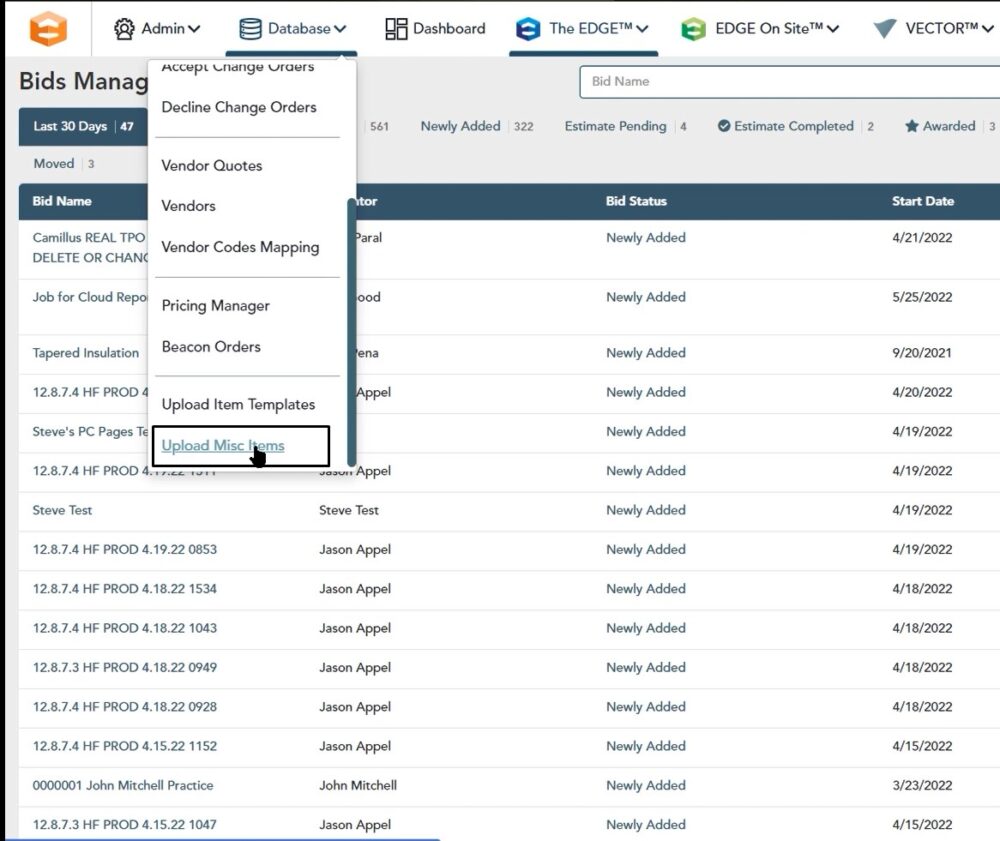
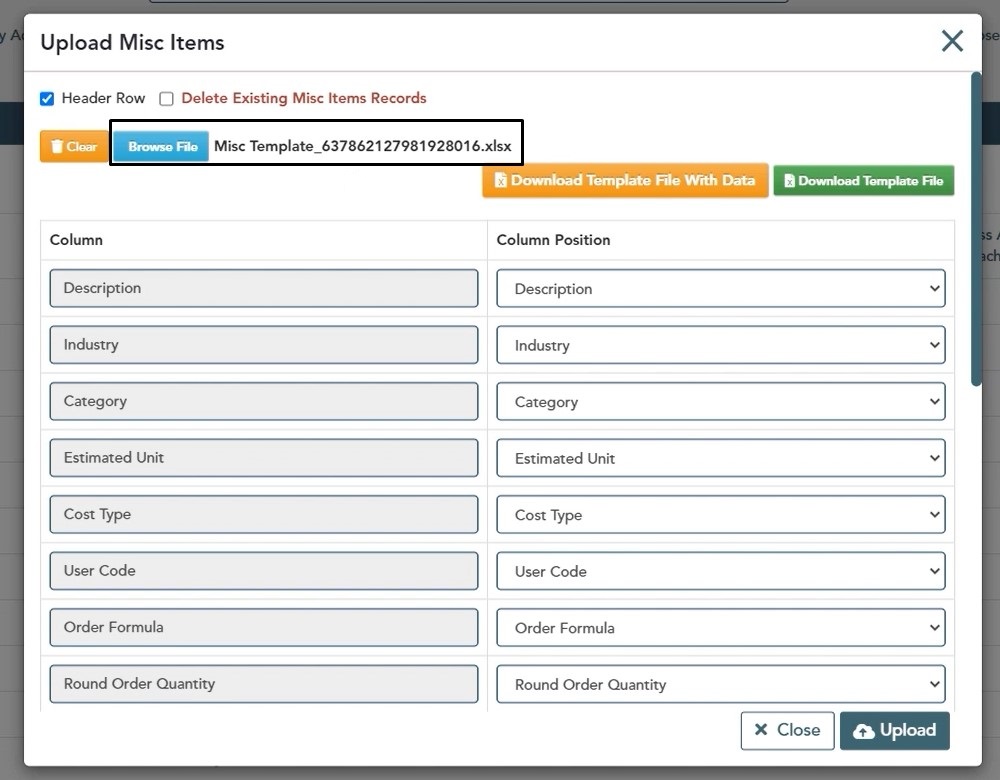
Once the window opens, it is recommended that you choose the download template file with data. This way, you’re getting all of the current information in your database.
In this case, once you click on it, give your computer just a couple of moments to download that Excel spreadsheet. Depending on the web browser you’re using is going to depend on where your file will be displayed. In Google Chrome, it’s the bottom left corner.
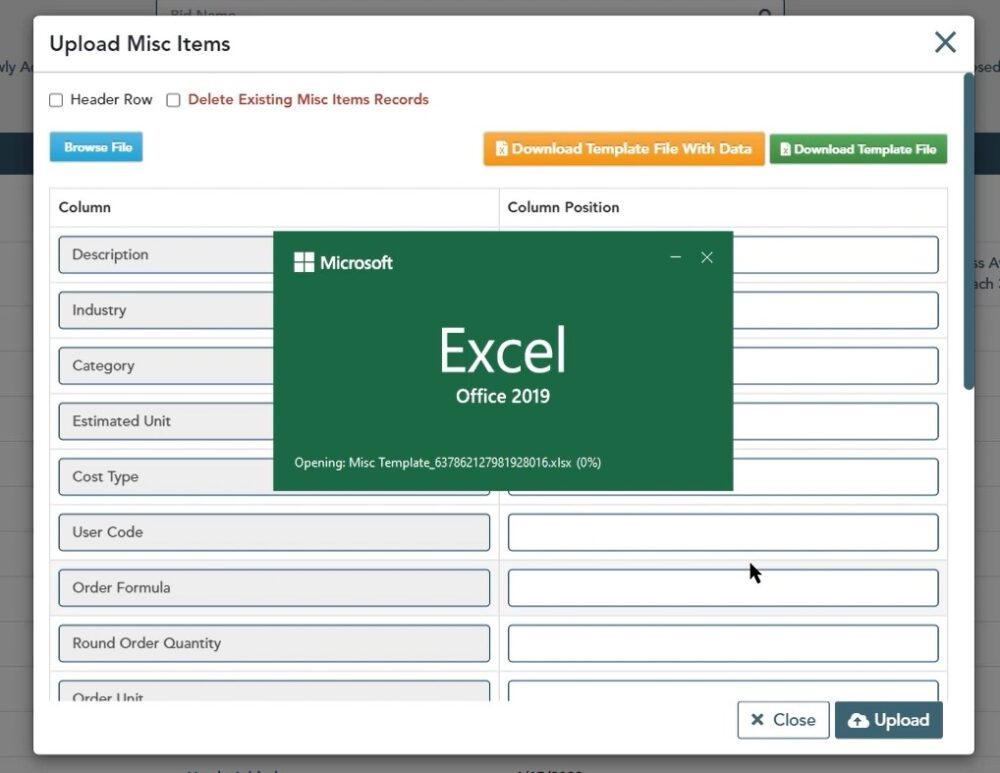
Once it’s finished, downloading, you can single left click on it to open it up.
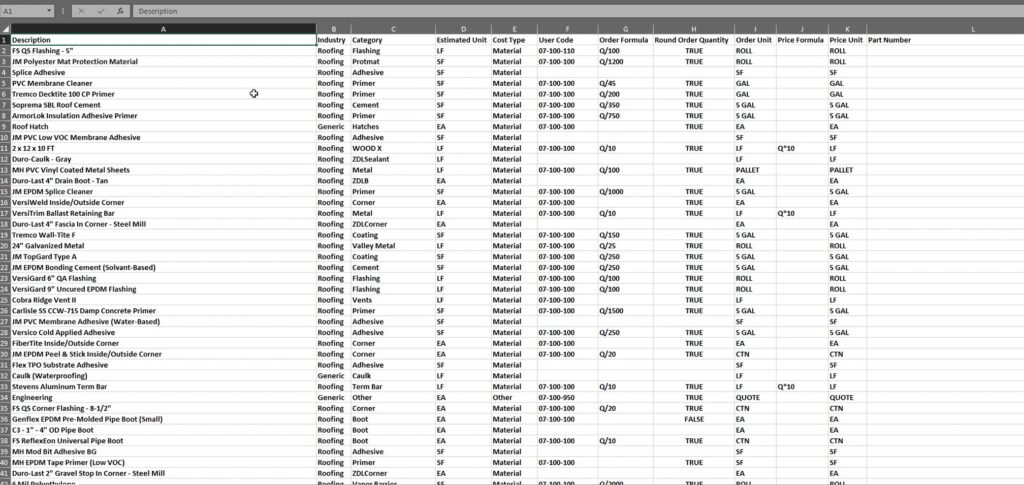
Once it opens, you’ll notice that this is going to be all of the material and labor and all of those miscellaneous items that you have created. You could have subcontractors out here. You could have equipment items as well, but ultimately it’s just putting that into a giant Excel spreadsheet.
Here, you can start to make your modifications if needed directly in the spreadsheet. Go through this list, update any information, delete any items that you don’t want to have on here.
Import Spreadsheet
The changes that you make here are only through the spreadsheet. To take all of those changes and push it back into your database for what you have currently in version 12, you will first go back into your administration portal and database uploads.
Here, you will click the check box for header row and then choose browse file. This allows you to browse your computer and pull in that spreadsheet that you just updated.
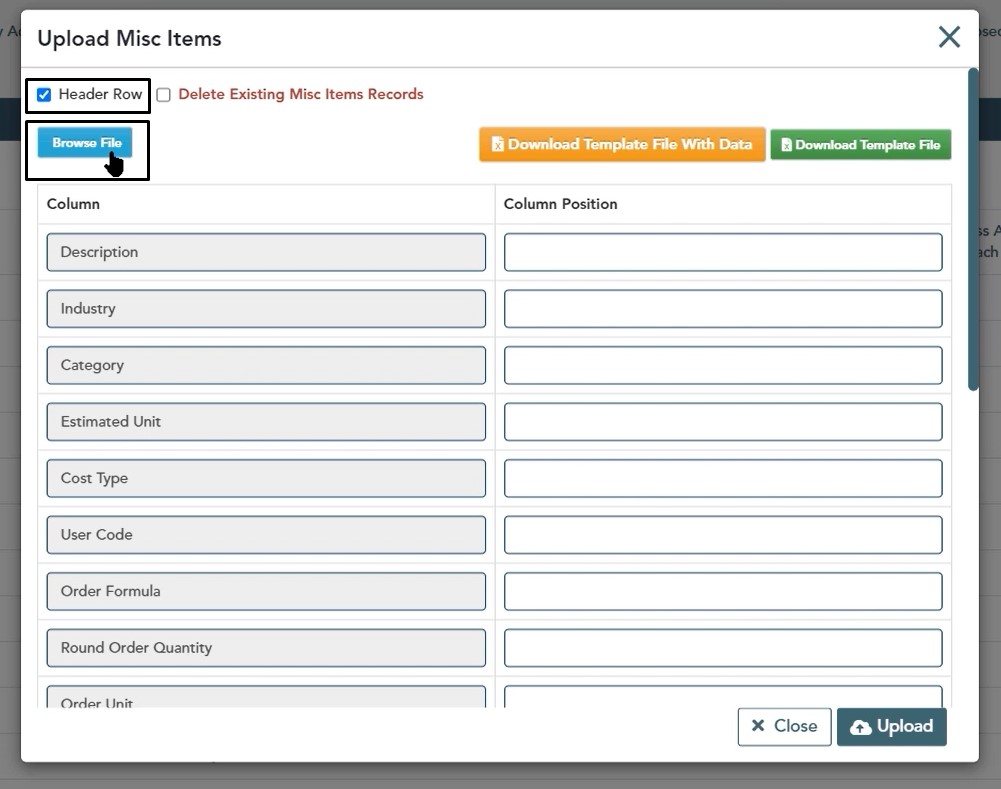
Note: The delete existing miscellaneous item records means that when you check this checkbox, if the product is not on the spreadsheet that you are pushing to the database, that it will be deleted. Make sure that you only select this option if you truly want to delete all of the items that are not on the spreadsheet. Most of the time you’re not going to want to delete this.
To upload the updated file:
- Choose header row
- Click browse file
- Navigate to the Excel file you saved, then left click on it
- Click Upload
Once uploaded you will see all of that information in your database.
If you have any additional questions or you run into any issues as you’re working with the item template upload or the miscellaneous items upload, please feel free to give us a call on the Tech Support Line. We’d be happy to assist you in any way we can.
