 Estimating Edge’s team of experienced construction professionals and software engineers have developed the industry’s smartest takeoff and estimating software solutions for competitive estimates.
Don’t just estimate faster. Estimate better.®
- /
- /
- /
- /
Quick Pricing Area, Length, and Count Condition Properties
This video covers Quick Pricing Area, Length, and Count Condition Properties in v12.
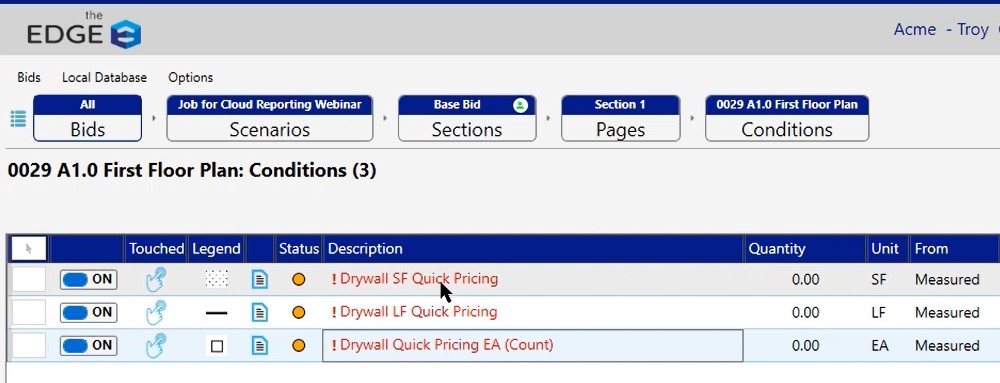
Today we’re going to cover the quick pricing conditions that you have the ability to use. These quick pricing conditions, even though the video is going to show drywall, these are available to you in every trade.
You can pull these quick pricing conditions in from the database in the search bar. Just type in “quick” and then it’ll be a quick, easy find for you to find those conditions.
These conditions, when we open the properties, are going to look very similar to a generic condition, and that’s because they are. The difference is that behind the scenes, we’ve added in a material and a labor item that gets calculated and quantified based off of the description that you have in your condition.
Change Description Names
For this example, we click on Drywall SF Quick Pricing
Then, change the description to drywall ceiling, then click OK in the bottom right of the window
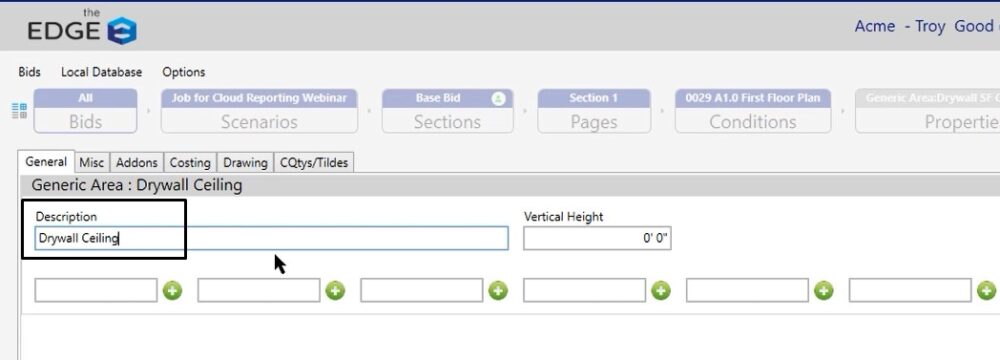
You will notice that you have a material and a labor line that are both called drywall ceiling In this case.
If you were to work with lineal footage, change it to drywall partition and for count, change it to drywall column.
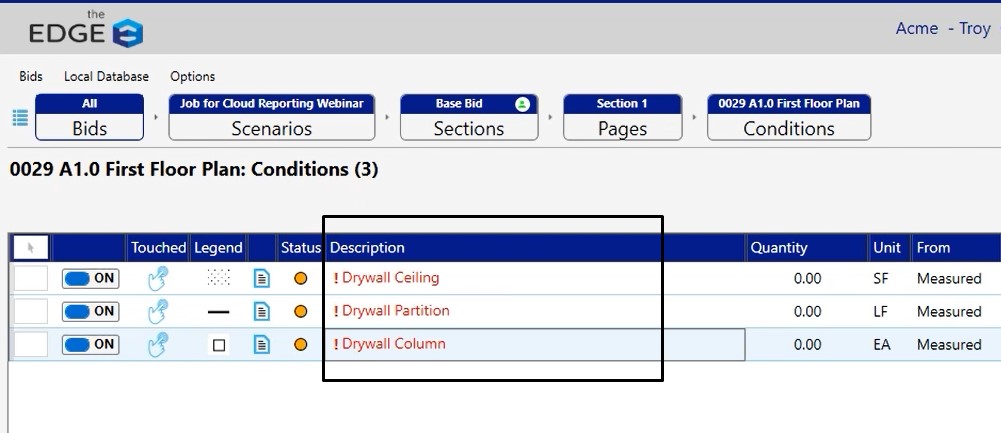
The main reason for the modifications is so as you go through you’ll see the material and labor items change once you quantify these tools.
Take Off Screen
For this example, first access your take off screen. Once the take off screen has refreshed:
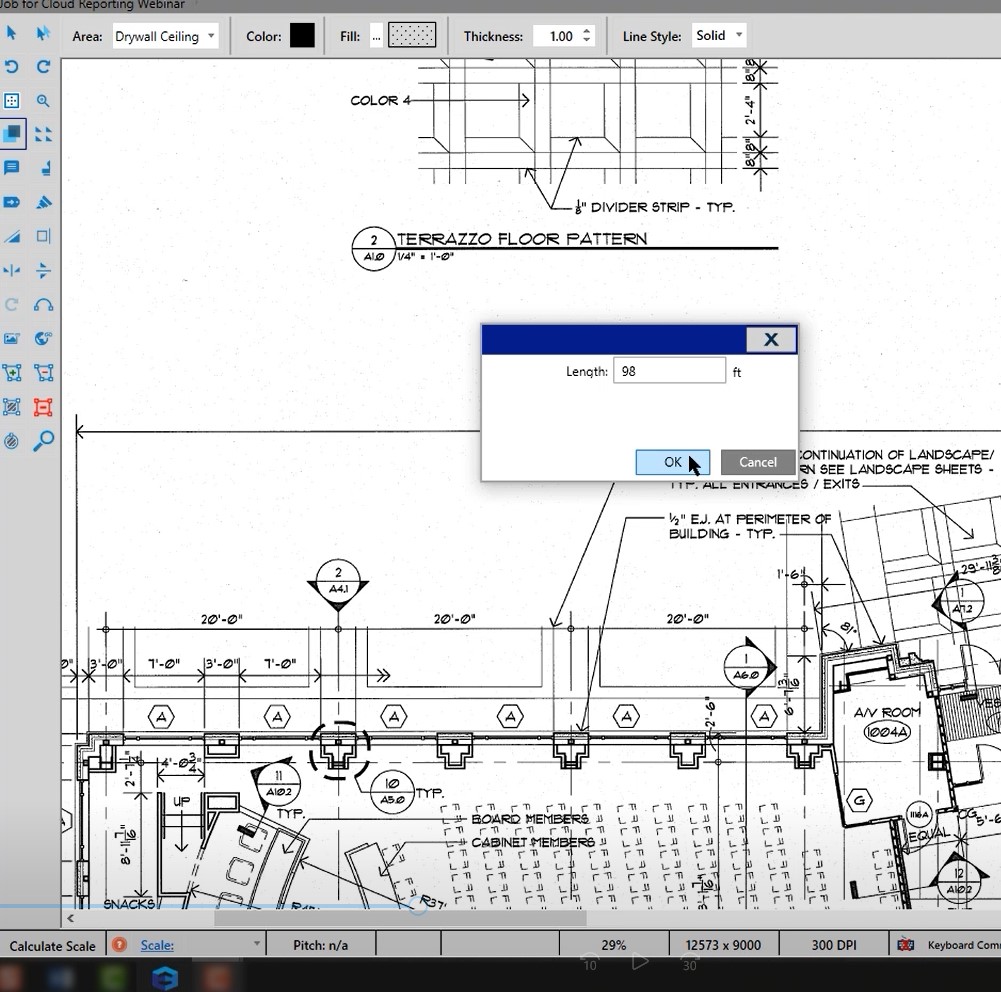
Click on scale, then click calculate
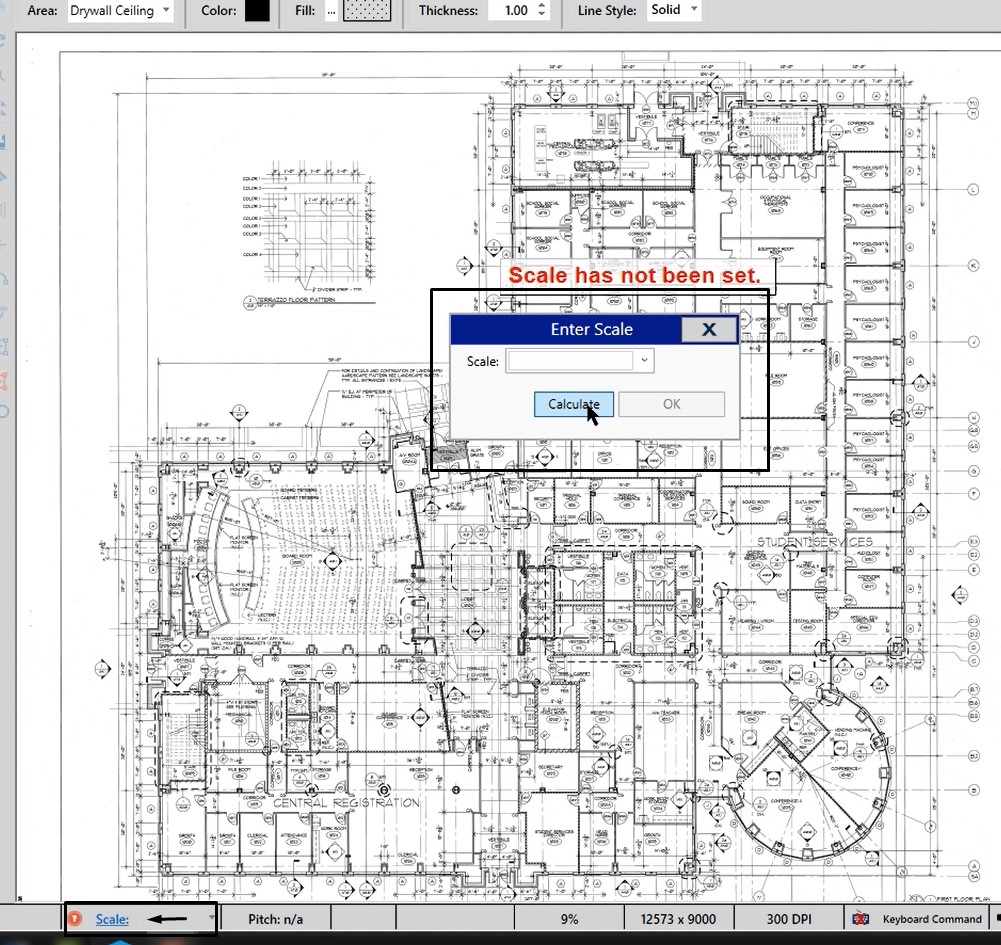
Zoom in, use the 98 foot measurement, click ok
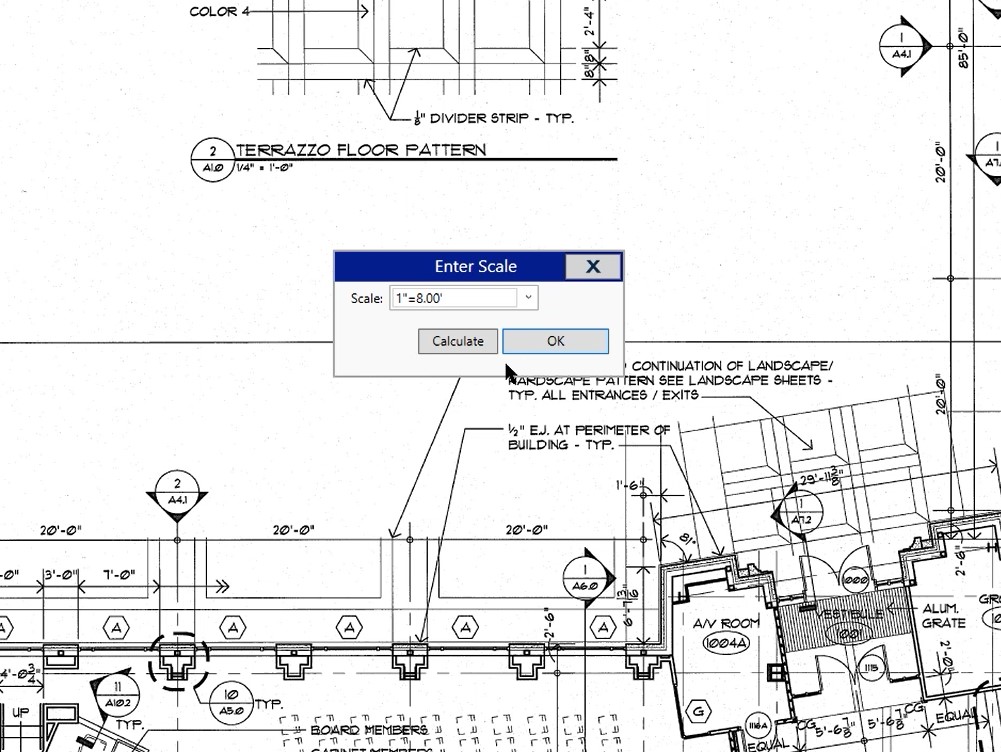
It is close to scale, so for this example, you can do a manual change to 8 ft, then click OK. Now the scale is set
Ceiling
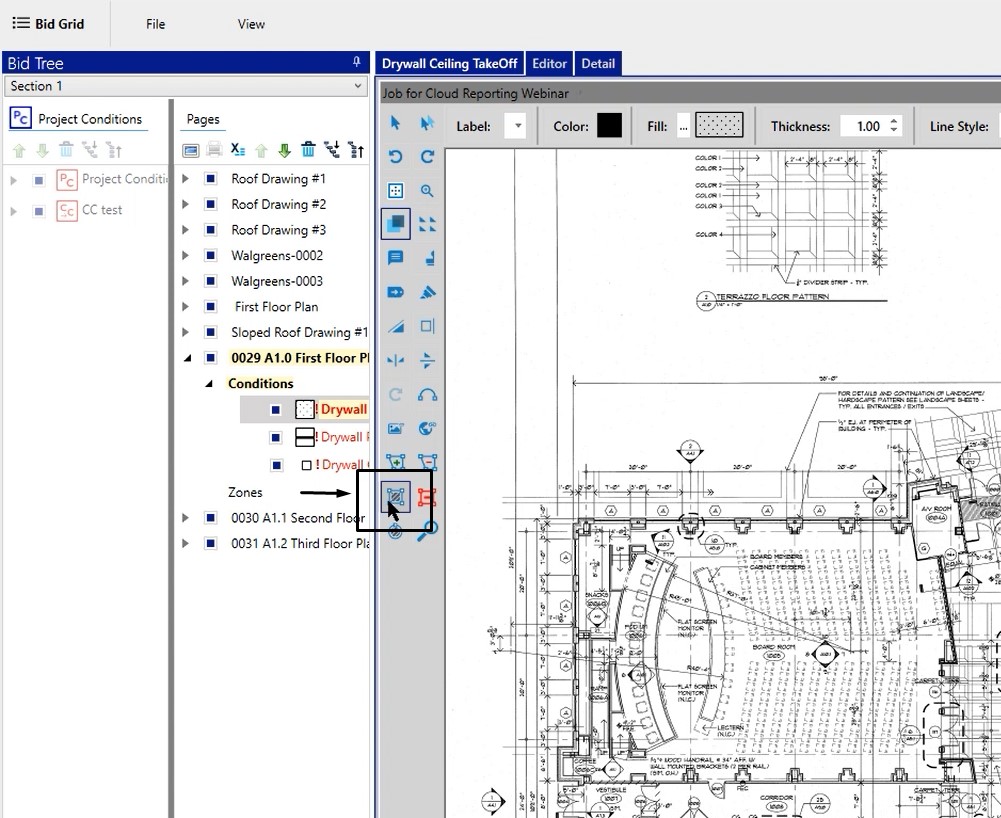
Next, we want some quantity take off with the area. In this case, because we’re going to be working with the area, we will use the rectangle tool to draw a couple of shapes.
Partitions/Walls
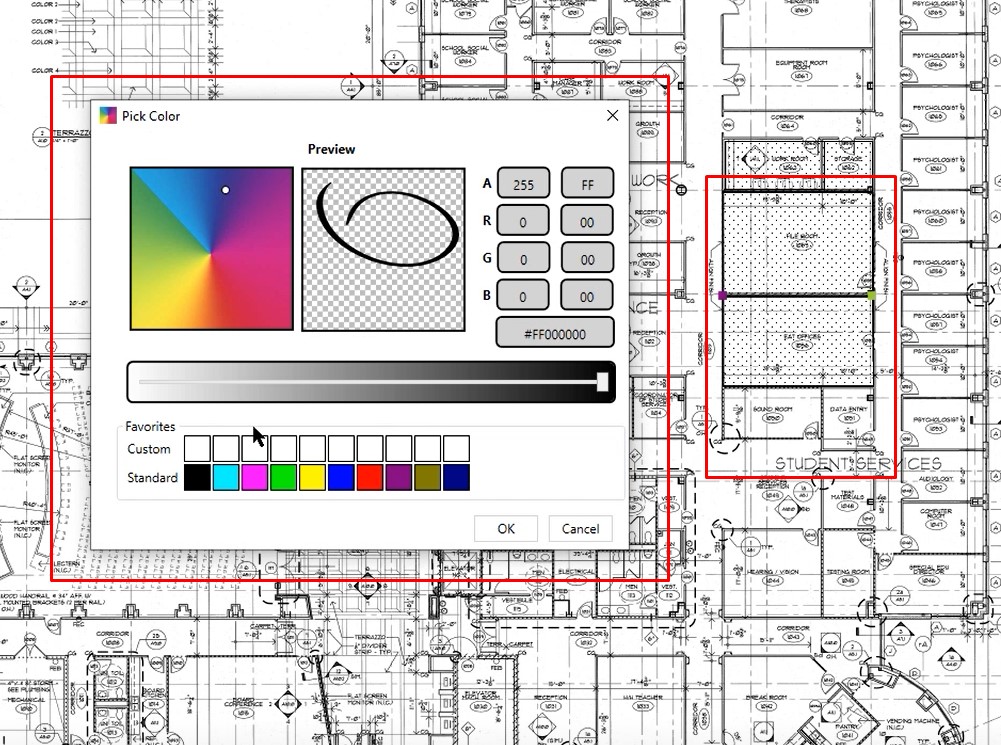
For this example, we do the same thing for the walls and draw in a couple of them and also change the color so it stands out better
Count/Column
For this, we place a column in the middle of the room
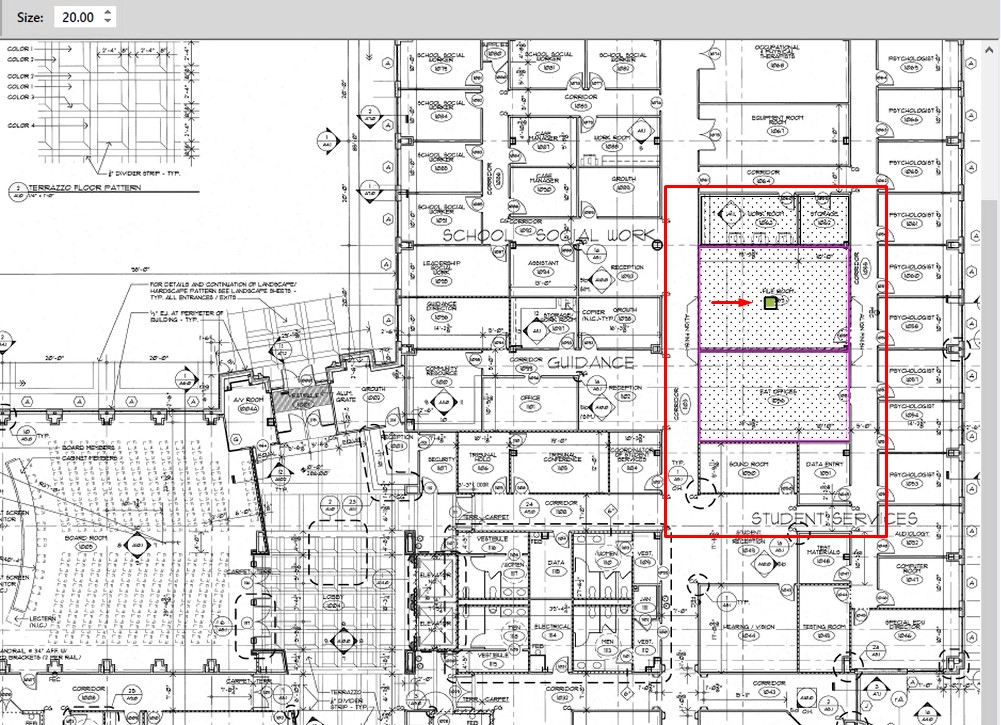
If you go back to the bid grid, you’ll notice that each one of these has some quantity.

Pricing Screen
To mark these so you can look at each one specifically, click the arrow button on the far left of the descriptions to select, then click the $ (price) icon

Once in the pricing screen, you’ll notice that our drywall ceiling material, column and partition material counts are all there.

Labor Screen
Click on the clock icon to go to the labor screen.
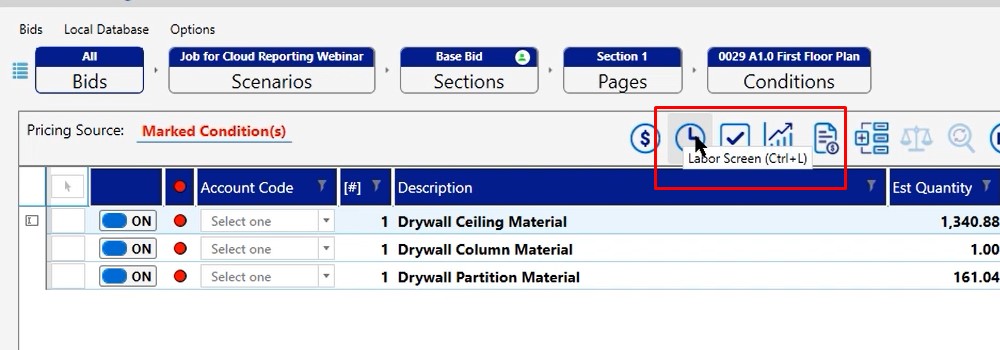
Once there, you can see the material and how you can price that information out.

This is a very handy tool for if you’re just trying to get budgetary numbers or if you’re just trying to create a one off condition that you need to apply pricing in either a square foot, lineal foot, or each methodology.
If you have any additional questions as it pertains to the quick pricing conditions, please feel free to give us a call on our tech line and we’d be happy to assist you in any way we can.
