 Estimating Edge’s team of experienced construction professionals and software engineers have developed the industry’s smartest takeoff and estimating software solutions for competitive estimates.
Don’t just estimate faster. Estimate better.®
- /
- /
- /
- /
Roofing BUR Area Condition Properties – Insulation and Perimeter
This video covers the Roofing BUR Area Condition Properties – Insulation and Perimeter in v12
Insulation Tab
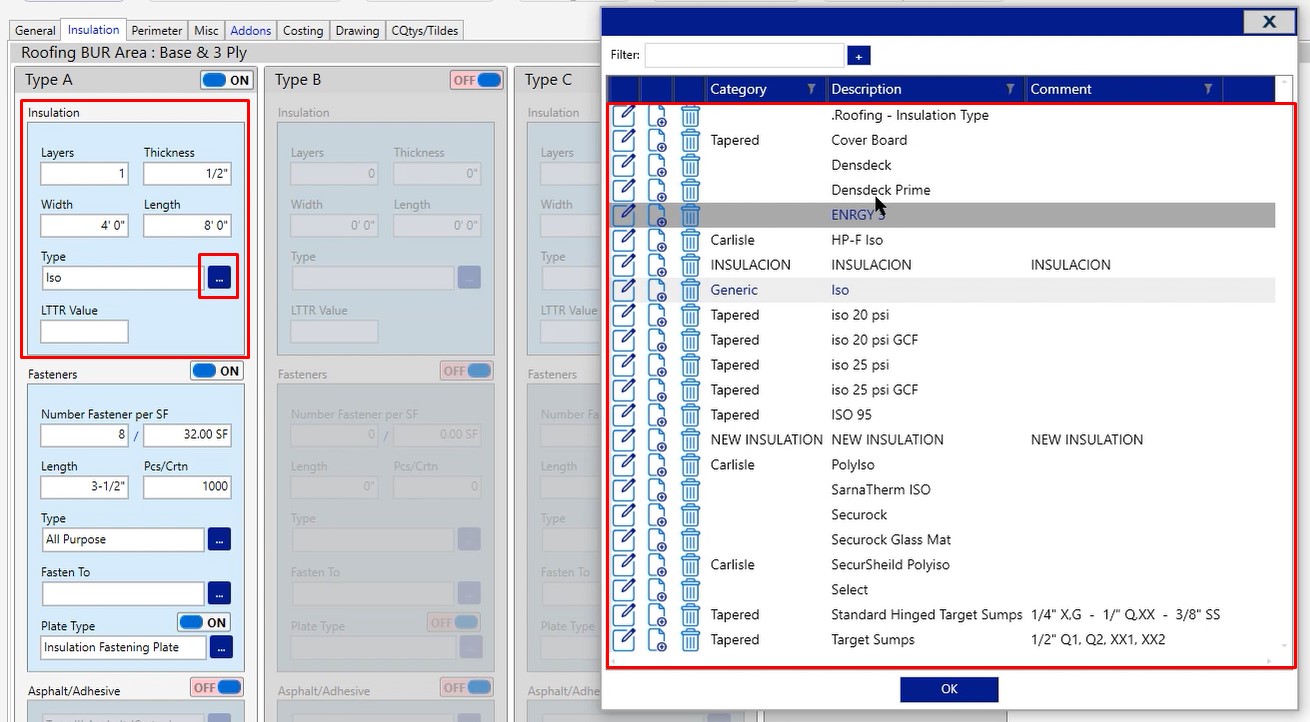
When you click on your installation tab you’re going to be presented with four fields. A, B & C are all representative of any board that you’re going to be placing underneath the layers of felt that you’re calculating for this project. All of three of these are filled out the same way, but we will only be covering Type A.
Insulation:
- Layers – Number of layers that you’re going to be placing down
- Thickness – Thickness of the material
- Width & Length – Width and length of the board being produced
- Type – Click the three dotted button and choose the product that you want to use
- LTTR Value – This field this is an information only field
Fasteners
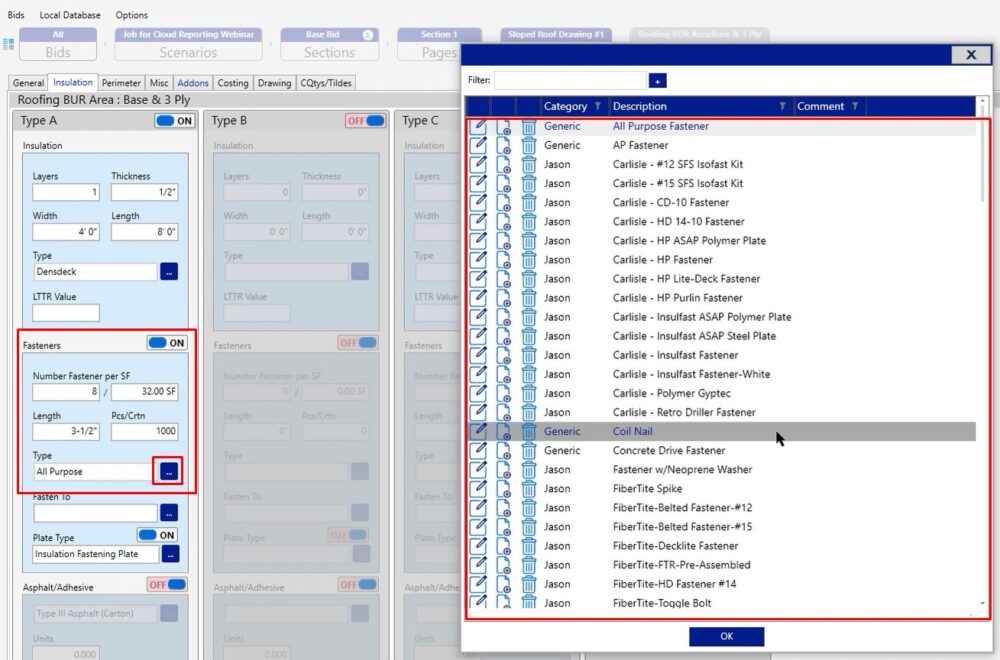
- Number Fastener per SF – The number of fasteners per square foot
- Length – Length of the fasteners you are producing
- Pcs/Crtn – If you wanted to change the pieces per carton depending on that fastener length, you can change that here
- Type – The type of fastener you’re working with. Click the three dotted button to choose from the predefined list
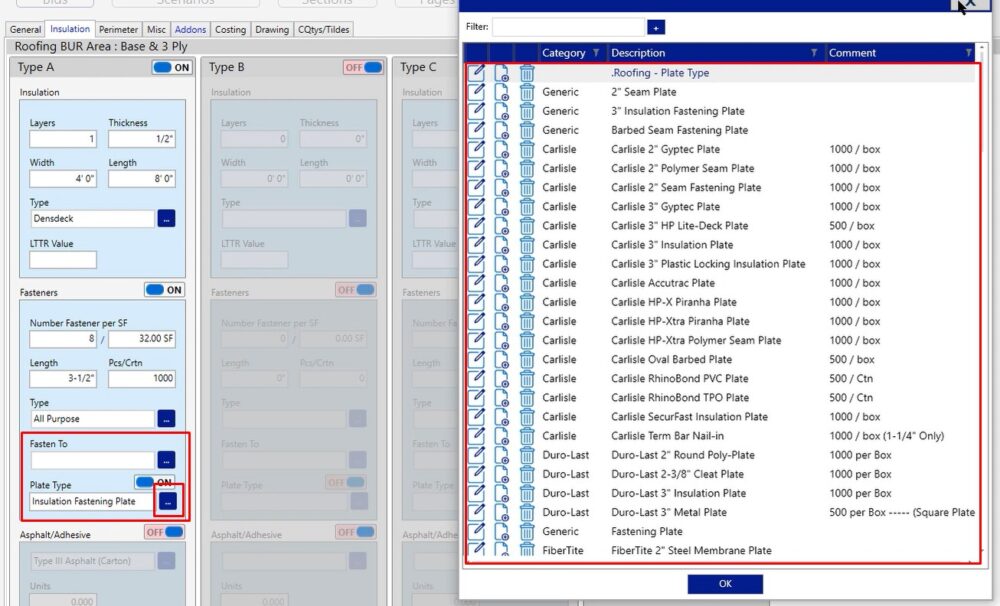
- Fasten To – Information only
- Plate Type – For the different plates you may need for fasteners. Click on the three dotted button to choose an option.
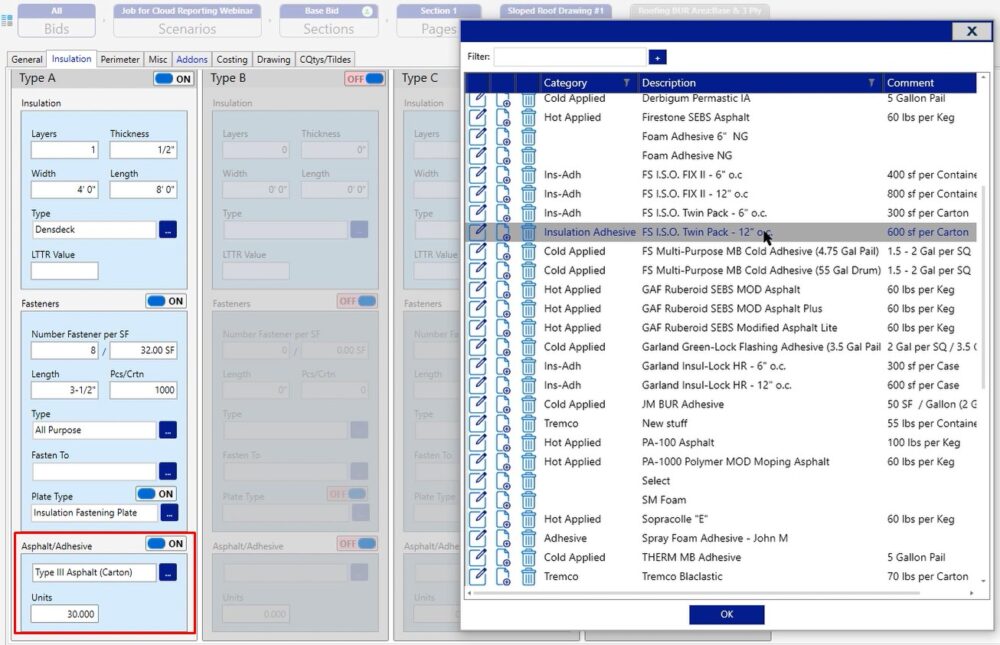
Asphalt/Adhesive
Please see video for a review on how these fields work (timestamp 0:02:11)
Tapered
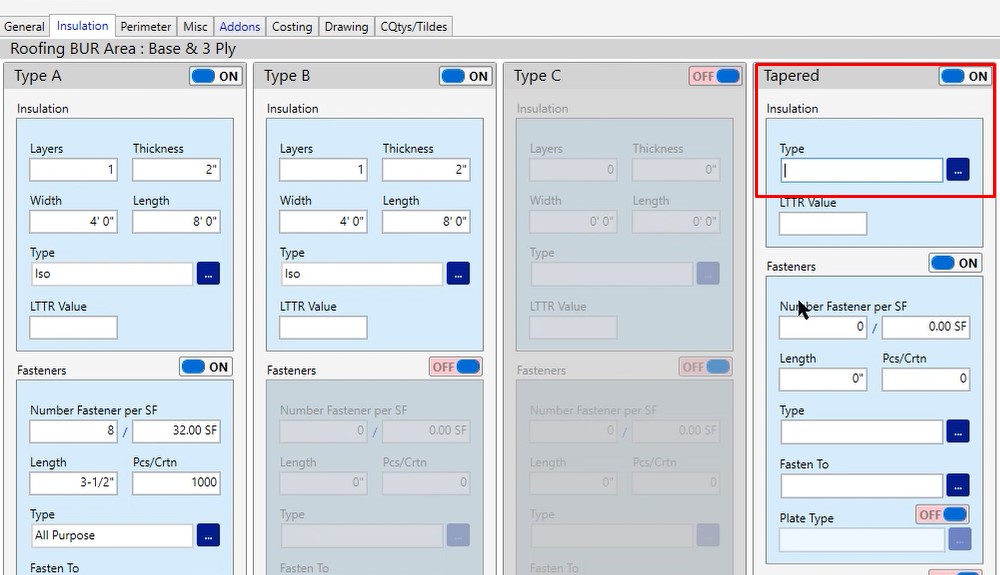
The tapered column is used to produce a quote for you. We are only going to give you one line item and it’s going to be a lump sum dollar amount for you to be able to calculate a quote coming from the supplier for them to give you a tapered package.
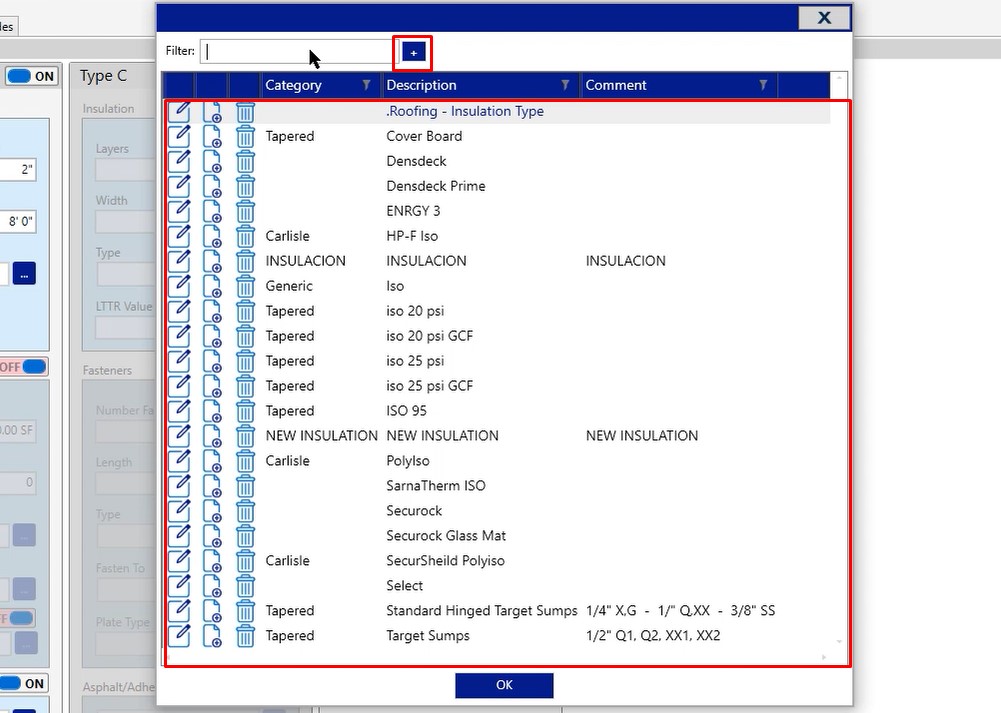
- Type – The type of insulation that you would be using. Click the three dotted button and choose from the options or click the blue plus sign to add your own product.
Fasteners
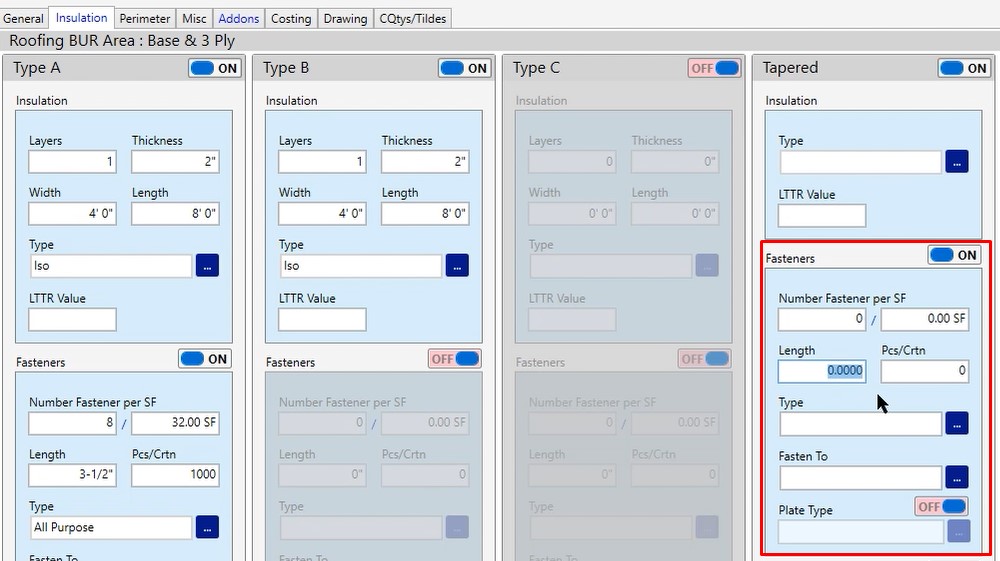
- Number Fastener per SF – The the number of fasteners per board that you would like to see per square foot
- Length – We recommend that you use an average of length.
Perimeter Tab
The way that the perimeter tab works is this is in addition to the insulation tab. On the insulation tab we’re calculating eight fasteners per 32 square feet.
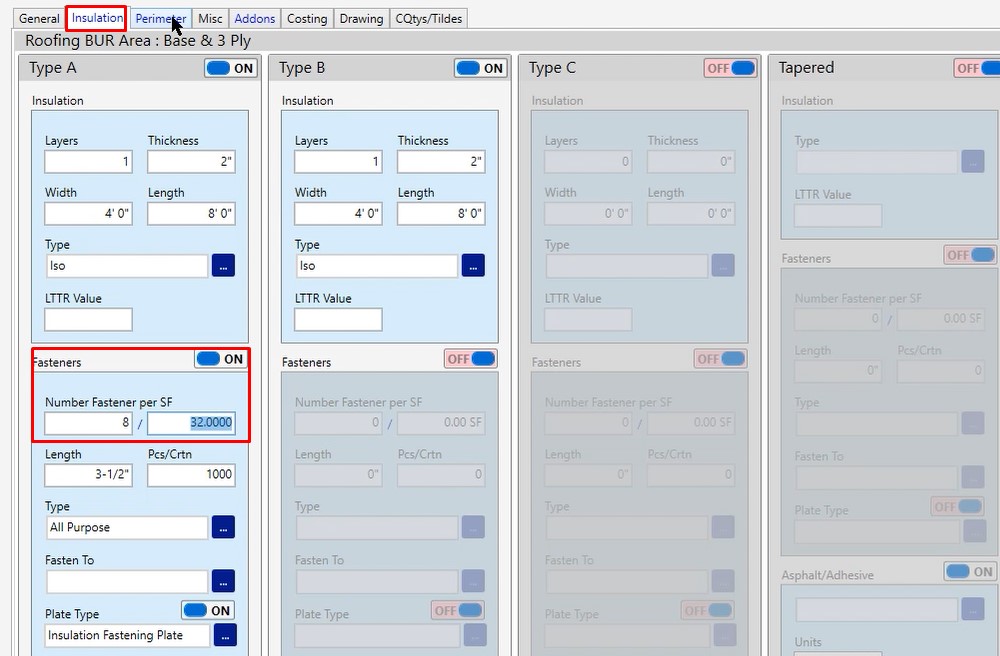
Let’s say that we want to meet our required fastening pattern of 8,12 and 16. 8 fasteners in the field, 12 in the perimeter and 16 in the corners. If that’s what we wanted to meet, first thing we would do is go to perimeter and turn our perimeter corners on.
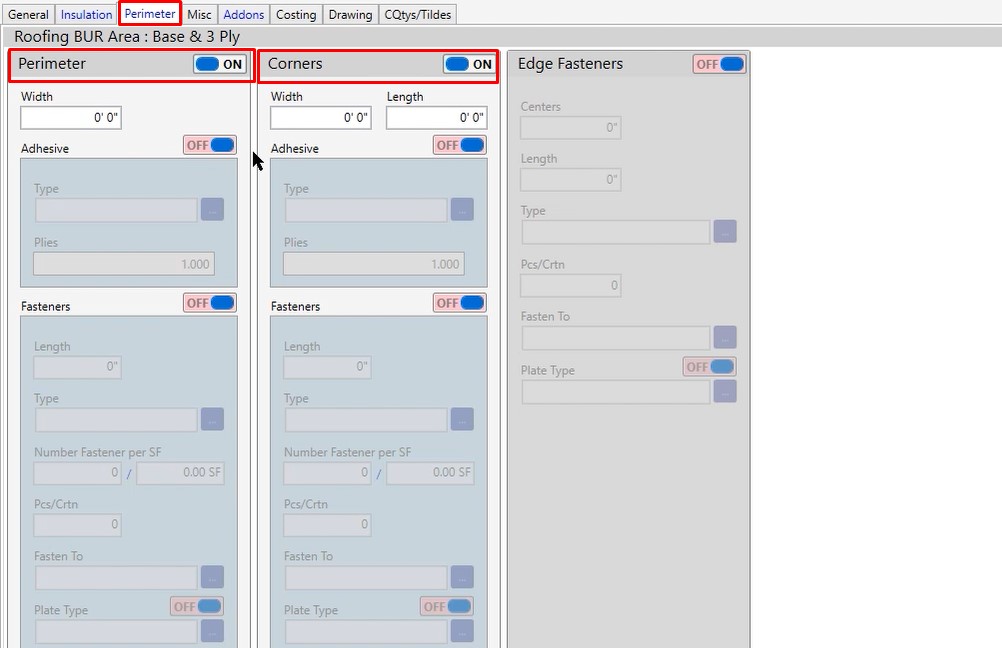
We would then need to tell the program how far off the parapet wall that perimeter is going to come into play. For today’s example, we’re going to use 10′ and we are going to set the corners to show the same.

In this case, let’s say we were using fasteners. If we’re using fasteners, we’re going to pull the same fastener length that we had on the insulation tab. We’re also going to pull the same fastener type that we had on the insulation tab.
On the fastener calculation for the perimeter, we will put 32 SF, knowing that we’re looking at a board. So again, this is in addition to the insulation pad. For our perimeter we’re trying to get to a total of 12 fasteners. In the field, we’re calculating eight. 12 – 8 = 4. So in this case, we’re going to add 4 fasteners per board and the perimeter.
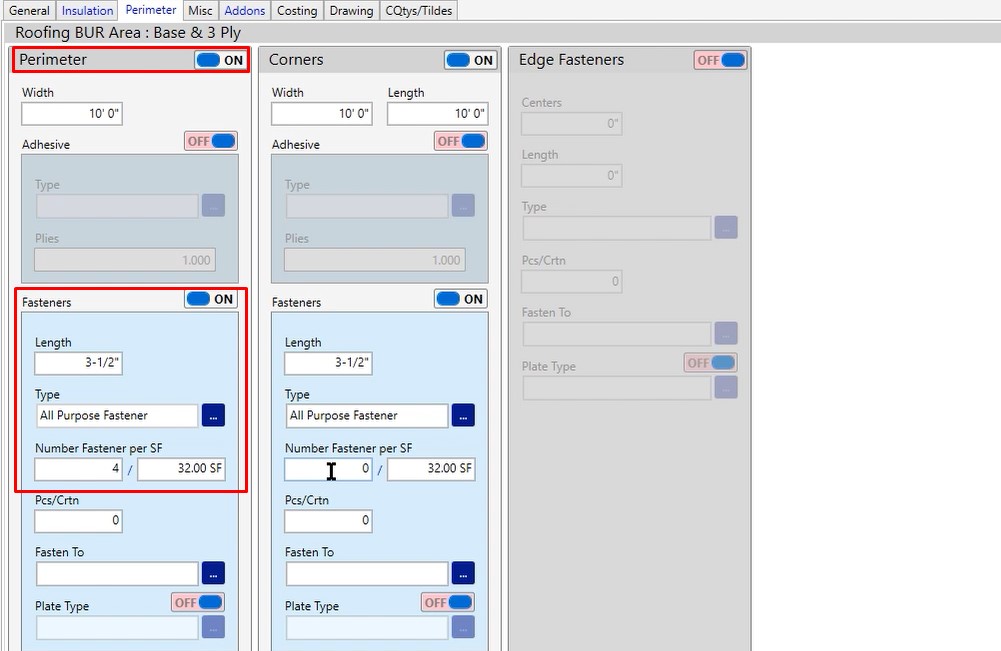
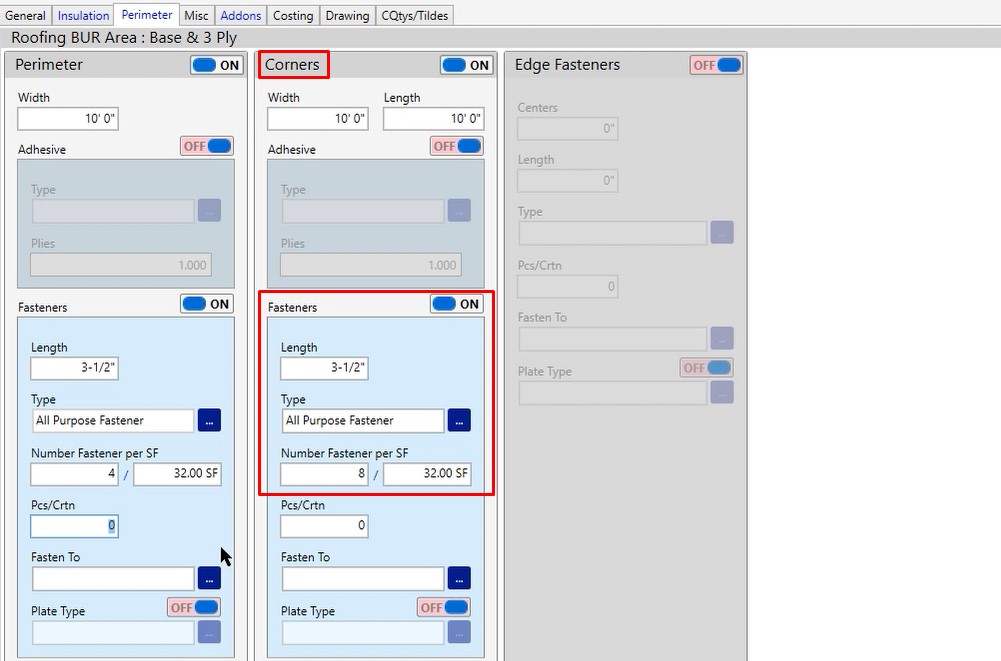
Corners and perimeter are calculated separately, so the 4 fasteners that you just added to the perimeter did not get added to the corners. Meaning, that if you wanted to meet at least a 12 fastener per board requirement, you would need to start with the number four in there.
However, we’re trying to get to a 16 fastener per board requirement. In that case, we have the 8 coming from the insulation tab. So 16 – 8 = 8 and that is what we would put in the field.
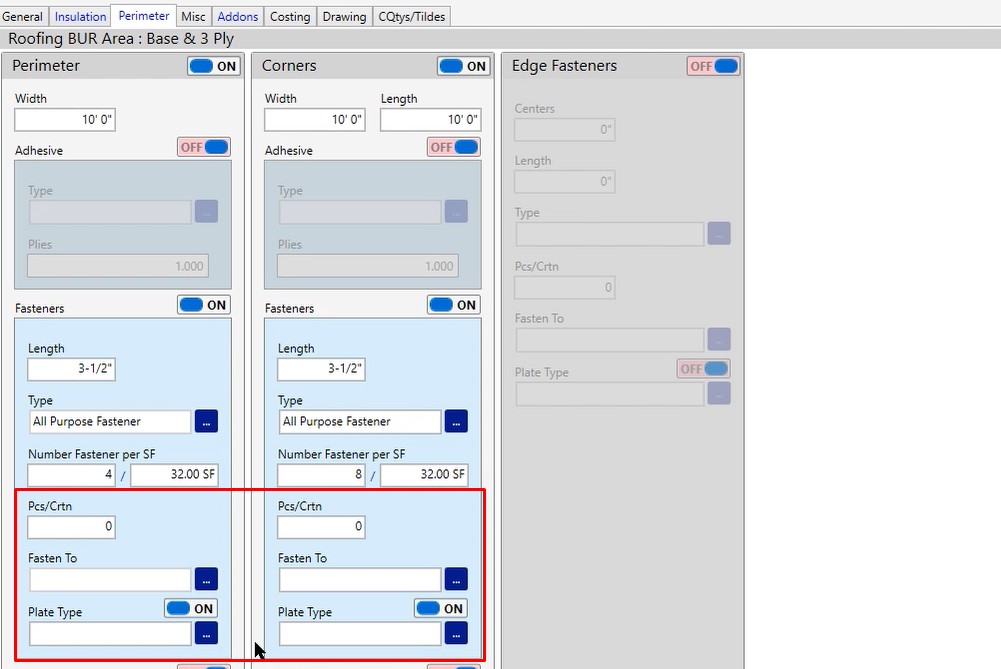
- Pcs/Crtn – We recommend filling it out if you know the fastener length that you’re going to be working with so that way you could price this by the box instead of by the piece.
- Fasten to – Information Only
- Plate type – If you are using fasteners, go ahead and turn the plate types on and choose the plate if you need.
When it comes to your insulation adhesive, this is where it’s a little bit different. We are still calculating a 12″ on center spray pattern from the field and that does carry over into your perimeters and corners. So if that’s the case, in the perimeter, we’re actually going to be using the same 12″ on center spray pattern because your team in the field is not going to lay two, 12″ spray patterns on top of each other. The the idea here is that we’re calculating enough material where it would technically be doubled up, but your team in the field is going to stagger those patterns.
In this case, this is in addition to what you have on the insulation. You already have 12″ on center. Realistically you’re getting 6″ on center if you double it.

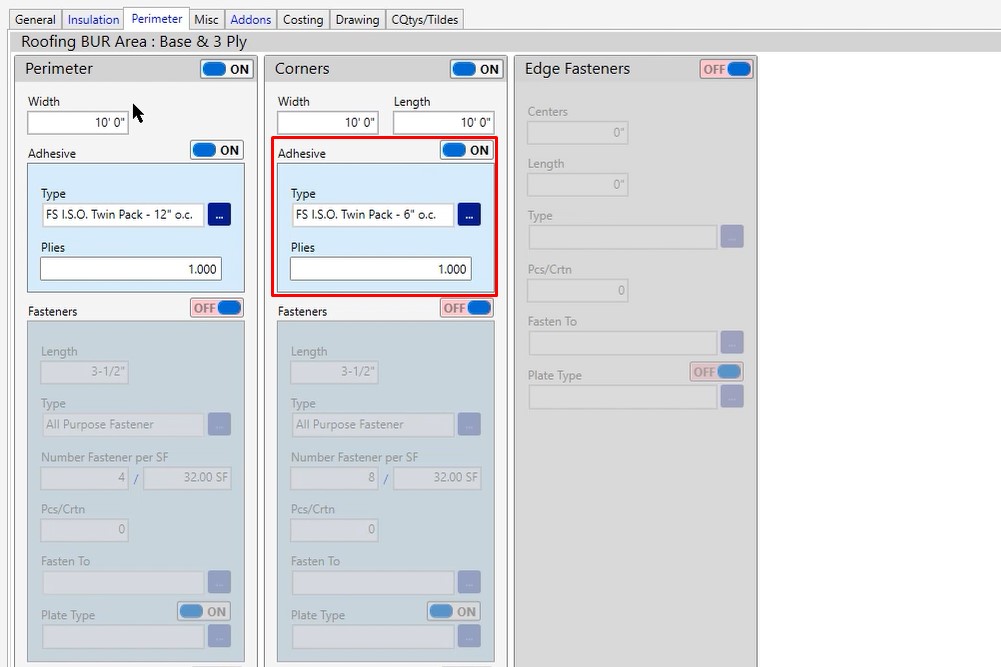
The corner does not catch any of the perimeter adhesive. To get the extra securement that you need, instead of choosing the 12″ on center, you’re going to choose the 6″, and the same concept applies.
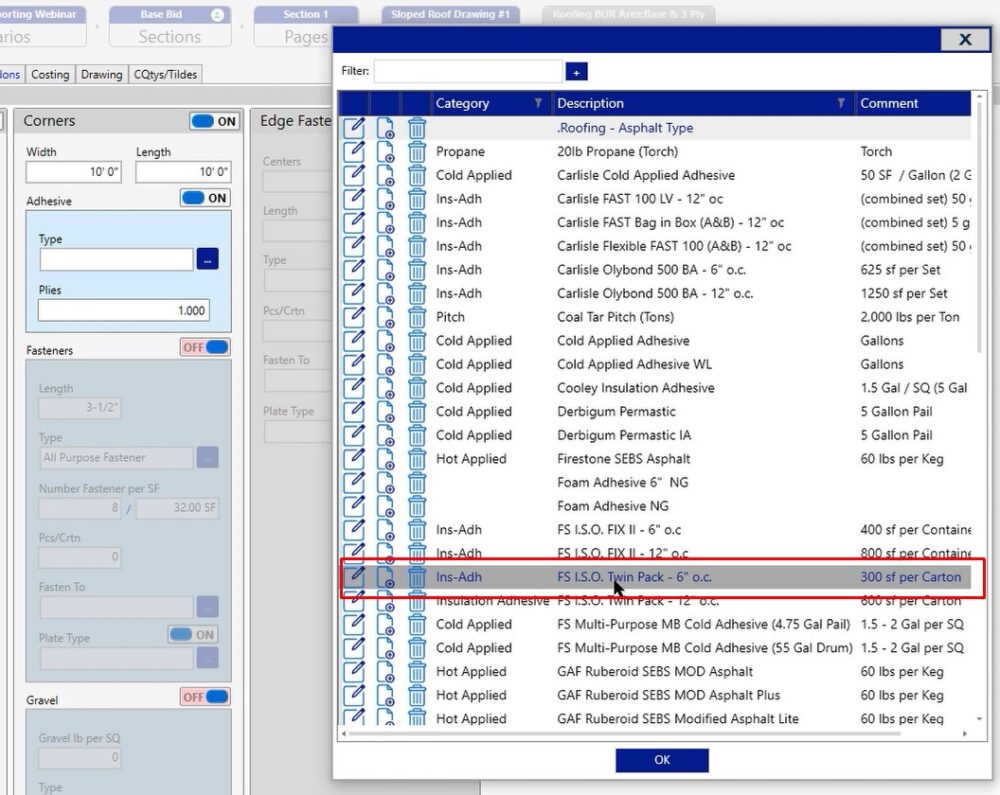
In this case if you choose a 6″ on center spray pattern, you know that one run of that is going to be getting caught by the adhesive from the installation tab. So really, it’s laying this bead down, and then in the perimeter tab, you’re calculating two additional runs that break up that 12″ increment. So in this case, you’re truly going to be calculating a 4″ on center spray pattern.
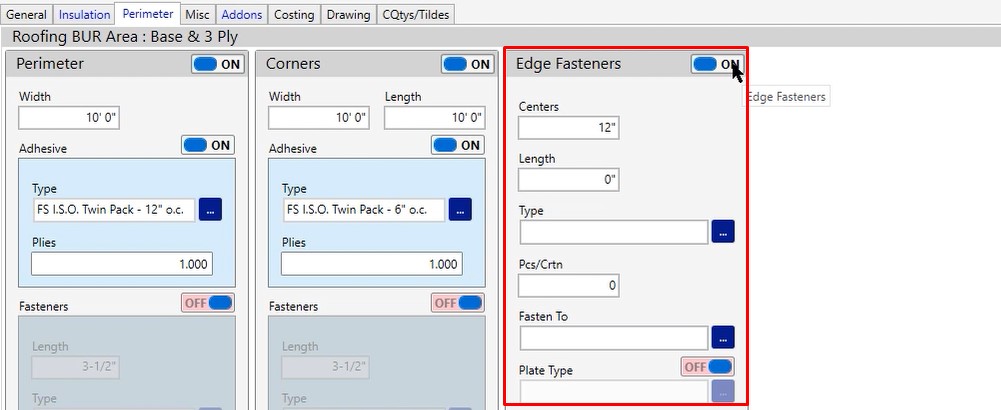
Edge Fasteners
Edge fasteners are very rarely used, but this is an additional fastener that goes around the lineal footage of perimeter that you have in your project. So going back to that same scenario of 100 x 100 building, in this case if we set fasteners every 12 inches, we would produce 400 additional fasteners on our project. Take the lineal footage of perimeter, divide it by 12 inches and it gives us a number.
Misc Tab
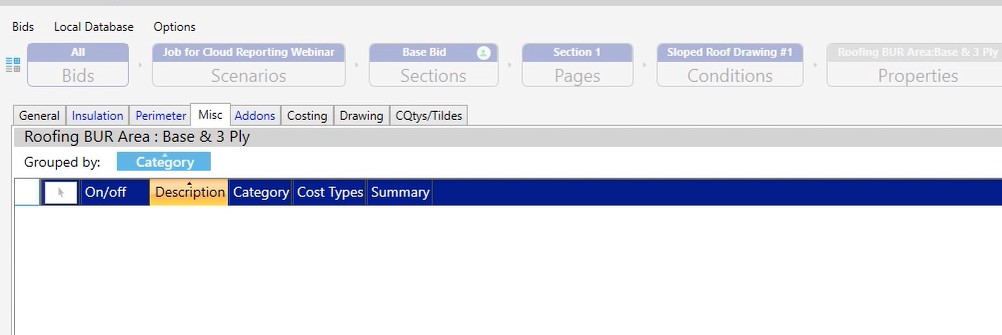
The miscellaneous tab is a catch all. In the general insulation and perimeter tab, if you didn’t grab all of the material that you’re going to need for this specific condition, the miscellaneous is where you’re going to build it. When working with the miscellaneous tab, you are building a ratio so as you measure square footage, how much of this specific product you want it to measure as well.
If you have any additional questions as it pertains to the roofing BUR area condition and setting this up or making modifications. please feel free to reach out to our tech team and they’d be happy to assist you in any way they can.

