![]() Estimating Edge’s team of experienced construction professionals and software engineers have developed the industry’s smartest takeoff and estimating software solutions for competitive estimates.
Estimating Edge’s team of experienced construction professionals and software engineers have developed the industry’s smartest takeoff and estimating software solutions for competitive estimates.
Don’t just estimate faster. Estimate better.®
- /
- /
- /
- /
Roofing Tapered Module – Drawing Tools
This video covers the tapered module drawing tools in v12.
Sump Tool
The sump tool is a simple count tool. So when you click on your sumps, you’re going to go where your drains are and place the sump down.

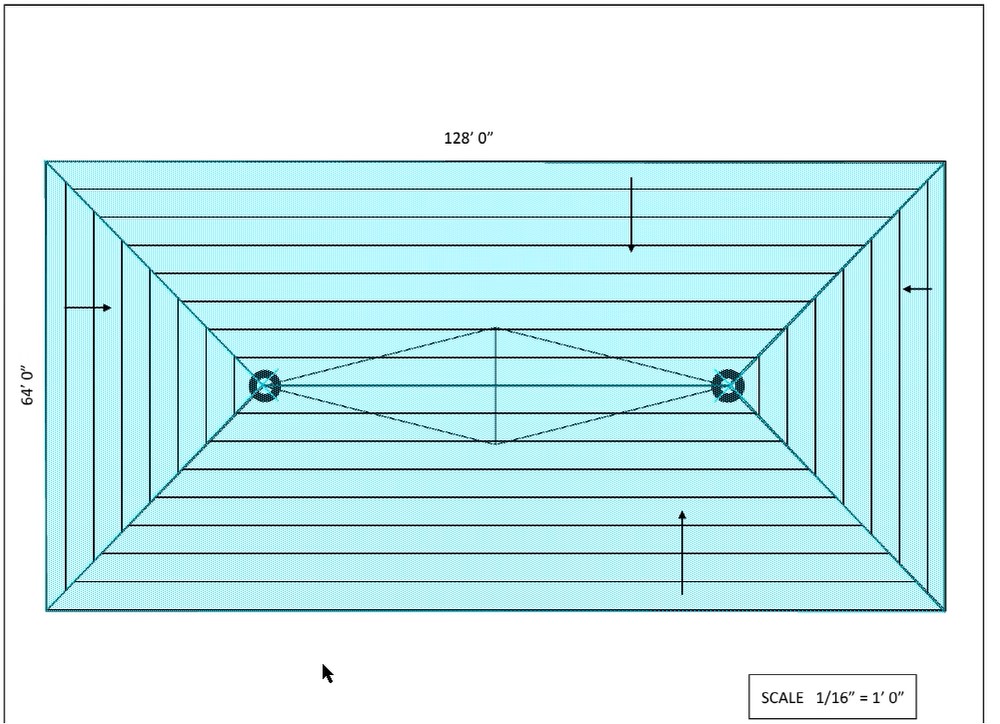
Area
To draw out your areas, you will need to draw each sloped area individually. Instead of drawing one big rectangle, you’re going to draw four individual shapes; two trapezoids and two triangles.
In this case, you click on your area tool and if you would like, you can start at the sump where you have your snap-to points. Then you’re going to follow along the image.
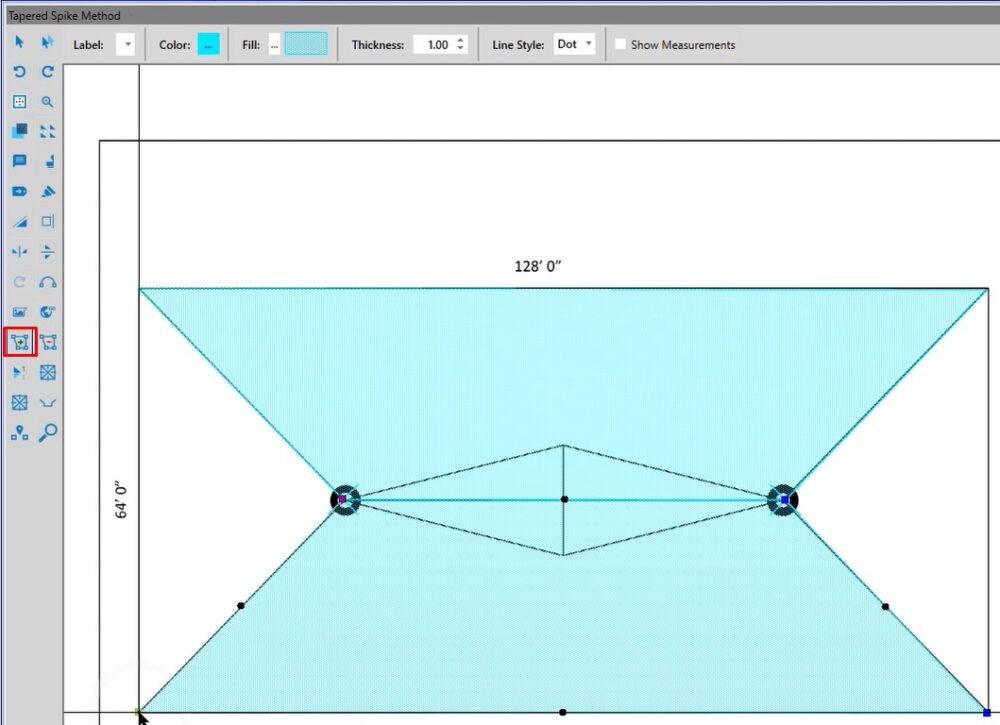
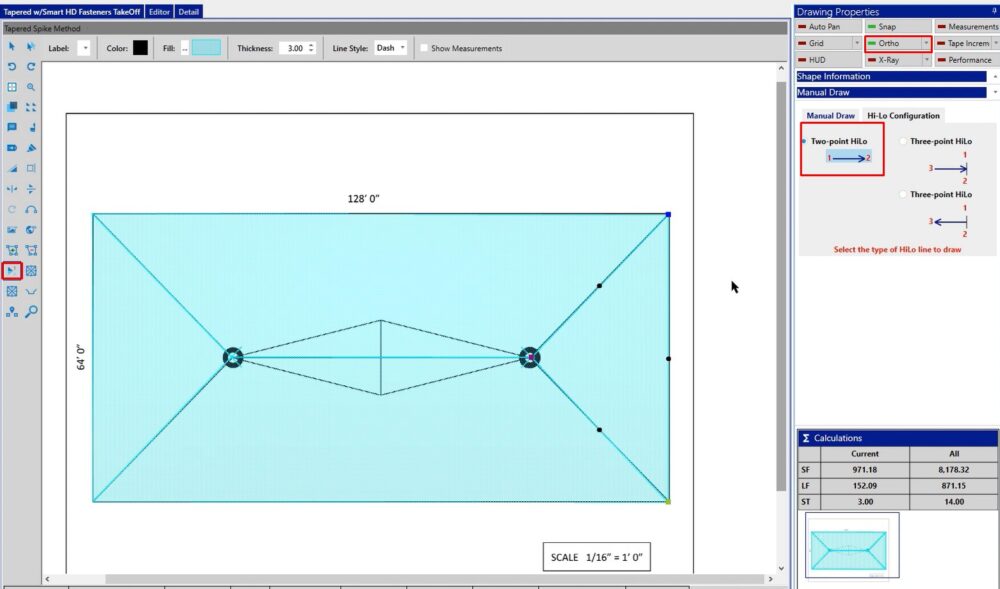
Hi-Lo
Once we finish drawing the area, we select the hi-lo tool. Now, we click the high point and the low point.
On the right hand side, there are a couple of options to change it. However, in most cases, the two-point hilo is going to be the easiest to use. We do recommend turning ortho on for this so you can lay out your tapered perfectly straight.
In this case, you’re going to click the high point and you’re going to click the low point. Notice that we are not clicking in the middle of the shape. Continue and draw your high point and your low point on all of your shapes.
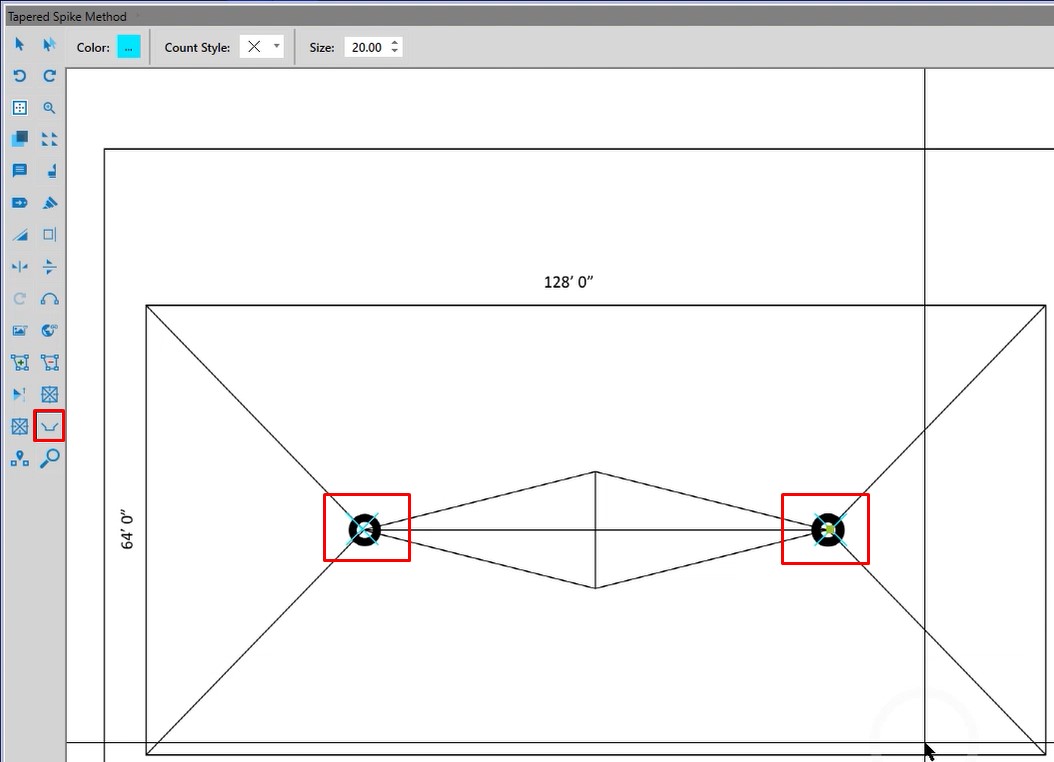
Auto Cricket
With the auto cricket you have a couple of different methods:
- 3 point method – Where you’re going to be referencing the red numbers to draw out the cricket
- Ratio – So if you want a three to one or a two to one ratio based off of your legs, you can build that as well
- Percentage – Allows you to draw out the percentage that you want
If you wanted to change from the full to top or bottom half, left or right, half or a quarter, click in the little white circle and it’s going to make the adjustment for you.
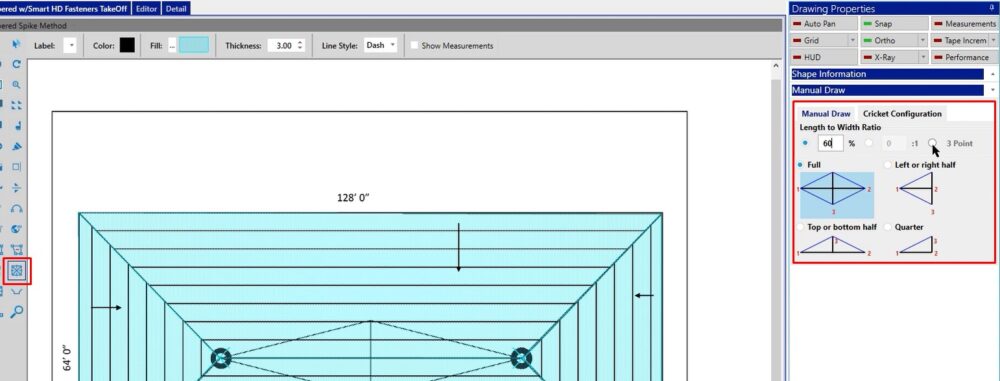
In this case, I’m going to use full and draw out my cricket. I’m going to go point number one, point number two and move my mouse to point number three.
One thing that’s unique is that it is going to make you snap-to your point. So instead of toggling off ortho, you can move your line down to where your crosshairs match up with your drawing and left click. So that way, you don’t have to turn the ortho off to be able to get your line to the right spot.
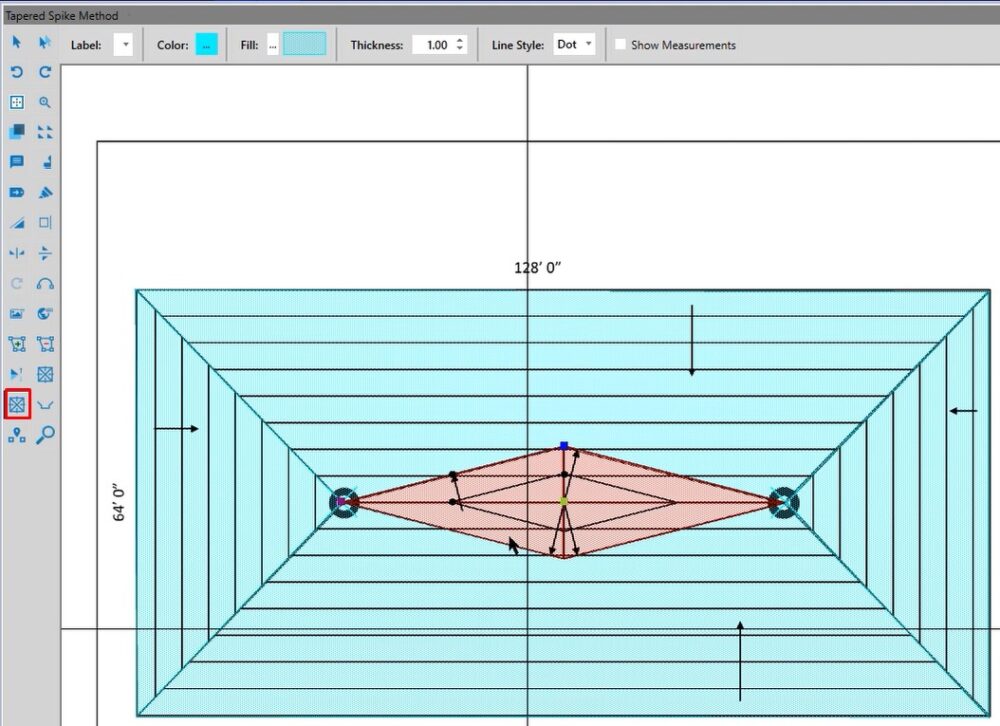
Manual Cricket
The manual cricket is unique because the very first line that you draw is going to be the sloped portion. For example, if I wanted to delete one cricket here and redraw this portion of the cricket with the manual cricket tool, you would follow these steps:
- Click on the manual cricket tool
- Draw low point line
- Draw the next shape
- Click enter
The arrow is a little bit different on the manual cricket than what you have on the auto cricket. However, you can see that it is still laying it out correctly for you.
Show on Report
To view these changes on the report:
- Click on bid grid
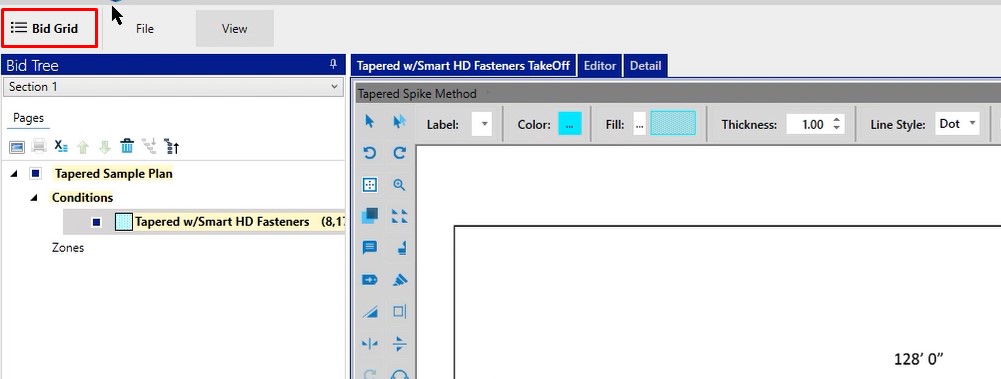
- Mark the tapered condition
- Click the Reports icon
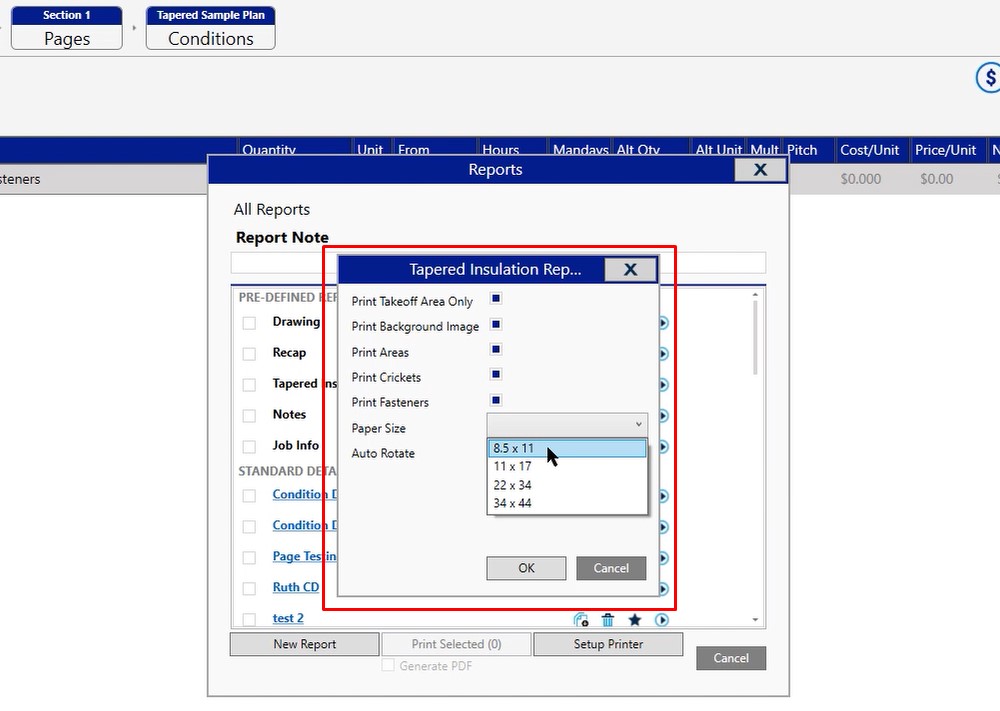
- Click the play button to preview the tapered insulation report
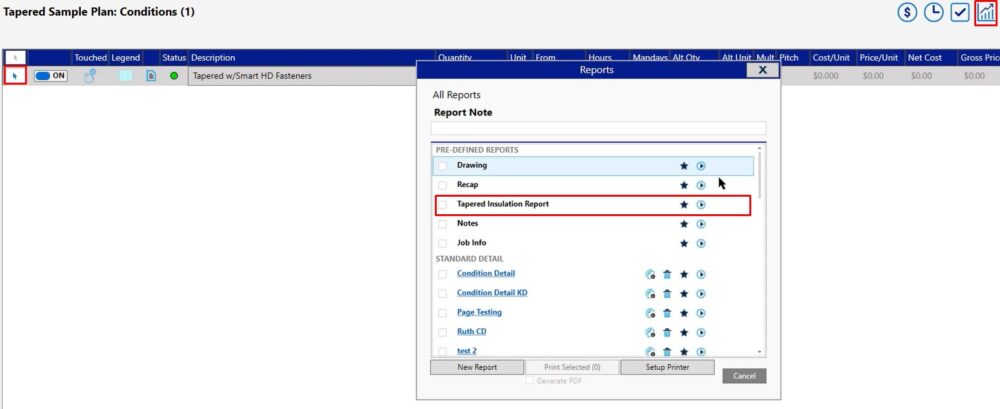
Here you can make some modifications to what you want to see on the report and how you want it printed
- Make your choices, then click OK
Reports
You’re going to be presented with a couple of reports.
First report – Top down view of what your drawing looks like.
In this case you can see we’ve got the tapered and you’ll even notice that on the drawing we have some numbers displayed there for you. This is your board layout.
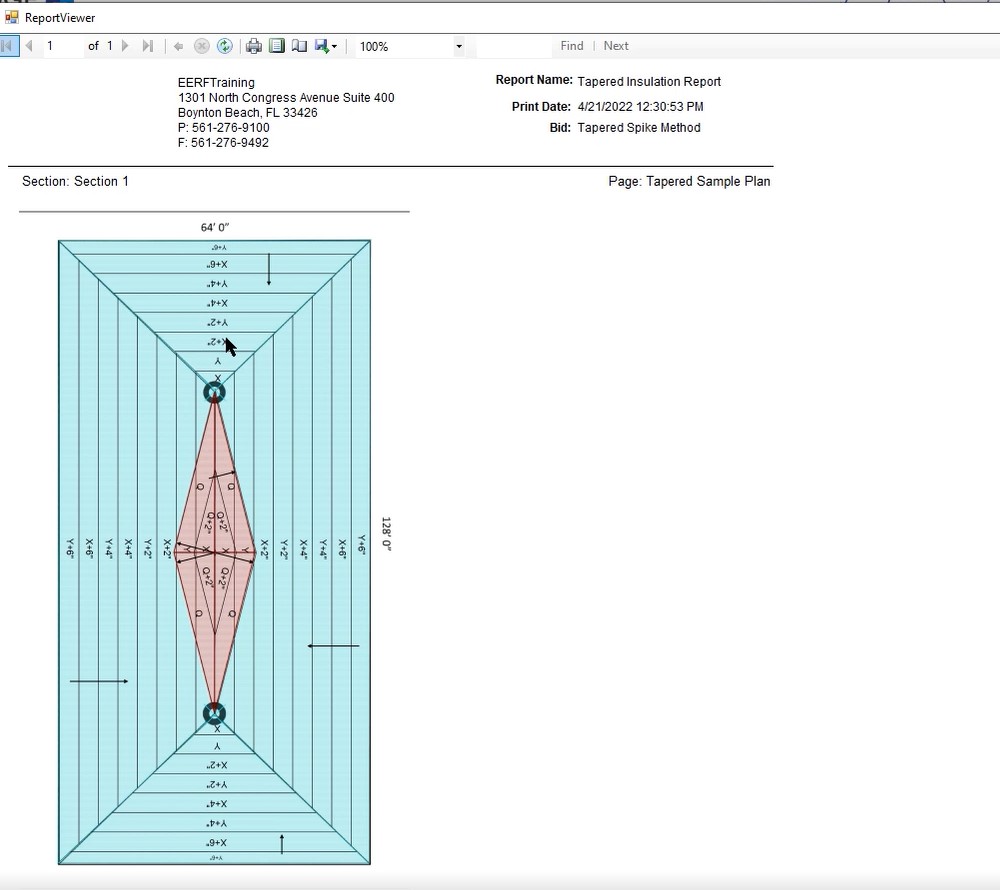
You can close out of this tapered report to show you a cut through tapered report

If you have any additional questions on the tapered module itself and you’ve watched both of those videos, please feel free to reach out to our tech team. They’d be happy to assist you with any questions you have or any issues that you ran into while you were making your modifications.